

Introduction to virtualization and ESXi
Virtualization has revolutionized the way we deploy and manage servers in modern IT infrastructure. By enabling the creation of virtual machines (VMs) that run multiple operating systems on a single physical server, virtualization offers significant benefits in terms of cost savings, flexibility, and scalability.
One of the leading virtualization platforms is ESXi, a bare-metal hypervisor developed by VMware. ESXi allows you to consolidate your server workloads, optimize resource allocation, and improve overall efficiency. In this step-by-step guide, I will walk you through the process of installing a Windows Server VM on ESXi, empowering you to harness the power of virtualization in your environment.
Benefits of virtualization
Before diving into the installation process, let’s explore the key advantages of virtualization. By virtualizing your servers with ESXi, you can:
- Reduce hardware costs: With virtualization, you can run multiple VMs on a single physical server, eliminating the need for separate hardware for each operating system. This leads to significant cost savings in terms of server hardware, power consumption, and maintenance.
- Increase resource utilization: Virtualization allows you to allocate resources dynamically to VMs based on their workload demands. This ensures efficient utilization of server resources and minimizes resource wastage.
- Enhance flexibility and scalability: Virtual machines can be easily created, cloned, and moved between physical servers without disrupting the underlying infrastructure. This provides flexibility in deploying new servers and enables seamless scalability as your business grows.
- Improve disaster recovery and business continuity: Virtualization allows for easy backup, replication, and restoration of VMs, ensuring faster recovery in the event of a hardware failure or system crash. Additionally, VMs can be migrated between physical servers with minimal downtime, enhancing business continuity.
Overview of Windows Server VM
Now that we understand the benefits of virtualization, let’s focus on the specific VM we will be installing – a Windows Server VM. Windows Server is a powerful operating system designed for server deployments, offering robust features and scalability options.
A Windows Server VM on ESXi provides a flexible and efficient way to deploy and manage Windows-based services such as Active Directory, file servers, web servers, and database servers. By virtualizing your Windows Server instances, you can optimize resource allocation, easily scale your infrastructure, and simplify management tasks.
In the next section, we will discuss the system requirements and compatibility considerations to ensure a smooth installation process.
Preparing for installation – system requirements and compatibility
Before diving into the installation process, it’s crucial to ensure that your server meets the necessary system requirements and compatibility criteria. This will help avoid any potential issues or compatibility conflicts during the installation of ESXi and the Windows Server VM.
To install ESXi, you will need a server with compatible hardware specifications, including a 64-bit x86 processor, a minimum of 4GB RAM, and supported network adapters. It is recommended to refer to the official VMware documentation for the latest hardware compatibility list.
Additionally, make sure your server meets the requirements for installing and running Windows Server on the virtual machine. This includes the necessary CPU, RAM, and storage specifications, as well as compatible virtual hardware components.
Once you have verified the system requirements and compatibility, you are ready to proceed with the installation of ESXi on your server. Let’s move on to the next section to learn how to install ESXi.
Installing ESXi on your server
The installation of ESXi involves a series of straightforward steps. Here’s a step-by-step guide to help you install ESXi on your server:
- Download the ESXi installation ISO: Visit the VMware website and download the ESXi installation ISO file that corresponds to your server hardware and version requirements.
- Create a bootable USB drive or CD: Use a tool like Rufus or VMware ESXi Image Builder to create a bootable USB drive or burn the ISO file to a CD.
- Boot your server from the installation media: Insert the bootable USB drive or CD into your server and configure the BIOS to boot from the installation media.
- Follow the ESXi installation wizard: The ESXi installation wizard will guide you through the installation process. Select the appropriate installation option, accept the license agreement, and choose the destination disk for the ESXi installation.
- Configure network settings: Set up the network settings for your ESXi host, including IP address, subnet mask, default gateway, and DNS configuration.
- Set the root password: Choose a strong password for the root user account, which will be used to administer the ESXi host.
- Complete the installation: Once you have configured the necessary settings, proceed with the installation. The installation process may take a few minutes, after which the server will reboot.
As we have setup ESXI in our server, we will explore the configuration settings required to enable virtualization on the ESXi host.
Configuring ESXi settings for virtualization
After installing ESXi, it is essential to configure the necessary settings to enable virtualization on the host. Here are the key configuration steps:
- Access the ESXi host management interface: Open a web browser and enter the IP address of your ESXi host to access the management interface. Log in using the root user credentials you set during installation.
- Configure networking: Ensure that the ESXi host is connected to the network and has a valid IP address. Configure additional networking settings as per your requirements, such as VLANs, port groups, and virtual switches.
- Enable virtualization features: Navigate to the “Configuration” tab in the ESXi management interface and select “Virtual Hardware.” Enable the necessary virtualization features such as Intel VT-x or AMD-V, depending on your processor architecture.
- Configure storage: Set up storage options for your VMs, including datastores and storage adapters. You can choose between local storage, network-attached storage (NAS), or storage area network (SAN) solutions based on your requirements.
- Configure security settings: Implement security measures such as SSL certificates, firewall rules, and access controls to protect your ESXi host and VMs from unauthorized access.
By following these configuration steps, you have prepared your ESXi host for virtualization. Now, let’s move on to creating a new virtual machine to install Windows Server.
Creating a new virtual machine
To install Windows Server on ESXi, you need to create a new virtual machine. Here’s a step-by-step guide to help you create a new VM:
Access the ESXi host management interface: Open a web browser and enter the IP address of your ESXi host to access the management interface. Log in using the root user credentials.
Navigate to the “Virtual Machines” tab: In the ESXi management interface, go to the “Virtual Machines” tab and click on “Create/Register VM.”

Choose a name and location: Provide a name for your new VM and select a location for storing the VM files.
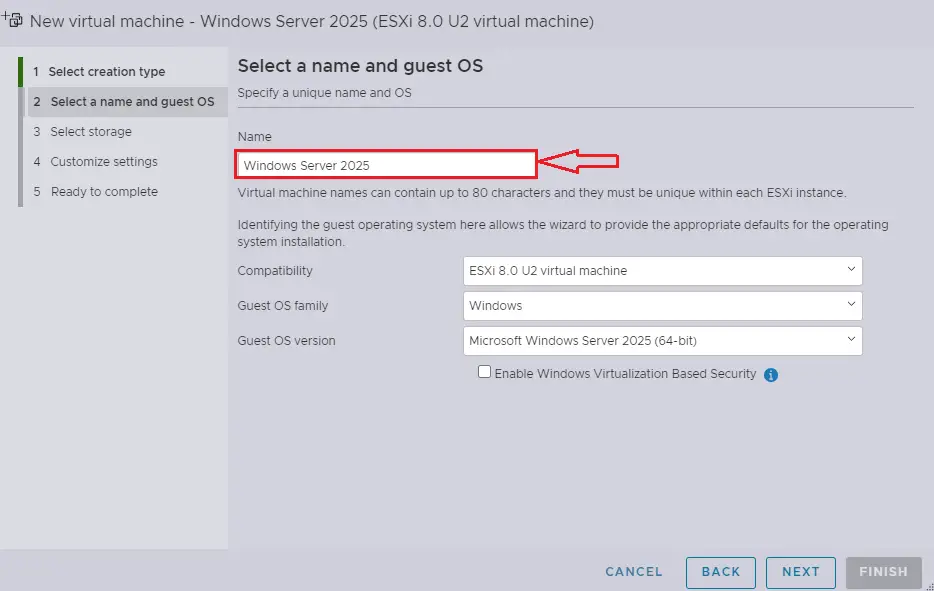
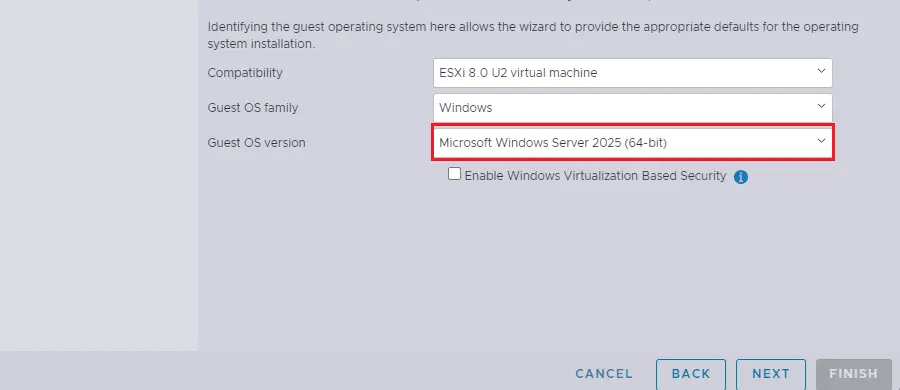
Select the guest operating system: Choose the version and edition of Windows Server you wish to install.
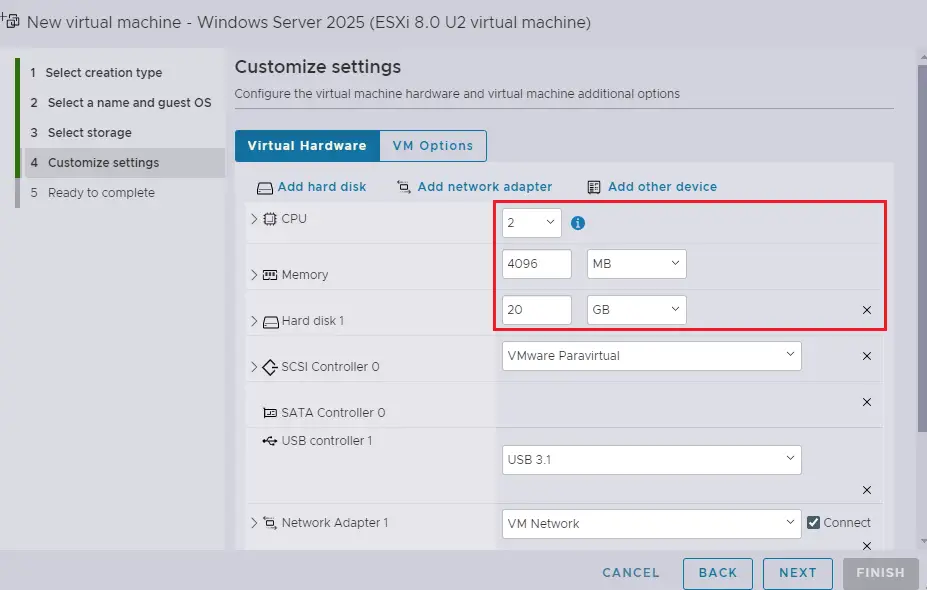
Configure hardware settings: Specify the number of CPUs, amount of RAM, and disk storage for the VM. Customize additional settings such as network adapters, graphics cards, and virtual CD/DVD drives as per your requirements.
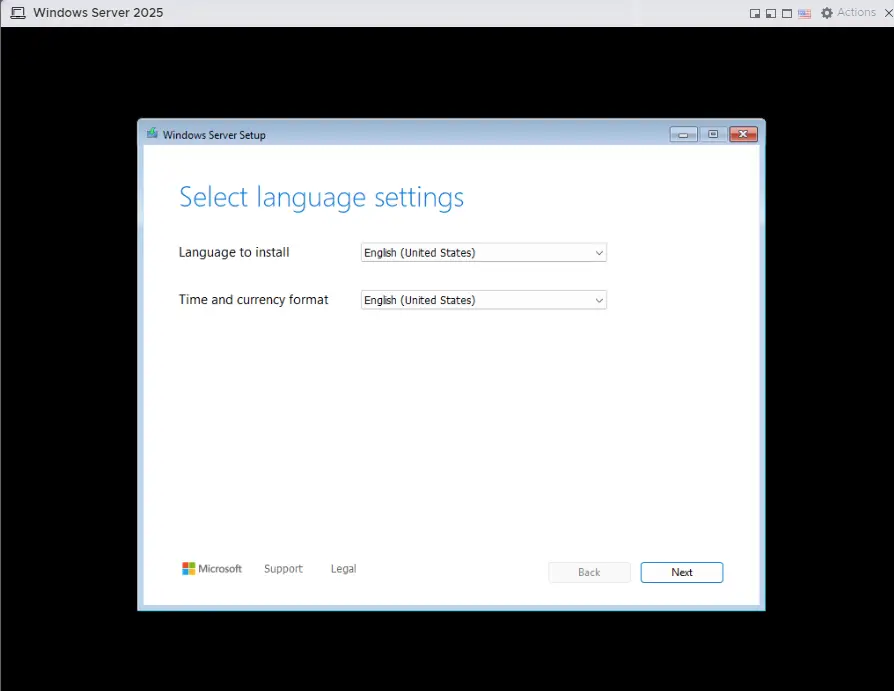
Create a virtual disk: Set up a virtual disk for the VM, specifying the size, provisioning type (thin or thick), and storage location.Install Windows Server: Once the VM is created, mount the Windows Server installation ISO to the VM’s virtual CD/DVD drive. Power on the VM and follow the on-screen instructions to install Windows Server.
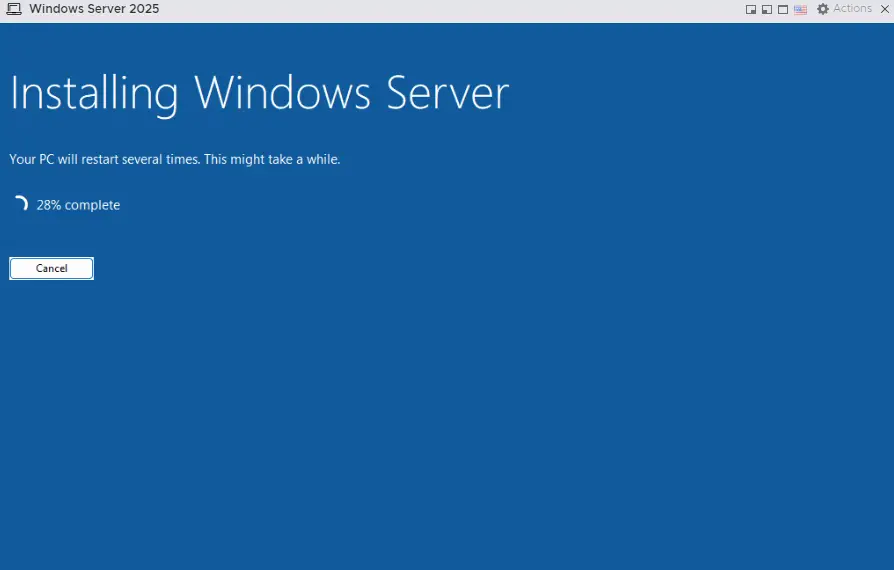
Congratulations! we have successfully created a new virtual machine and installed Windows Server. In the next section, we will explore the essential settings to configure on the Windows Server VM.
Configuring Windows Server settings
After installing Windows Server on the VM, there are several essential settings to configure to optimize its performance and security. Let’s explore these settings:
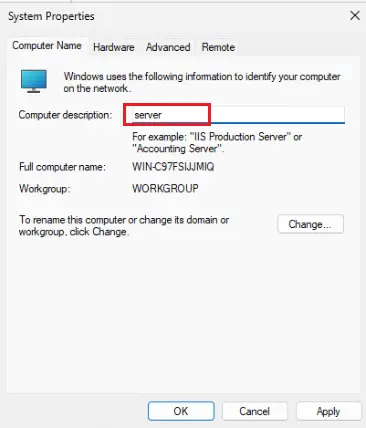
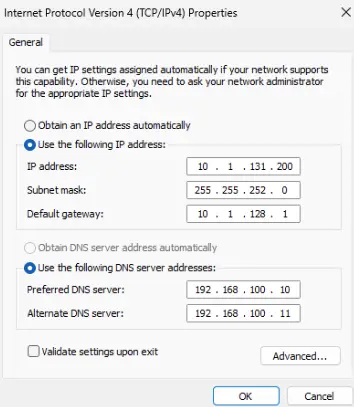
Set the server name and IP address: Assign a unique server name to the Windows Server VM and configure a static IP address to ensure consistent network connectivity.
Join a domain: If you have an existing Active Directory domain, join the Windows Server VM to the domain to enable centralized user authentication and management.
Install necessary roles and features: Depending on your requirements, install the relevant roles and features on the Windows Server VM. This may include services such as Active Directory Domain Services, DNS server, DHCP server, or web server.
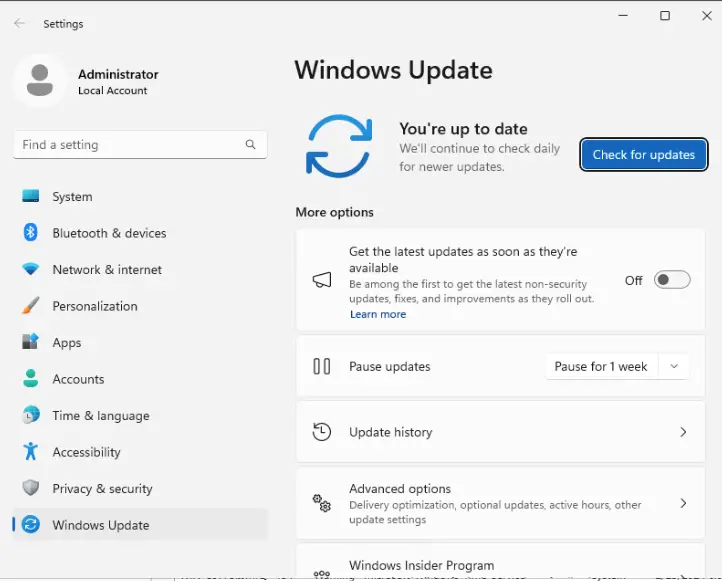
Configure Windows Update settings: Enable automatic Windows updates or set a schedule for installing updates to keep the Windows Server VM secure and up to date.
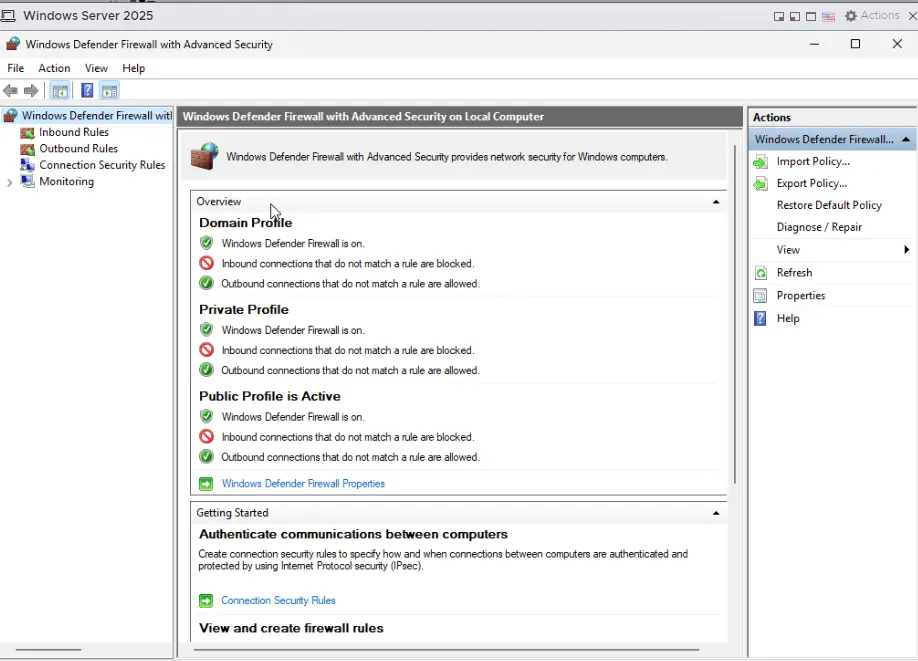
Implement security measures: Configure firewall rules, enable Windows Defender or other antivirus software, and implement appropriate access controls to protect the Windows Server VM from security threats.
Optimize performance: Fine-tune the performance settings of the Windows Server VM, including adjusting CPU and memory allocations, configuring disk caching, and optimizing network settings.
By configuring these settings, you can ensure that your Windows Server VM is optimized for performance, security, and reliability. In the next section, we will discuss common installation issues that you may encounter and how to troubleshoot them.
Best practices for managing and maintaining your Windows Server VM on ESXi
Once you have successfully installed and configured your Windows Server VM on ESXi, it’s important to implement best practices for managing and maintaining the VM. Here are some recommendations:
- Regularly back up your VM: Implement a backup strategy to ensure that critical data and configurations are protected. Take regular snapshots or use backup solutions to create backups of the Windows Server VM. Click here to learn more about how to back VM.
- Monitor performance: Monitor the performance of the Windows Server VM using tools like VMware vSphere or Microsoft System Center. Identify any performance bottlenecks, resource utilization issues, or security vulnerabilities and take appropriate actions to optimize performance and security.
- Apply patches and updates: Keep the Windows Server VM up to date by regularly applying patches, updates, and security fixes. This helps protect against vulnerabilities and ensures the stability and reliability of the VM.
- Implement security measures: Harden the security of the Windows Server VM by implementing measures such as strong passwords, firewall rules, access controls, and intrusion detection systems.
- Regularly test backups and disaster recovery plans: Periodically test your backup and disaster recovery plans to ensure that they are functioning correctly. This helps minimize downtime and ensures a quick recovery in the event of a disaster.
By following these best practices, you can effectively manage and maintain your Windows Server VM on ESXi, ensuring its performance, security, and availability.
Conclusion
Virtualization is a powerful technology that offers numerous benefits for server deployments. By leveraging ESXi, you can unlock the full potential of virtualization and streamline your IT infrastructure. In this step-by-step guide, we have explored the installation process of a Windows Server VM on ESXi, from preparing your server to configuring the VM.
By following the outlined steps and best practices, you can master virtualization and harness its advantages in your environment. Remember to regularly monitor and maintain your Windows Server VM to ensure optimal performance, security, and reliability.
Click here to download Windows Server

[…] Installing Kerio Connect on Windows Server 2022 is straightforward. Follow the steps below for a successful installation. For this tutorial we have installed Microsoft Windows Server 2022. […]