

This article provides step-by-step instructions on how to install Active Directory on Server 2025. Windows Server vNext, version 25951, introduces several exciting improvements for Active Directory Domain Services (AD DS) and AD LDS. These enhancements include a new functional level for forests and domains, increased database page capacity of up to 32KB, updates to the schema, and various security enhancements.
Ever since the release of Windows Server 2016, there have been no significant updates to the AD DS (Active Directory Domain Services). The functional level has remained unchanged in Server 2019/2022. However, this pattern is expected to change with the upcoming version of the operating system in the LTSC (Long-Term Servicing Channel). If Microsoft follows its usual update schedule, the next version will probably be named Windows Server 2025.
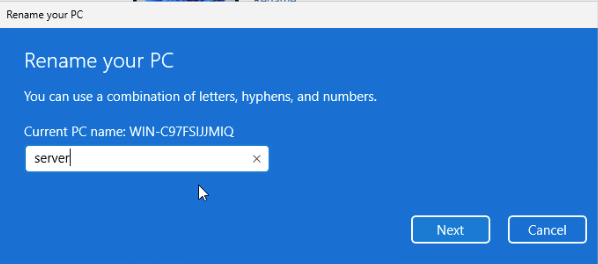
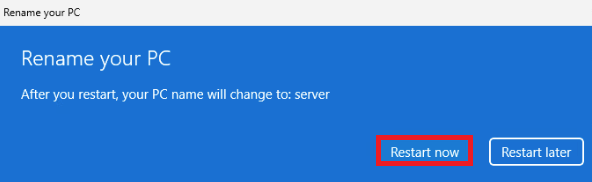
Change Server Name
In the insider preview version of Windows Server vNext 2025, we can proceed with the installation of Active Directory after completing the general installation. It is important to configure our servers before starting the installation process. Firstly, let’s assign a name to the server and then perform a restart.
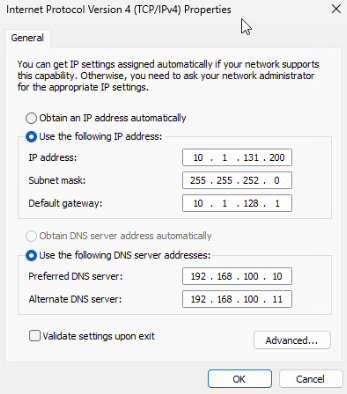
Initially, let us assign a static IP address to the server. Upon establishing the AD server role, we provide an IP address as the DNS.
Install Active Directory in Server 2025
We will proceed with the implementation and configuration of an active directory domain controller on a Windows Server 2025 operating system. The operating system for this purpose can be either a virtual machine or a physical machine.
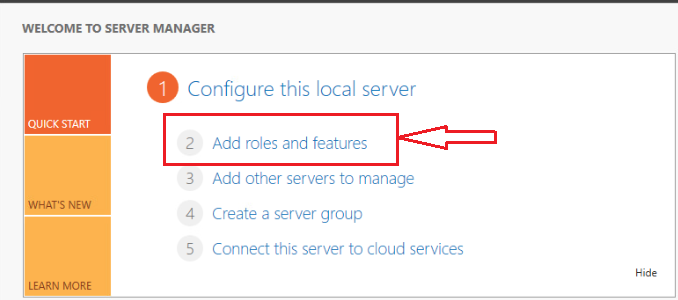
To install the AD role, click on the “Add roles and features” option in any of the fields displayed on the Server Manager console.
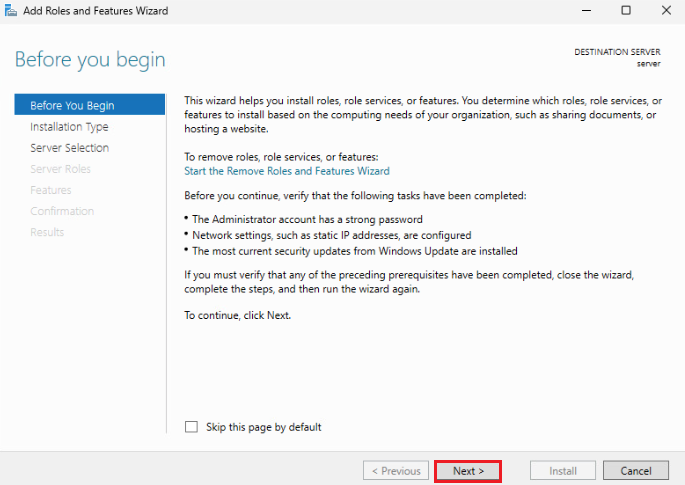
The first screen contains information about the features and abilities of the wizard. Move on to the following screen by choosing the “Next” option.
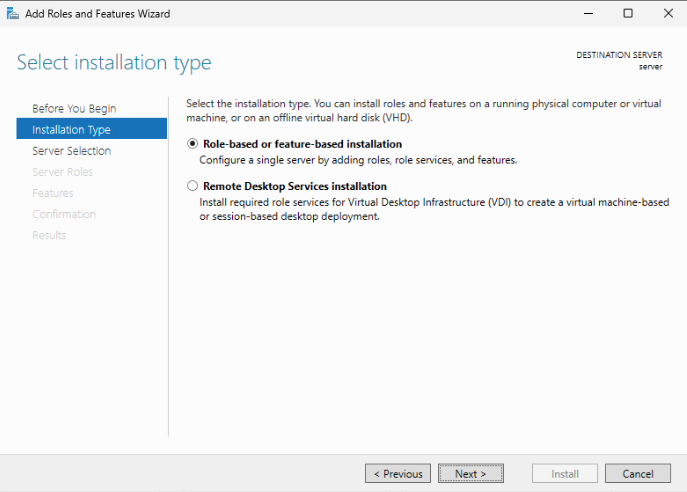
To accomplish this, we will not be carrying out RDS installation and setup. Instead, we will proceed with the next step by selecting Role-based or feature-based installation.
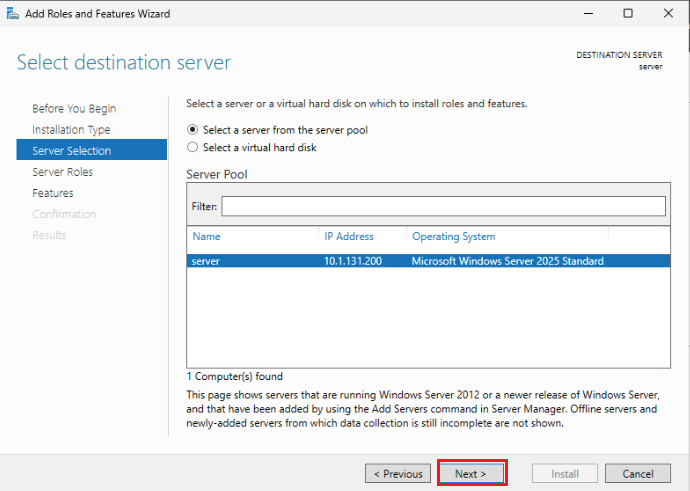
We have the capability to create a server cluster using Windows Server 2008 and 2012. We can also add or remove Roles and Features on this cluster as a whole, as well as on individual servers. In order to perform this process directly, we needed to add certain features to Windows Server 2008. However, this can be done directly on Windows Server 2012 and later versions. As we only have one server in our setup and will be installing the Active Directory role on it, we select the server based on its name, IP address, and version, and proceed by clicking Next.
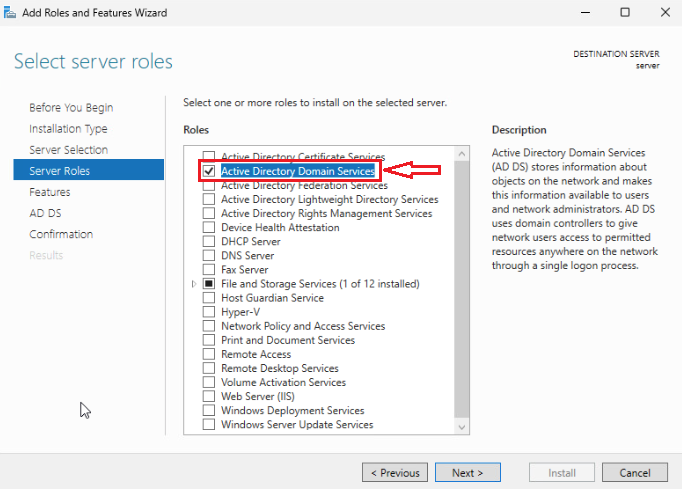
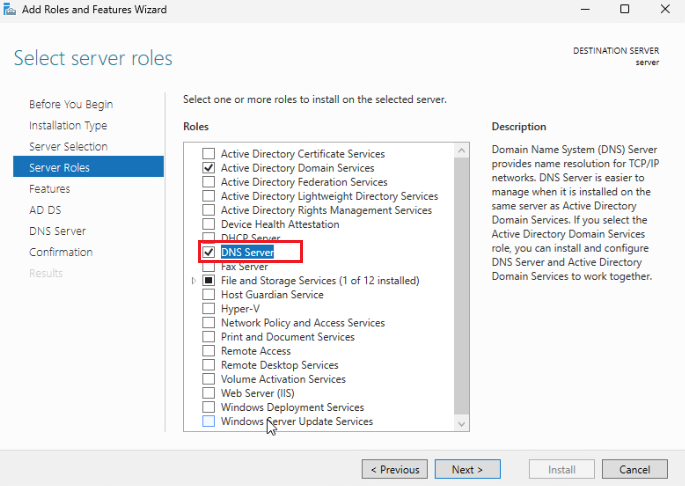
From the screen that appears, we select the Active Directory Services role we will install.
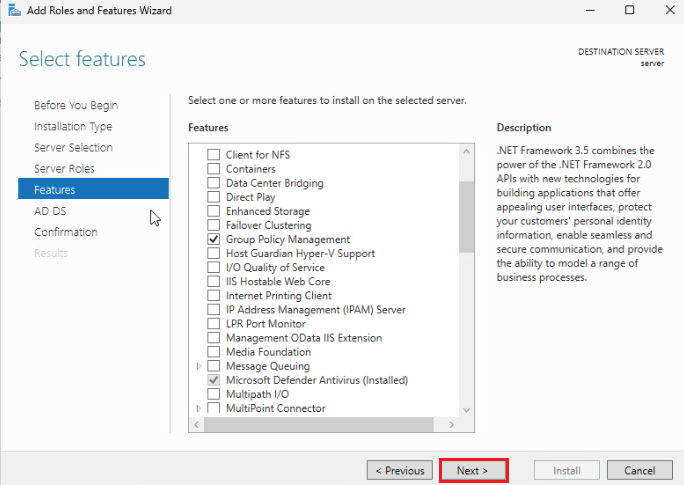
To install the Active Directory role, a screen will be displayed indicating the necessary features and components. Clicking on the “Add Features” button will initiate the installation of the required components for the role.

Enable DNS server role
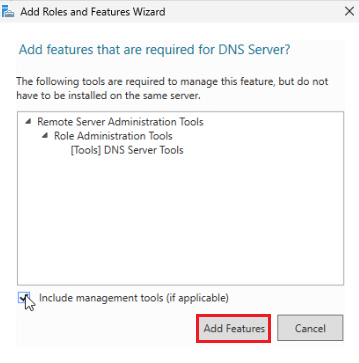
Click on Add features
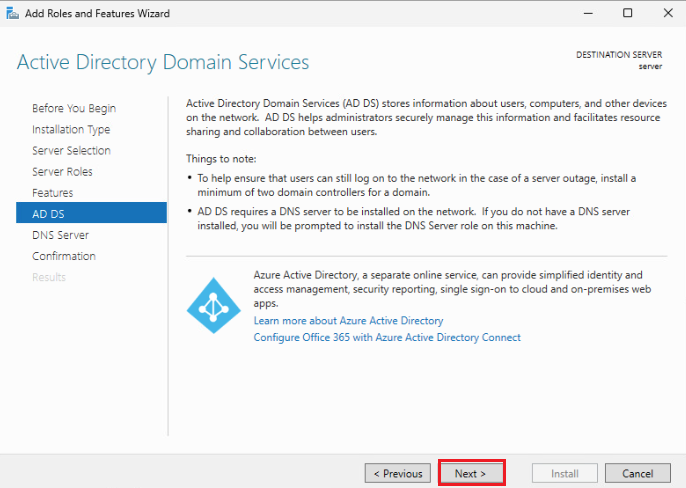
AD DS, click next.
DNS Server option, click next.
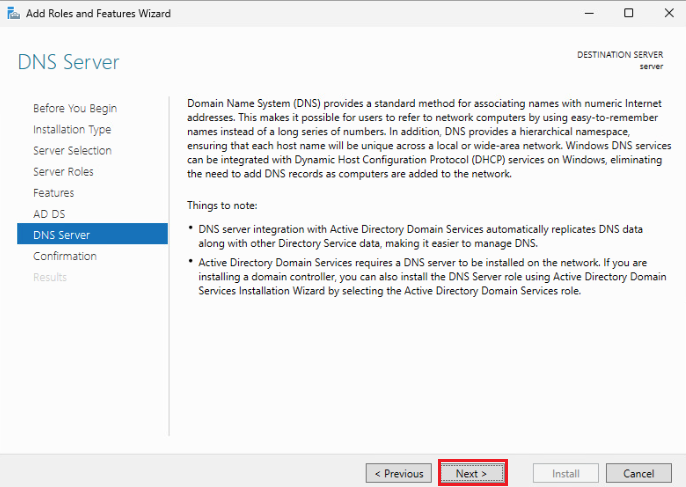
Please confirm the selected options for the Active Directory installation and proceed by clicking on the install button to set up the Active Directory and DNS servers.
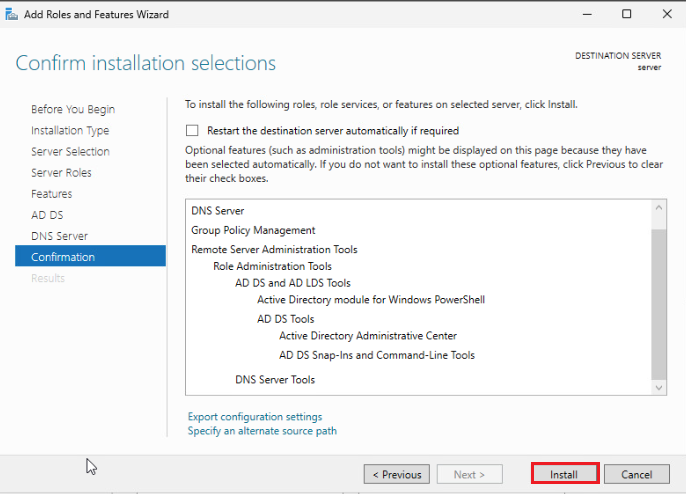
Once the Active Directory setup and DNS server installation are done, we will proceed to the next step that is Promote this Server to a Domain Controller.
Promote this Server to a Domain Controller
The installation process has commenced. The pre-installation phase is now complete. By selecting the option to promote this server to a domain controller, we can initiate the server setup.

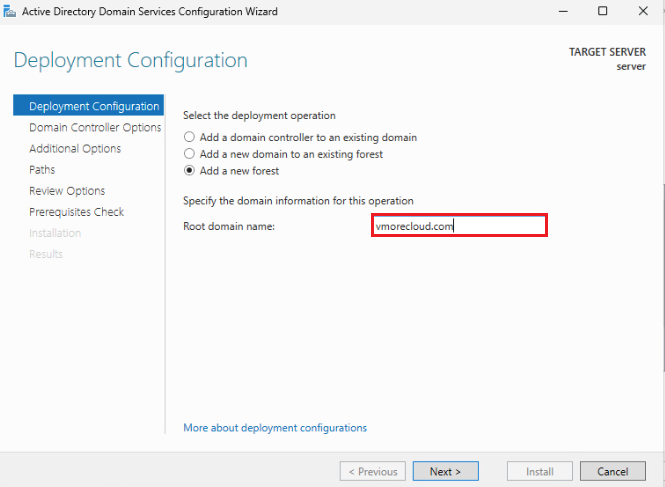
We are now at the initial stage of designing our architecture. As we do not have any existing forests in our environment, we will create the first forest and configure the initial domain within it. To proceed, let’s choose the “Add new forest” option and specify the name for our relevant domain structure. After that, we can move forward by clicking on “Next.”
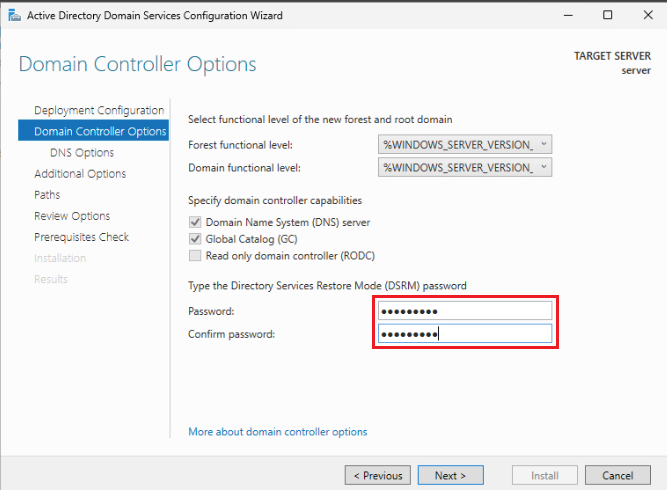
Choose the forest functional level and the domain functional level based on your needs when you install the domain controller.
Specify domain controller capabilities
Domain name system (DNS) server selected
Global Catalog (GC) selected
Provide the password for Directory Services Restore Mode (DSRM), confirm the password, and then click on the “next” button.
On our screen, we receive a notification indicating that our DNS server is not configured. We proceed to the next stage by selecting the “Next” option. The installation of the Domain Controller will include setting up the DNS role and all the required configurations will be made automatically.

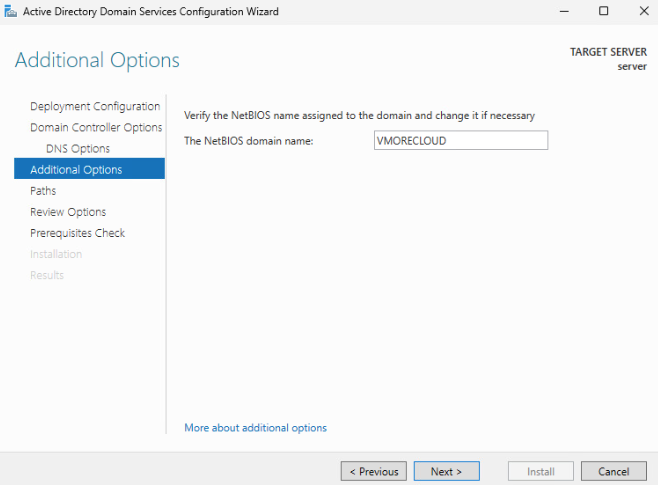
Check the domain name for NetBIOS (vmorecloud.com). It mostly picked out your domain name for you, and then you clicked “Next.”
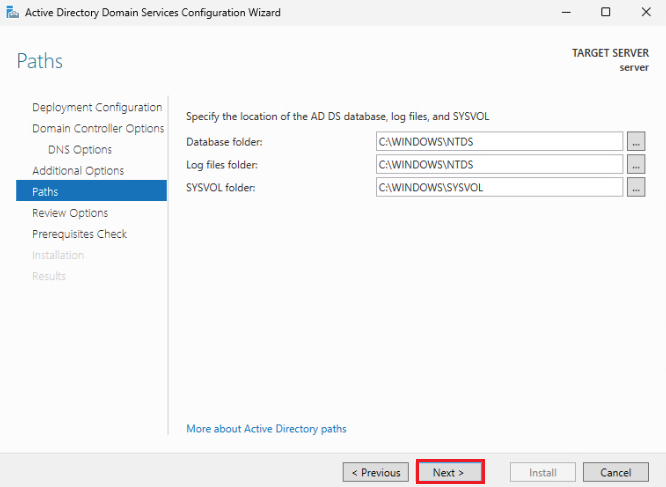
Specify the location of the AD DS database
Database folder
Log files folder
SYSVOL folder
Leave it as it is, and then click next.
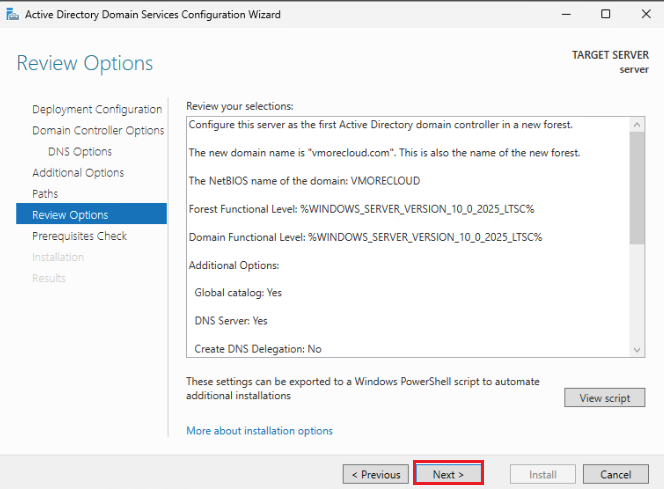
Ensure that all the settings for the Active Directory setup align with your requirements before proceeding by clicking “Next”.
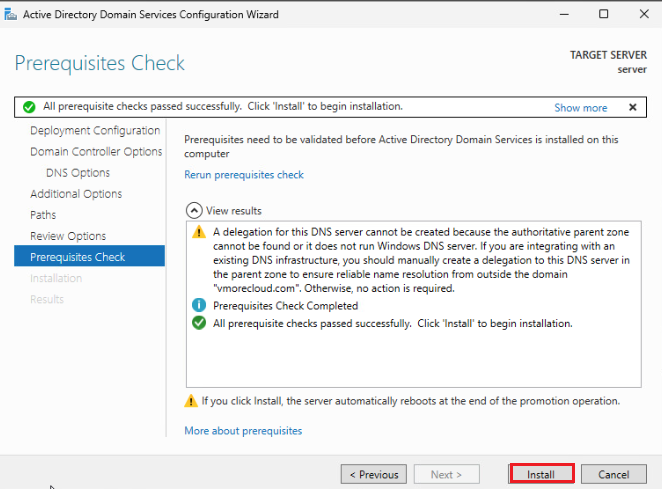
The configuration of Active Directory in the upcoming version of Windows Server in 2025 will be verified by the setup wizard. To initiate the configuration of Active Directory Domain Services, simply click on the “install” button.
The end has come for our institution. It is imperative that we initiate a system reboot. We can commence the reboot procedure by clicking the Close button located on the warning displayed on the screen.
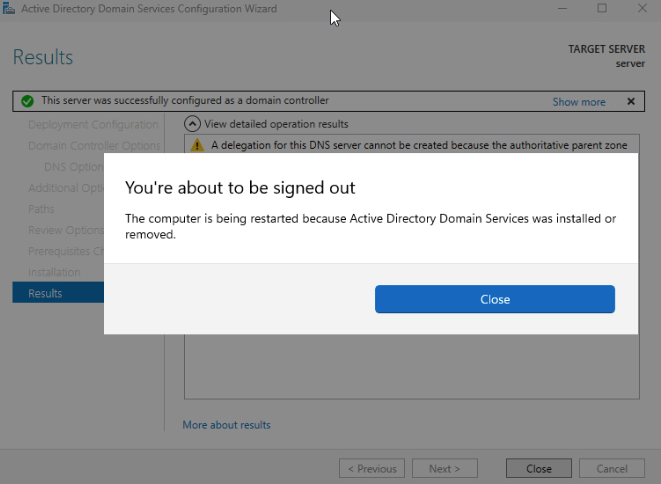
Your server will reboot automatically once you configure Active Directory.
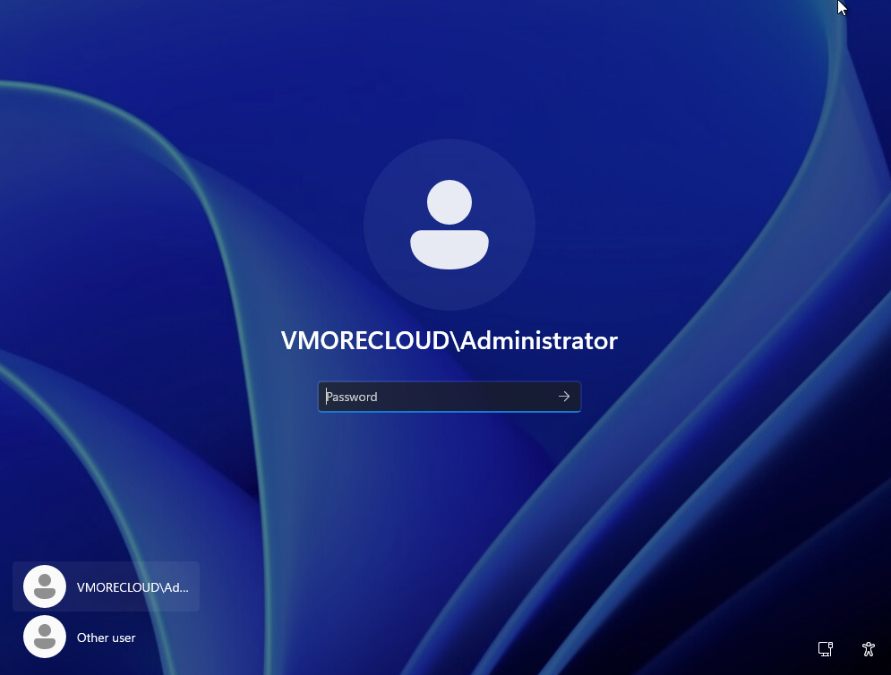
In the Domain Administrator Login window, enter your domain controller password.
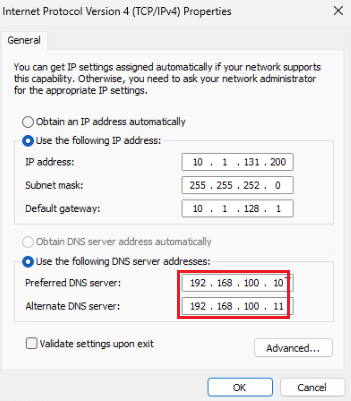
After successfully logging in with your Active Directory domain controller, you can access the TCP/IP properties of the network connection. The displayed information will include the IP address of the desired DNS server (IP address for loopback).
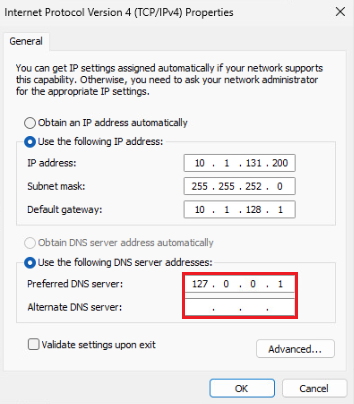
Replace it with your DNS server IP address.
Conclusion
Installing Active Directory in Server 2025 is a crucial step in managing and organizing your network resources effectively. By following the step-by-step guide provided in this article, you can ensure a smooth and successful installation process. Remember to prepare your server, configure Active Directory settings, and monitor its performance regularly to maintain a healthy and optimized network environment.
With the latest features and enhancements offered by Server 2025, you can take full advantage of Active Directory’s capabilities and simplify your network administration tasks. As you become more familiar with Active Directory, don’t hesitate to explore its advanced features and functionalities, allowing you to further optimize and secure your network environment.
Learn more about how to install Windows Server 2025 in VMware ESXi