VMware Cloud Foundation 9: VCF Installer Walkthrough
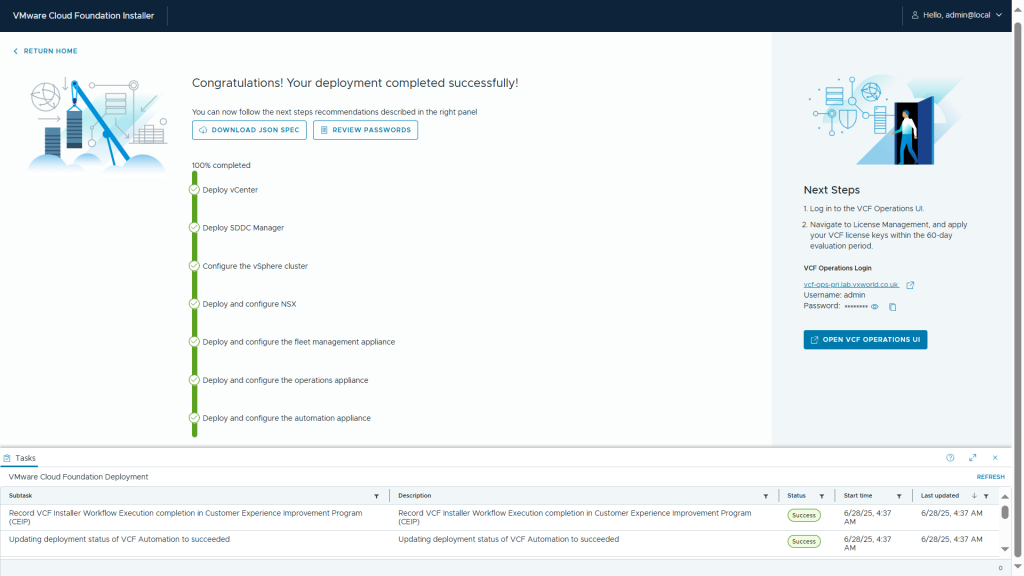
VMware Cloud Foundation (VCF) 9 marks the first major release following Broadcom’s acquisition of VMware and it’s a substantial step forward. Designed to deliver public cloud-like capabilities within on-premises private cloud environments, VCF 9 offers a more streamlined, integrated, and automated experience than ever before.
This post kicks off a new hands-on series exploring VCF 9, starting with an in-depth look at the all-new VCF Installer the next-generation replacement for Cloud Builder (used in VCF 5.2 and earlier).
What’s New: A Better Installer Experience
The VCF 9 Installer is a massive improvement over its predecessor. Compared to the old Excel-based Cloud Builder method, the new approach is more robust, polished, and streamlined. It comes with:
- A modernized wizard-based UI
- Significantly improved built-in validation
- Support for JSON-based configuration files
- Broader scope of deployment, reducing post-bring-up tasks
You can now choose between using the interactive UI wizard or simply uploading a JSON file for automation.
High-Level Logical Components
The diagram below shows the components of a VCF 9 deployment. It introduces the VCF Fleet, with Operations and Automation sitting above the VCF Instance. These fleet-level services provide centralised management across multiple instances, while each instance includes its own vCenter, NSX Manager, vSphere Cluster, and SDDC Manager.

Before We Begin: Lessons from the Lab
Before diving into the walkthrough, I want to share a few hard-earned lessons from building this nested ESX 9 lab environment. These issues stemmed from running a nested lab setup and may save you hours of troubleshooting:
Don’t Clone ESXi VMs
Cloning ESXi VMs is tempting when setting up a lab quickly, but it causes subtle and painful issues. As of 2021, William Lam has updated his guidance to recommend not cloning ESXi hosts — and I fully agree after losing hours to it.
Use the vSAN ESA Mock VIB, Not JSON
If you’re using vSAN ESA for your management domain. Don’t use the create_custom_vsan_esa_hcl_json.ps1 script. While it helps pass validation, for me, it lead to failures during vCenter deployment:
Error: No storage pool eligible disks found on ESXi Host xyxyxyxy
Remediation: Provide ESXi Host with vSAN ESA eligible disks
Reference Token: GU0SAE
Instead, use the vSAN ESA HCL mock VIB method.
Enable Promiscuous Mode and Forged Transmit
While MAC Learning + Forged Transmit is better for performance, the deployment failed at:
“Migrate ESXi Host Management vmknic(s) to vSphere Distributed Switch”
For installation, enable Promiscuous Mode and Forged Transmit. You can revert to your preferred settings post-deployment.
DNS Requirements
As with previous VCF versions, DNS pre-configuration is critical. Missing or incorrect DNS entries will cause deployment validation to fail. The table below lists the required entries for my setup:
| Name | IP Address | Purpose |
|---|---|---|
| vcf-ins-01 | 10.50.10.1 | VCF 9 Installer |
| vcf-m1-esx01 | 10.50.10.11 | Mgmt. Domain ESX host |
| vcf-m1-esx02 | 10.50.10.12 | Mgmt. Domain ESX host |
| vcf-m1-esx03 | 10.50.10.13 | Mgmt. Domain ESX host |
| vcf-m1-esx04 | 10.50.10.14 | Mgmt. Domain ESX host |
| vcf-m1-vc01 | 10.50.10.21 | Mgmt. Domain vCenter |
| vcf-sddc | 10.50.10.20 | SDDC Manager |
| vcf-portal | 10.50.10.109 | VCF Automation |
| vcf-m1-nsx | 10.50.10.30 | Mgmt. Domain NSX Virtual IP |
| vcf-m1-nsx01 | 10.50.10.31 | Mgmt. Domain NSX Node |
| vcf-m1-nsx02 | 10.50.10.32 | Mgmt. Domain NSX Node |
| vcf-m1-nsx03 | 10.50.10.33 | Mgmt. Domain NSX Node |
| vcf-ops-pri | 10.50.10.101 | VCF Operations Primary |
| vcf-ops-rep | 10.50.10.102 | VCF Operations Replica |
| vcf-ops-data | 10.50.10.103 | VCF Operations Data |
| vcf-ops-col | 10.50.10.104 | VCF Operations Collector |
| vcf-fleet | 10.50.10.110 | VCF Operations fleet management appliance |
ESX 9 VM configuration
Let’s start with building the nested ESX 9 environment. (Yes — it’s back to being called ESX, not ESXi!)
VM Build
I’m deploying the management domain as a vSAN ESA cluster. The nested VM configuration is based on the following key settings:
- 24 vCPUs
The VCF Automation VM requires 24 vCPUs to boot successfully for a single-node installation. Thanks to Erik for highlighting this requirement in his excellent post on VCF Automation vCPU requirements. - Four Network Adapters
Add four NICs to each ESX VM. This enables flexibility in network topology and supports various deployment scenarios. - NVMe Controller
Use an NVMe controller for all hard disks. This is critical for vSAN ESA compatibility. - CPU Virtualization Settings
In the VM options, expose hardware-assisted virtualization to the guest OS. Without this setting, nested ESX VMs will be unable to power on child VMs. - Post-Install Cleanup
After installing ESX 9, remove the CD-ROM drive and SCSI controller. These are no longer needed and can cause the installer to fail.

Expose hardware assisted virtualisation to the guest OS

Ensure the hard drives are using the NVME controller.

Now that the nested VMs are configured, you’re ready to install ESX 9 on each of them.
ESX 9 Configuration
Step 1 – Set a Compliant Root Password.
The VCF Installer enforces strict password requirements. Ensure the root password on each ESX 9 host meets the following criteria:
Password must contain at least 1 special character. Special characters [@!#$%?^]. Password must contain only letters, numbers and the following special characters: [@!#$%?^]
Step 2 – Configure NTP.
Time synchronization is critical for VCF deployments. You can configure NTP using either the command line or the vSphere web interface.
Option 1: Using esxcli (CLI Method)
# Specify the NTP servers by IP address
esxcli system ntp set -s=192.168.1.2

# Start the ntpd service
esxcli system ntp set -e=yes

# Check the status
esxcli system ntp get
Option 2: Using the vSphere UI
If you prefer a graphical interface, you can configure NTP settings via the ESX host UI. Follow the same steps used in ESXi 8 NTP Configuration — they apply to ESX 9 as well.
Step 3 – Generate SSL Certificates with the correct CN.
/sbin/generate-certificates
/etc/init.d/hostd restart && /etc/init.d/vpxa restart
If you do not do this, you will likely get the error
jjavax.net.ssl.SSLPeerUnverifiedException: Certificate for FQDN doesn’t match any of the subject alternative names: [localhost.localdomain]

As we are deployed a nested lab, I need to emulate compatible host hardware to get it to build a vSAN ESA node.
vSAN VIB – Enabling vSAN ESA Compatibility in a Nested Lab
As mentioned earlier, I needed to use the vSAN ESA HCL hardware mock VIB to deploy VCF 9 successfully in a nested lab environment. The JSON override method passed validation but failed during deployment — specifically when VCF attempted to create the vSAN storage pool.
Deployment Error Encountered
No storage pool eligible disks found on ESXi Host xyxyxyxy Remediation: No storage pool eligible disks found on ESXi Host. Provide ESXi Host with vSAN ESA eligible disks Reference Token: GU0SAE
To avoid this, I followed William Lam’s workaround documented in his post: vSAN ESA Disk & HCL Workaround for VCF 9.0
Below is a step-by-step guide to installing the mock VIB required to emulate ESA-compatible hardware.
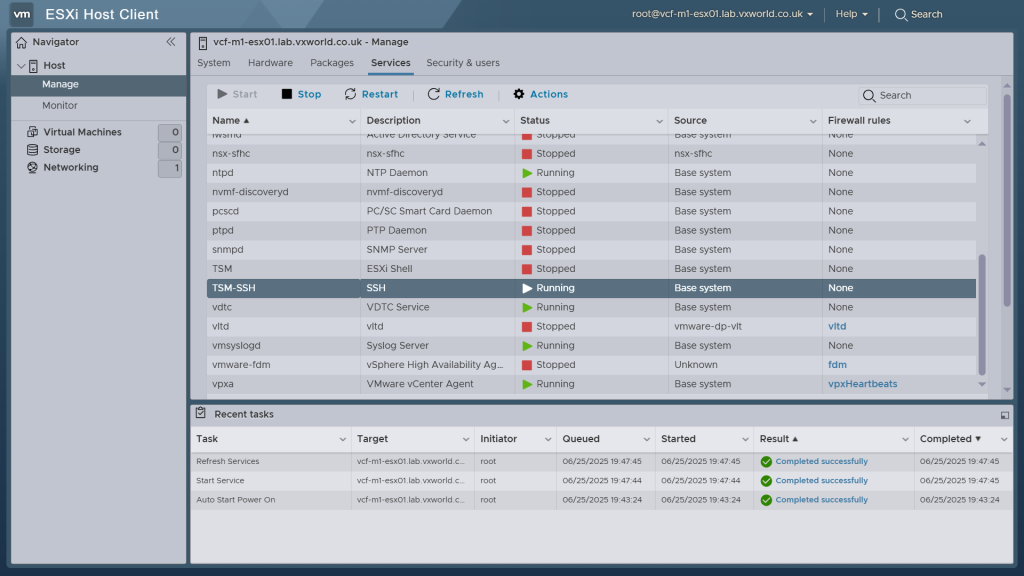
Step 1 – Enable SSH on the ESX Host
You’ll need SSH access to copy the file and run commands.
Step 2 – Copy the VIB to the Host
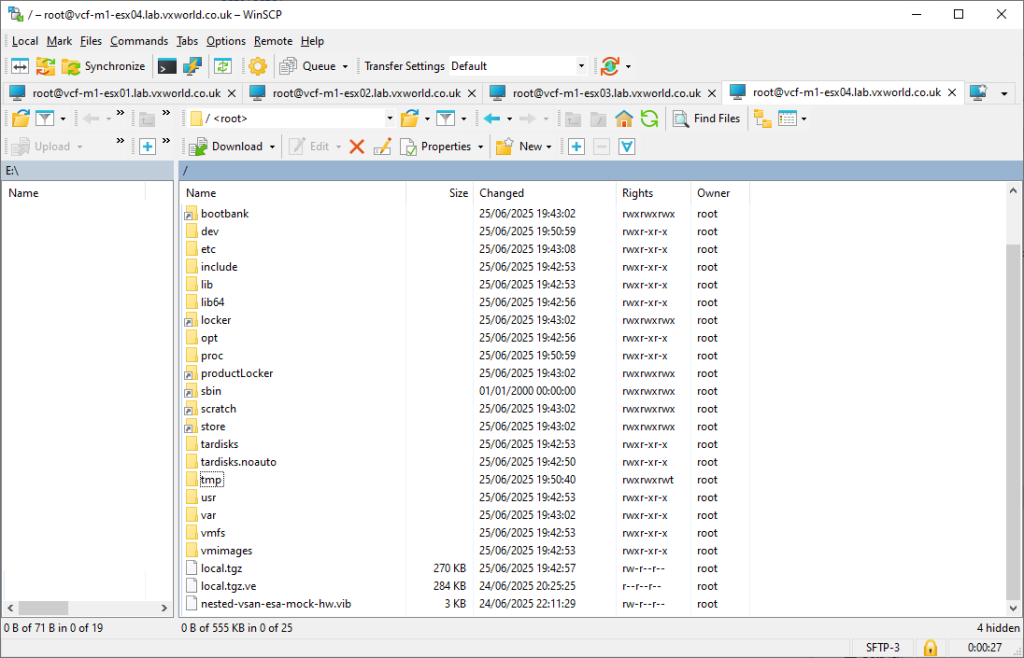
Download the mock VIB from William Lam’s GitHub repository and use WinSCP (or your preferred SCP tool) to transfer it to the root (/) directory of the ESX host.
Tip: Do not copy the VIB to
/tmp. While the install may appear to succeed, VCF bring-up might fail unless the file is placed in/
Step 3 – Install the VIB
SSH into the host and run the following commands:
# Set acceptance level to CommunitySupported

[root@esxi:~] esxcli software acceptance set --level CommunitySupported

# Install the VIB

[root@esxi:~] esxcli software vib install -v /nested-vsan-esa-mock-hw.vib --no-sig-check
You should see an output like this:
Installation Result
   Message: Operation finished successfully.
   VIBs Installed: williamlam.com_bootbank_nested-vsan-esa-mock-hw_1.0.0-1.0
   VIBs Removed:
   VIBs Skipped:
   Reboot Required: false
Step 4 – Restart the vSAN Management Service
[root@esxi:~] /etc/init.d/vsanmgmtd restart
With the hosts fully prepared — including vSAN support, NTP, DNS, and certificates — we’re ready to deploy the VCF 9 Installer appliance.
