

If you over see a VMware vSphere environment, there could be instances where altering the IP address of your vCenter Server becomes necessary. Perhaps you aim to transition your vSphere management to a specialized management network, a practice strongly recommended for security reasons. This comprehensive guide will lead you through the step-by-step process of changing the vCenter IP address.
What is VMware vCenter Server?
Prior to delving into the procedure of changing the IP address, it’s important to take a moment to understand the significance of VMware vCenter Server in a virtualized environment. Serving as the centralized management platform for VMware vSphere, it enables administrators to effectively oversee multiple ESXi hosts and virtual machines.
This platform offers a unified interface for monitoring, managing, and automating diverse tasks within the virtual infrastructure.
vCenter Server offers a range of features, including:
- Centralized management of ESXi hosts and virtual machines.
- Simplified deployment and configuration of virtual machines and templates.
- Advanced capabilities include vMotion, Storage vMotion, and Distributed Resource Scheduler (DRS) for optimizing resource utilization.
- High Availability (HA) and Fault Tolerance (FT) for ensuring the continuous operation of critical virtual machines.
- Integrations with third-party tools and solutions include backup, monitoring, and automation software.
VMware vCenter Server plays a vital role within a vSphere environment by simplifying administration and boosting the overall performance and reliability of your virtual infrastructure.
Prerequisites
We will focus on altering the IP address of the vCenter Server Appliance (VCSA) instead of a vCenter server based on Windows, as the latter is no longer supported.
Before diving into the process, ensure that you have the following:
- A backup of your current vCenter Server configuration.
- Administrator access to the vCenter Server Appliance and vSphere Web Client.
- A valid new IP address that does not conflict with any other devices on your network.
Step 1 – Verify the Current vCenter Server IP Address
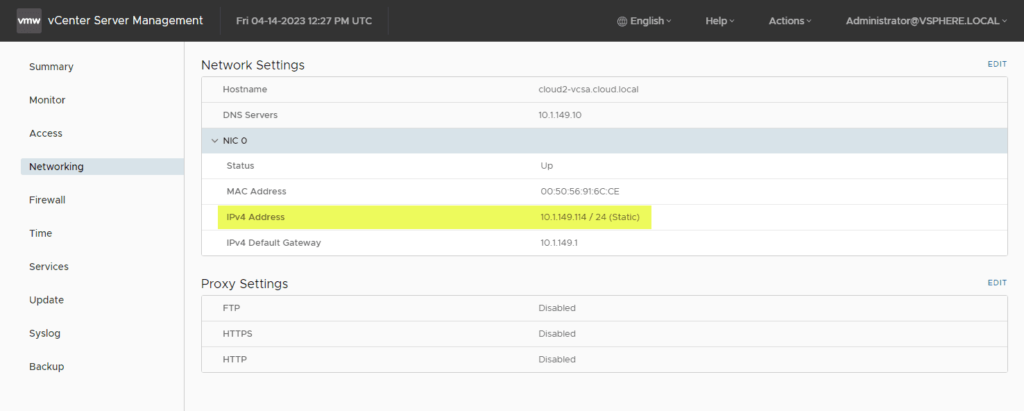
Begin by signing in to the vCenter Appliance Management Interface (VAMI) using your root account credentials. Move to the “Networking” tab and make a note of the existing IP address settings. This data will prove valuable as you move forward with the IP address modification.
Step 2 – Prepare Your Environment for the IP Address Change
Prior to altering the vCenter Server IP address, it is essential to ready your environment:
- Stop all backup jobs that connect to vCenter Server
- Stop any other third-party integrations that rely on a vCenter Server connection
- Notify all relevant stakeholders of the upcoming IP address change
- Ensure that all ESXi hosts, virtual machines, and inventory objects are stable
- Verify there are no vCenter Server-dependent tasks, such as VM migrations, that the change could disrupt.
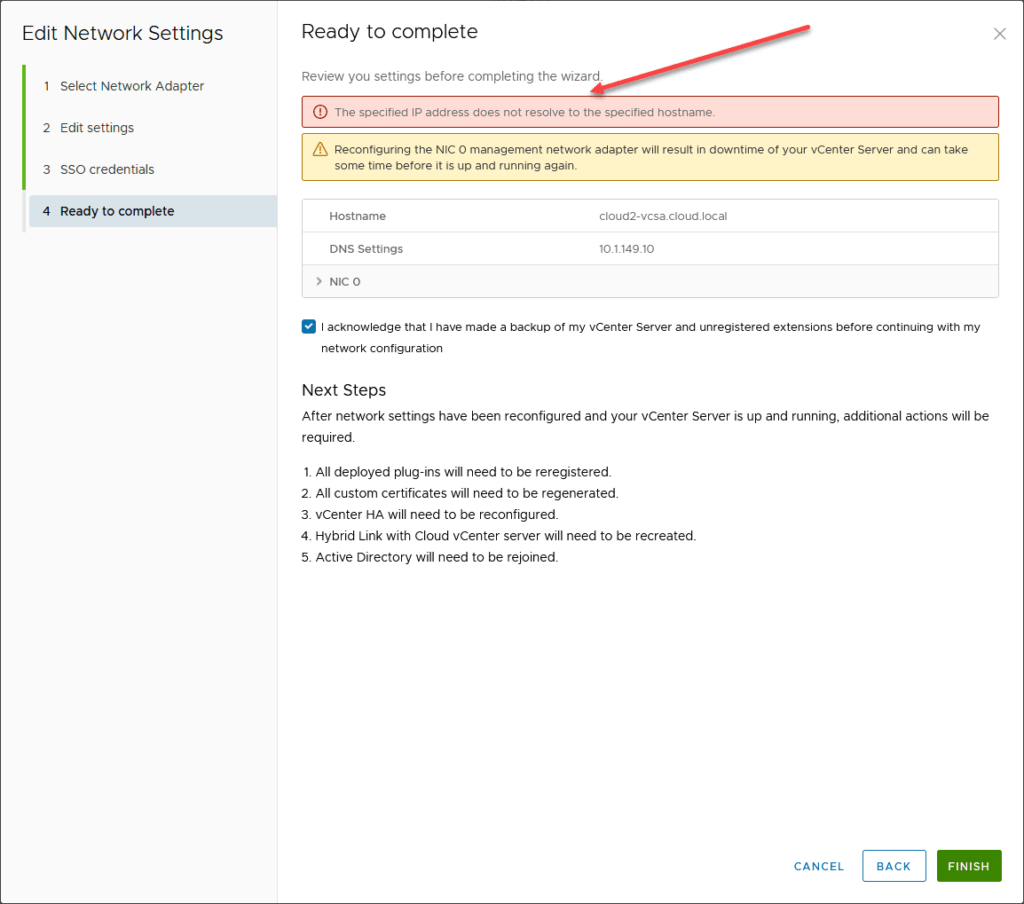
- Before initiating the IP address change wizard for your vCenter Server appliance, ensure that you update the DNS record. The wizard verifies that the DNS is aligned with the correct IP address, and failure to do so will result in an error message.
Step 3 – Prepare vSphere Clusters for vCenter Server IP Address Change
Preparing your vSphere clusters is essential to minimize the risk of disruptions during the transition when changing the vCenter Server IP address. Follow these steps to ensure your clusters are adequately prepared:
- Assess Cluster Health – Review the overall health of your vSphere clusters. You don’t want to introduce changes on top of existing issues in the environment.
- Disable HA – Verify that vSphere High Availability (HA) is disabled on your vSphere clusters as taking vCenter down could trigger HA failures.
- Suspend Cluster-Level Tasks – Temporarily pause any ongoing cluster-level tasks, such as vMotion and Storage vMotion, to prevent potential conflicts or disruptions during the IP address change process.
- Disable vCenter Server Alarms – To prevent an overload of alarms and notifications associated with vCenter Server connectivity, it is crucial to temporarily disable them when modifying the vCenter Server IP address.
- Please ensure that you reactivate these alarms once you have finished adjusting the IP address and your environment is in a stable state.
- Coordinate with Application Teams – Inform the application teams and other relevant stakeholders regarding the imminent IP address modification, and kindly ask them to delay any non-essential alterations or deployments until the transition is successfully executed.
By getting your vSphere clusters ready for the change in the vCenter Server IP address, you can reduce the likelihood of disruptions and facilitate a more seamless transition to the updated IP address configuration.
Step 4 – Changing the vCenter Server IP Address
To change the vCenter IP address, follow these steps:
- Log in to the vSphere Web Client with your administrator account.
- In the vSphere Web Client main interface, navigate to the vCenter Server instance you want to modify.
- Click on the “Manage” tab and then select “Settings.”
- Under “Settings,” click on “Edit” to open the IP settings configuration window.
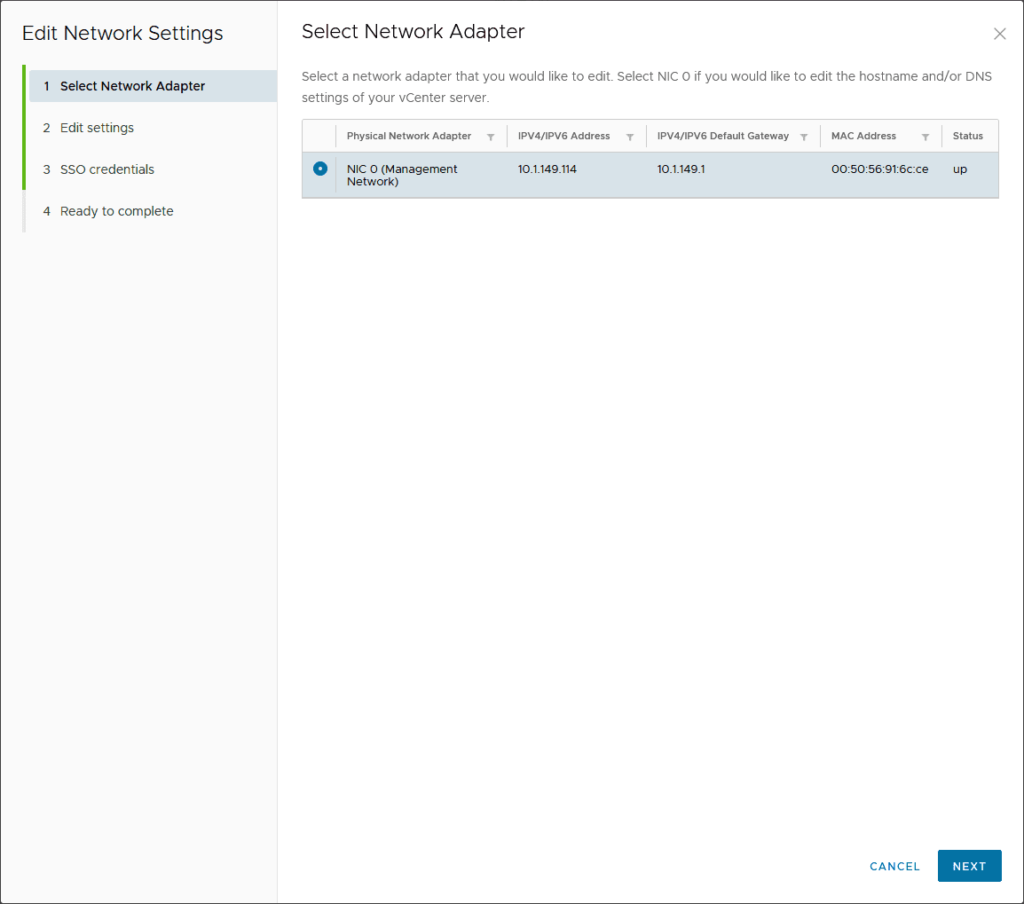
- Update the IP address, subnet mask, and default gateway with the new IP address settings.
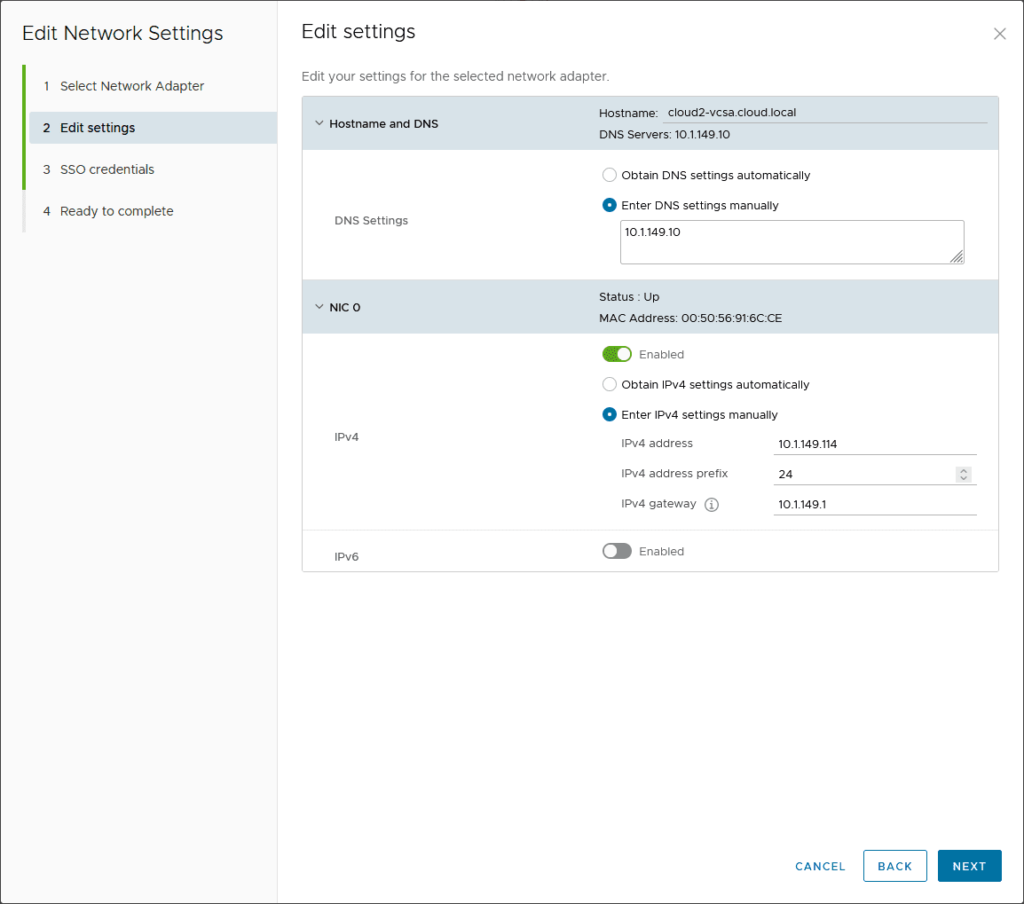
Updating the IP and mask on the network adapter settings.
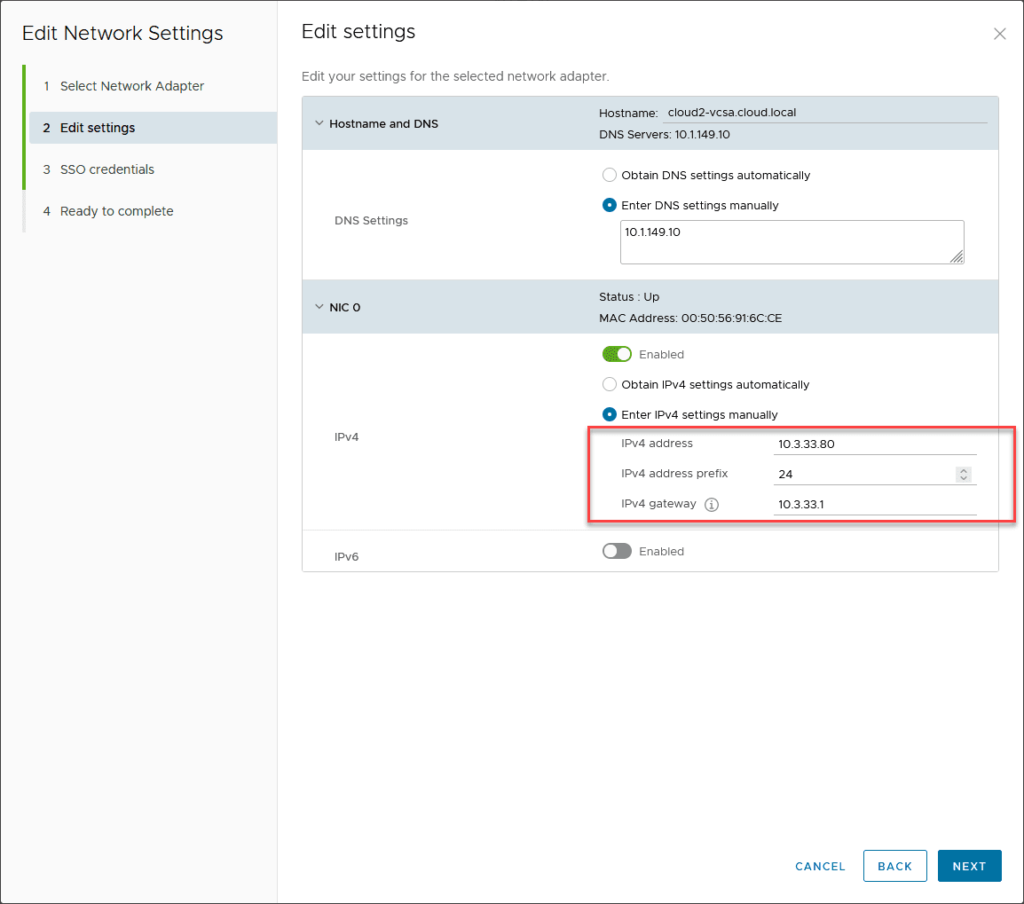
Note that reconfiguring means downtime as per the informational message.
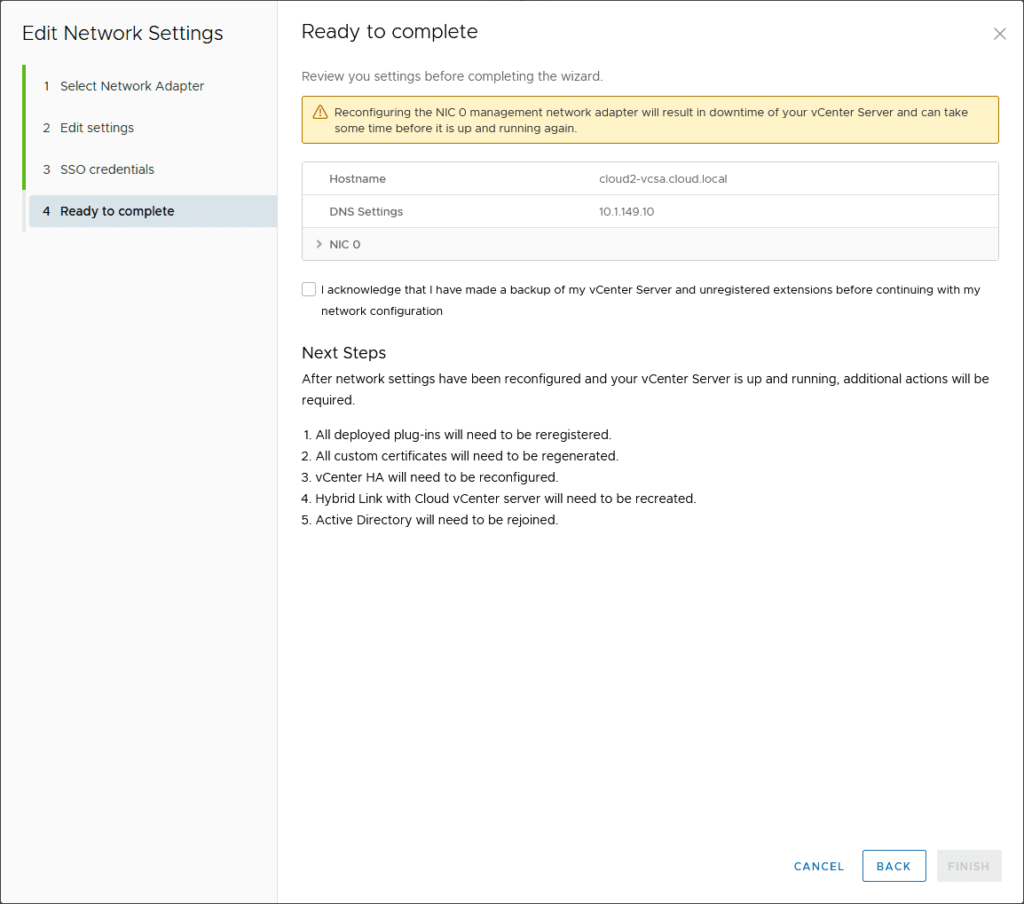
Check the box that you have backed up your vCenter Server appliance.
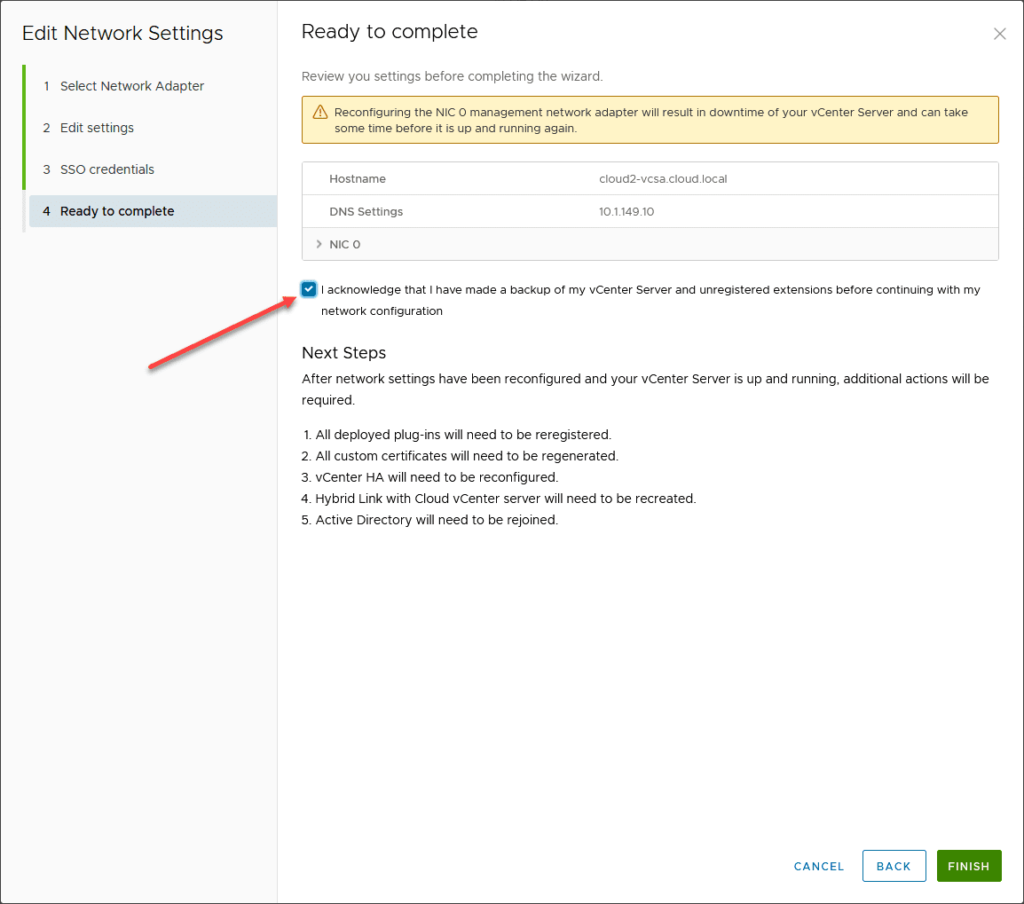
- Confirm the changes and click OK to apply the new IP address configuration.
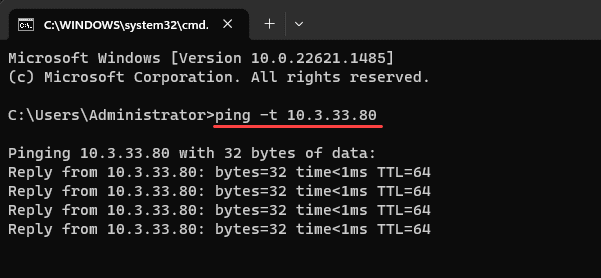
The new IP address of the VCSA appliance begins pinging correctly.
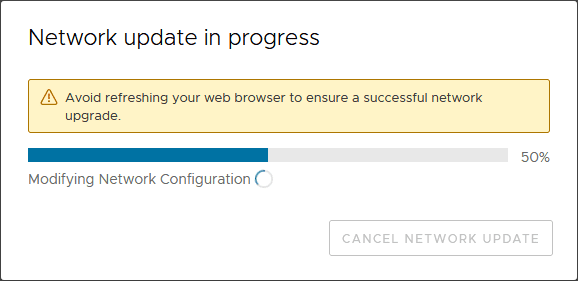
Kindly be aware that the vCenter Server will undergo a restart in order to implement the updated IP settings. This may cause a temporary interruption to any existing connections with the vCenter Server.
Step 5 – Update DNS Settings and ESXi Hosts
Following the modification of the vCenter Server IP address, ensure that your DNS server settings are adjusted to correspond with the updated IP address.
- Update the DNS server with the new vCenter Server IP address.

- If applicable, adjust your DNS settings for any dual IP stacks.
- You can log in to each ESXi host to verify that they can connect to the vCenter Server at the updated address, ensuring that DNS has been successfully updated.
Step 6 – Verify Connectivity and Functionality
After updating the vCenter Server IP address and making the required adjustments to your DNS settings and ESXi hosts, confirm the proper functioning of your environment.
- Log in to the vSphere Web Client using the new vCenter Server IP address.
- Ensure all ESXi hosts, virtual machines, and inventory objects are visible and accessible.
- Verify that you can perform management tasks like creating and modifying virtual machines.
Wrapping up
Modifying the vCenter IP address is a crucial task that demands thorough planning and precise execution. Nevertheless, the procedure itself is relatively uncomplicated. This guide aims to facilitate a seamless shift to the new IP address, minimizing downtime and potential disturbances in your VMware vSphere environment. Strongly recommend creating a backup before initiating any alterations to your vCenter Server.