The Ultimate VCF Lab Guide: Deploying VCF9 on a single ESXi host – Part 3
In the last post in this series, we deployed the VMware Cloud Foundation 9 Installer & configured the offline depot. We can now proceed with the VCF 9 Deployment Wizard.
Part 1 – Physical ESXi Host Configuration
Part 2 – Deploying the VCF 9 Installer & Offline Depot
Part 3 – Deploying VCF 9 with the VCF Installer < You are here
Running the VCF 9 Installer Deployment Wizard
You can use the Deployment Wizard, or supply a JSON with all the configuration pre-set. Today, we will use the deployment wizard to get familiar with the deployment options.
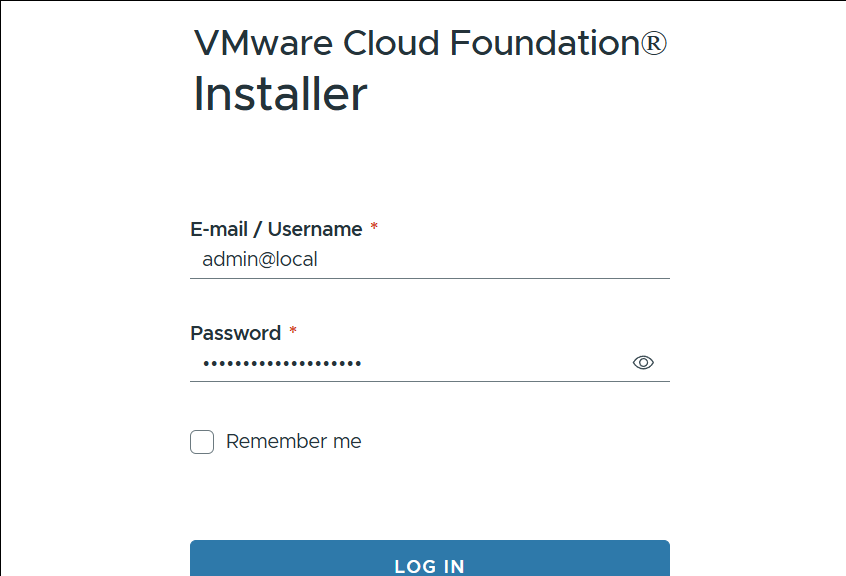
Log in to the VMware Cloud Foundation 9 Installer

Log in to the Vmware Cloud Foundation 9 Installer
Start the Deployment Wizard for VMware Cloud Foundation

Start the Deployment Wizard for Vmware Cloud Foundation
Deploy a new VCF Fleet

Deploy a New Vcf Fleet
Since we do not have any pre-existing components, we don’t need to select anything in the Existing Components section.

Select Existing Vcf 9 Components
Complete the general deployment options
Due to the compute and storage constraints in the lab, I’ve opted for a simple, single-node deployment.
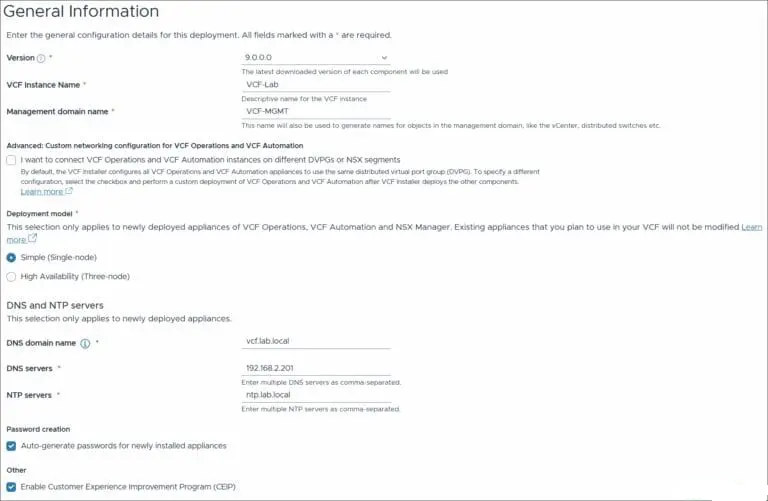
General Vcf 9 Deployment Options
Configure VCF Operations
Enter the details for the VCF Operations, Fleet Manager and Collector Appliance.
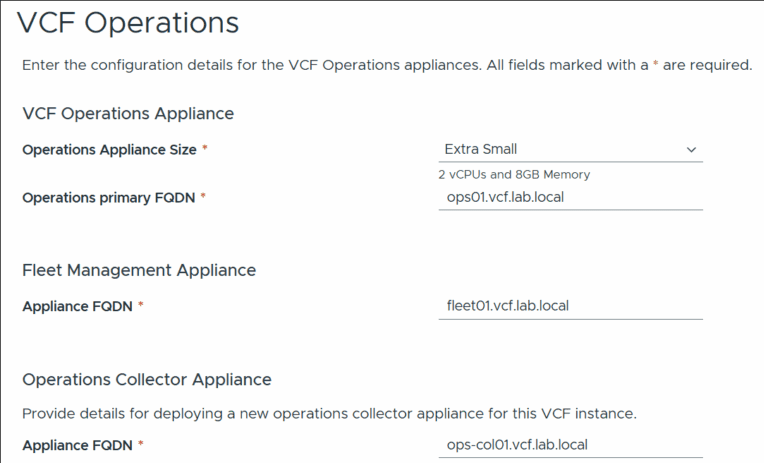
Configure Vcf Operations for Vcf 9
Configure VCF Automation
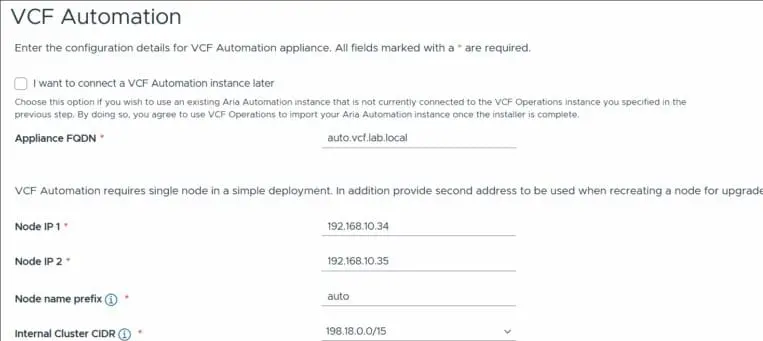
Configure Vcf Automation for Vcf 9
Configure vCenter Server
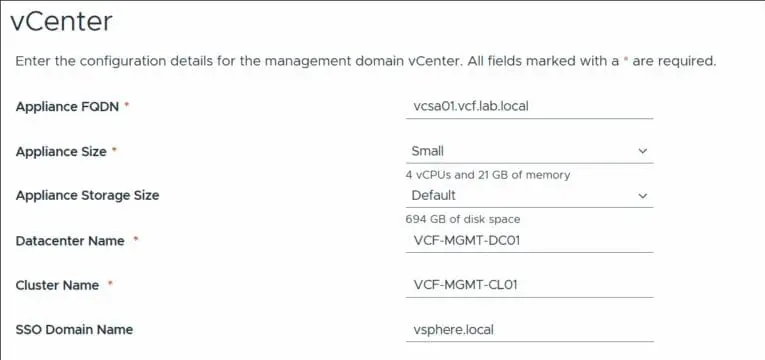
Configure Vcenter Server for Vcf 9
Configure NSX Manager
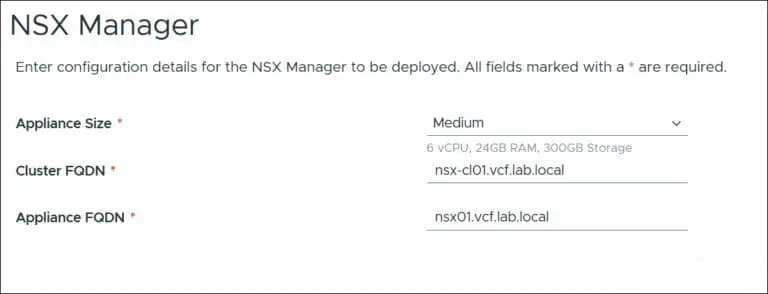
Configure Nsx Manager for Vcf 9
Configure Storage
For storage, I mentioned earlier that you have several options. I’m going with a vSAN OSA deployment for simplicity. FC and NFS are also viable options if you have the hardware in the lab. I recommend not selecting ESA for lab use due to the additional steps required to get this working on our nested deployment. For production deployment, ESA is a great option.
I’ve selected FTT 0 due to space constraints and acknowledge that this option provides zero redundancy.
I’ve disabled vSAN deduplication and compression due to the CPU overheads, but if you can, these are also great options to use if you have a well-sized environment.
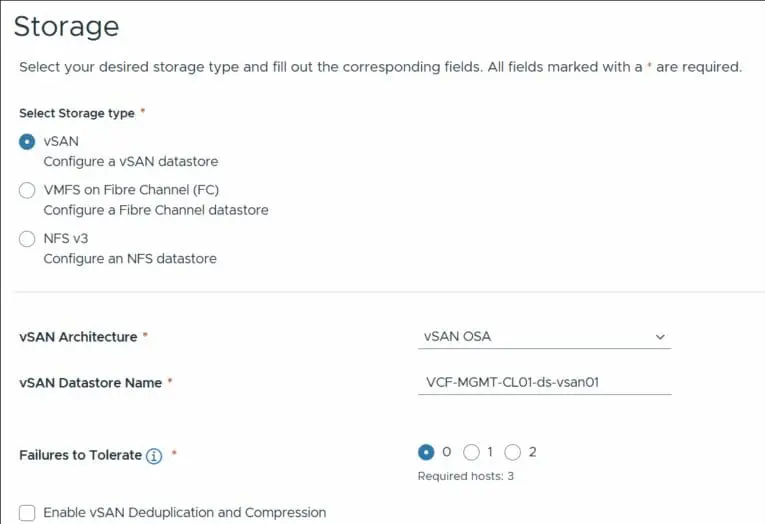
Configure Storage for Vcf 9
Management Hosts
Enter the details for the first three ESXi hosts, which will be used for VCF Management & confirm the thumbprints.
If you get an error regarding Certificates not matching the subject alternative names, then regenerate the certificates on the hosts as per this Broadcom KB.
Then, remove the hosts and re-add them to the VCF Deployment Wizard to re-generate the thumbprints.
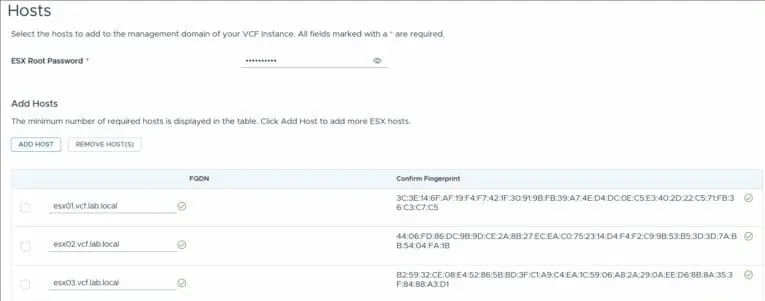
Management Hosts for Vcf 9
Networks
Enter all the required networking information for the Management Domain
Ensure you have created the vMotion and vSAN VLANS in your network and that the gateways are reachable
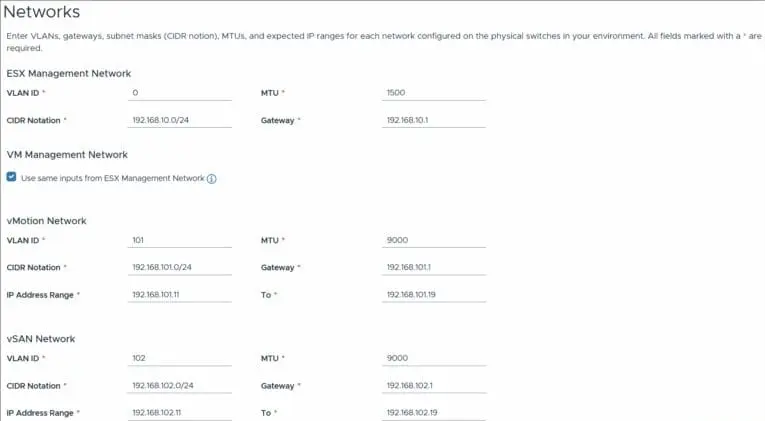
Networks for Vcf 9 Installation
Distributed Switch
I selected the default switch option for simplicity
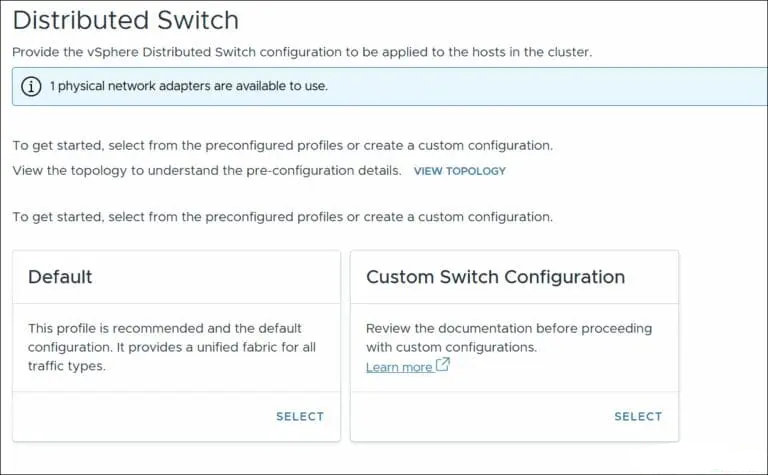
Distributed Switch for Vcf 9 Deployment
Expand the Distributed Switch Name and enter the required details for the vDS
For the NSX overlay, I used a new VLAN that was configured on my network with DHCP for ease of use.
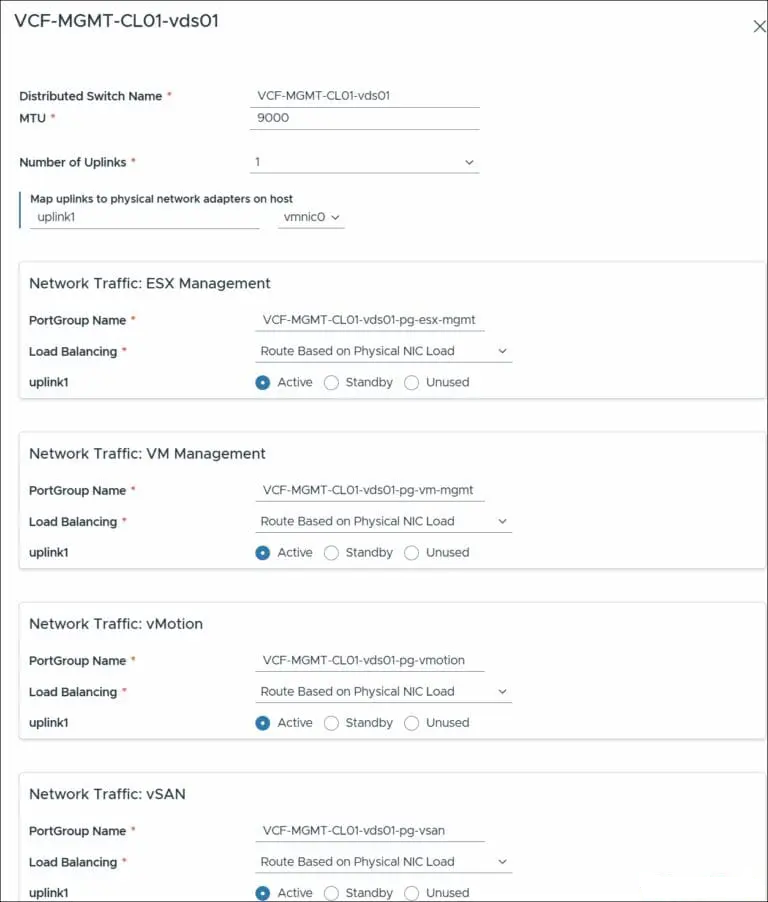
Vcf 9 Vds Configuration.
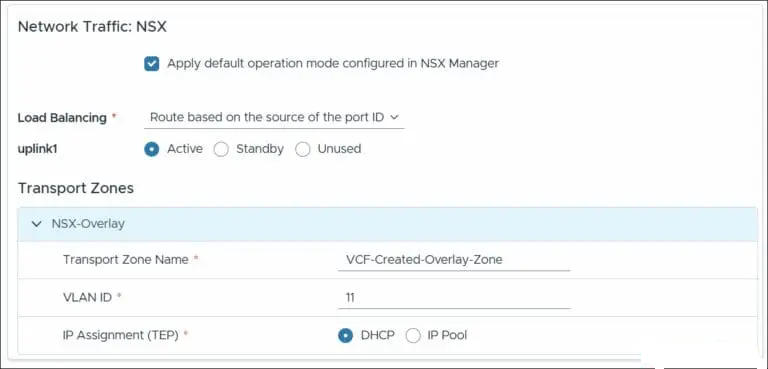
Vcf 9 Nsx Overlay Network Configuration
SDDC Manager
Enter the FQDN for the SDDC Manager Appliance

Enter the Fqdn for the Vcf 9 Sddc Manager Appliance
Review
On the VCF Deployment Review page, check all the configurations.
I highly recommend downloading the JSON spec, which will contain all your configuration which you can import later for a new deployment. It is also helpful to use if your deployment fails, or simply as a backup of your selected options.

Review the Vcf 9 Configuration
Validation
The VCF 9 validation process takes a few minutes; you may be prompted to review warnings along the way, so keep checking the UI for updates.
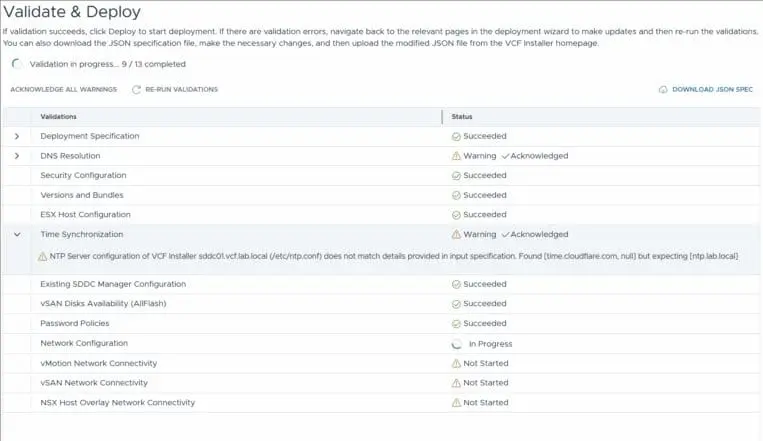
Vcf 9 Validation Process
VCF Deployed
That’s it! – The VCF 9 Management Cluster is deployed. You’ll be presented with login details after deployment, and you can then proceed to log in to VCF 9 and explore the solution!





[…] Once all the binaries are downloaded to the VCF 9 Installer, proceed to the next step in the process here: Part 3 – Deploying VCF 9 with the VCF Installer […]