Physical Address
304 North Cardinal St.
Dorchester Center, MA 02124
Physical Address
304 North Cardinal St.
Dorchester Center, MA 02124
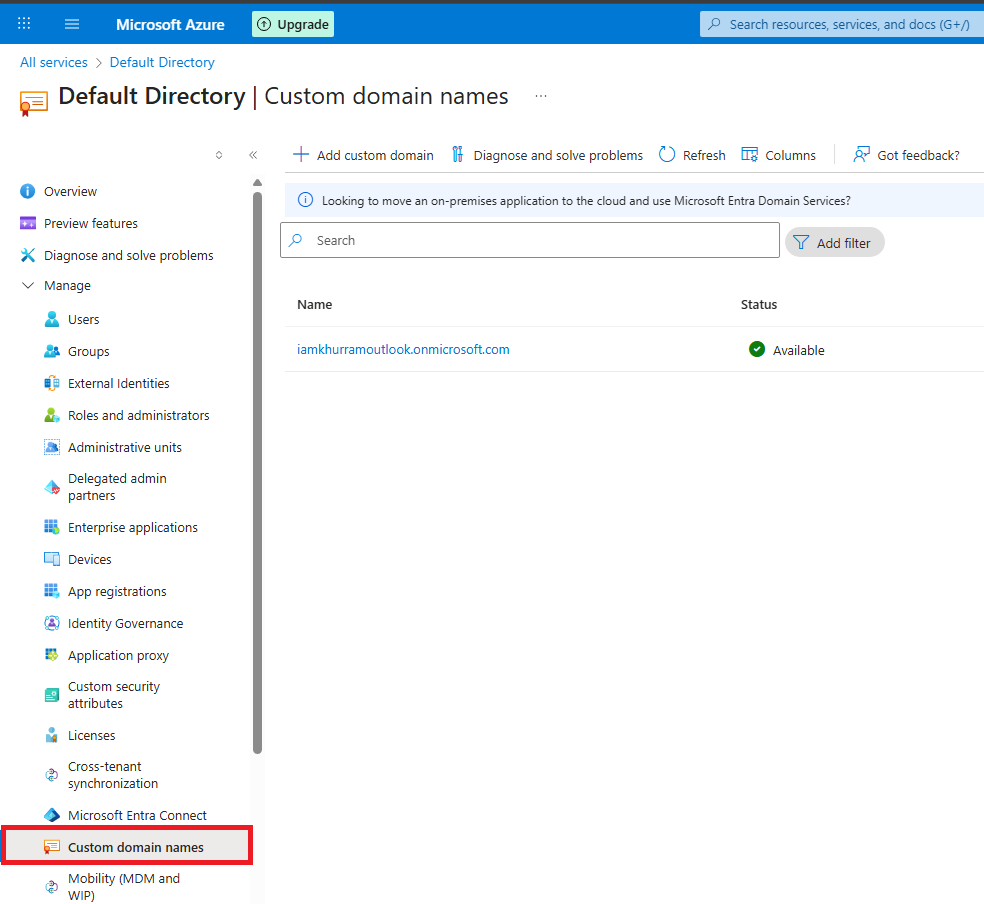
When you first set up an Azure Active Directory (Azure AD) tenant, Microsoft gives you a default domain name like:
yourcompany.onmicrosoft.com
That works fine for testing, but let’s be honest — it doesn’t look very professional. In the real world, you want your employees and users to sign in with your actual company domain, like @yourcompany.com. That’s where adding a custom domain comes in.
In this guide, we’ll walk through why you should add a custom domain, the steps to set it up, and what to expect afterward.
Every new Azure AD tenant comes with an initial domain name, You cannot change or delete the initial domain name, but you can add your organization’s names. Adding custom domain names helps you to create usernames that are familiar to your users, such as In the previous section, we saw how to create a domain and create a default initial domain. In this demo, we will see how to add your own custom domain. To add a custom domain, it’s important that you should own the domain name and the domain
should be registered with the domain registrar. Following are the steps to add a custom domain to Azure AD.
Go to the Azure Portal and log in with your admin account.
In the search bar at the top, type Azure Active Directory and open it.
From the left-hand menu, select Custom domain names.

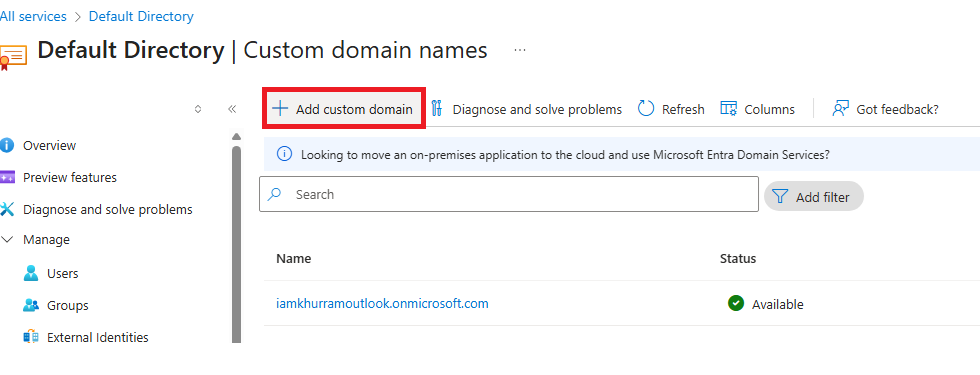
Click + Add custom domain.
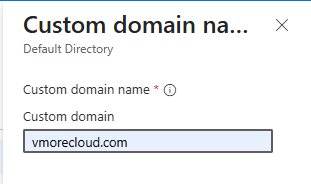
Enter your domain name (for example, yourcompany.com). In our case we will enter our own domain vmorecloud.com.
Click Add domain.
This step proves to Microsoft that you actually own the domain.
Azure will give you a TXT record.
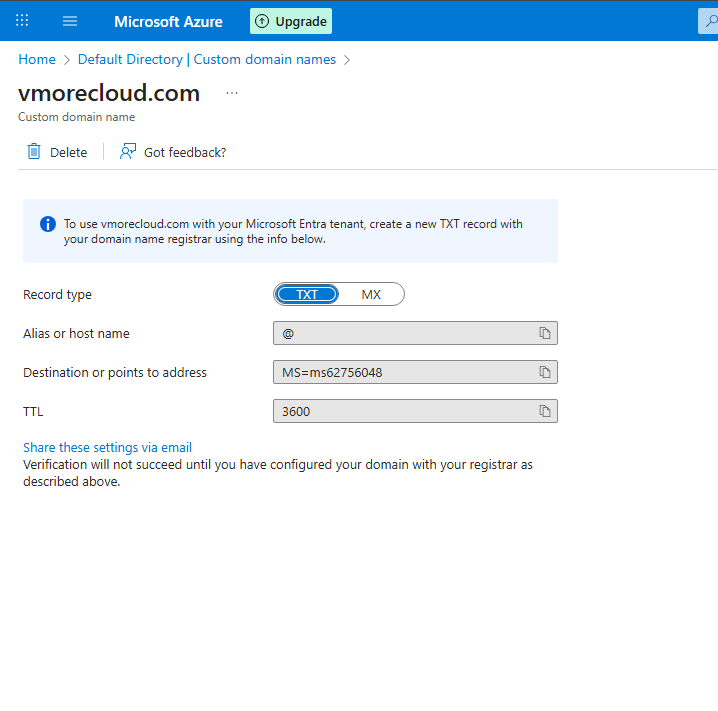
Log in to your domain registrar (GoDaddy, Namecheap, Cloudflare, Hostiner etc.). As i have purchased this domain from hostinger.com i will open hostinger website, and enter its entry. Go the DNS section of hostinger
Add the TXT record to your DNS zone.
Save your changes.

Similarly for MX record, insert the entry in the hosting provider DNS section.
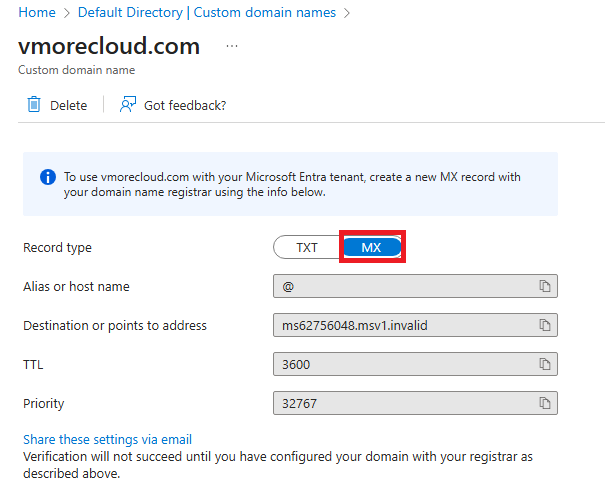
Enter the value in the DNS record., and click add to save the entries.

Back in the Azure Portal, click Verify. DNS propagation may take a few minutes to a few hours. Once verified, Azure will confirm ownership of the domain.

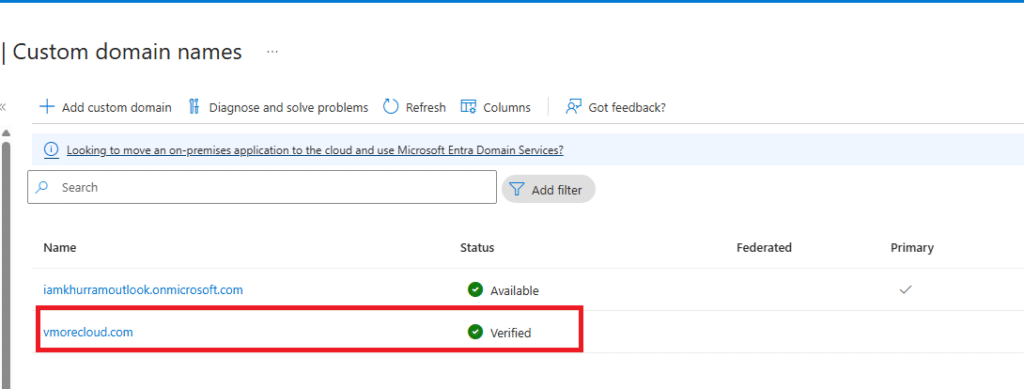
If you want all new users to use your custom domain by default, set it as the Primary domain. Now lets create a user in newly registered domain vmorecloud.com. Click on the users and create a user name with name david and select desire domain vmorecloud.com.
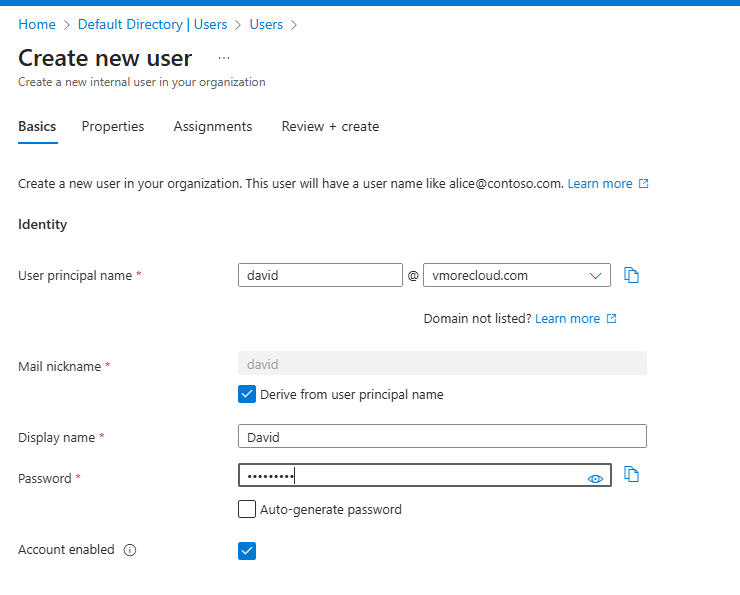
Type the crendential for this user name and click create to save new this david account.
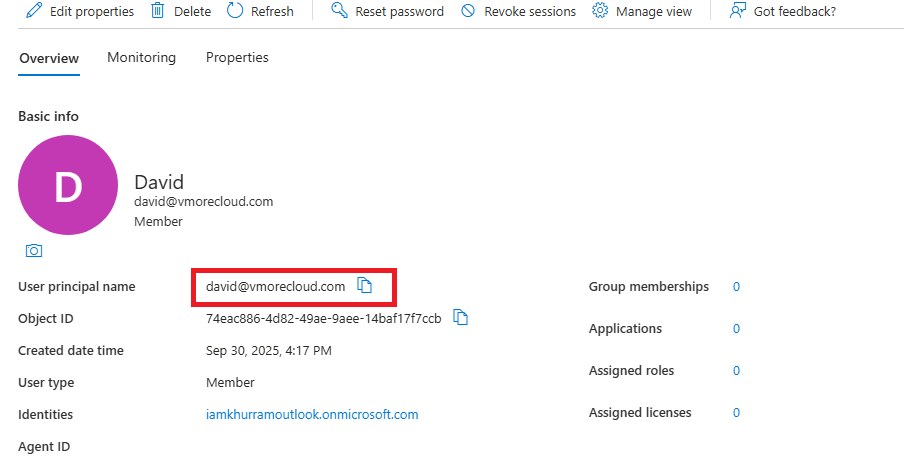
Adding a custom domain to Azure Active Directory is one of the first steps to making your cloud environment production-ready. It strengthens your corporate identity, improves the user experience, and prepares your tenant for services like Microsoft 365.
So if you’re still stuck with the default onmicrosoft.com domain, take a few minutes to add your own your users (and your brand) will thank you.