Windows Server 2022 as a RADIUS Server for Two-Factor Authentication in ESXi 8
Introduction
As cyber threats continue to evolve, securing access to your VMware ESXi 8 environment is more critical than ever. While traditional username-password authentication provides a basic level of security, it is no longer sufficient against modern attack vectors like credential theft, brute-force attacks, and phishing. Two-Factor Authentication (2FA) adds an additional layer of protection by requiring a second form of verification, such as a one-time password (OTP) or a push notification, before granting access.
In this guide, we will walk through the process of configuring Windows Server 2022 as a RADIUS (Remote Authentication Dial-In User Service) server for integrating 2FA authentication in VMware ESXi 8. By leveraging Network Policy Server (NPS) on Windows Server 2022, you can enforce strong authentication policies, restrict unauthorized access, and comply with security standards like ISO 27001, PCI DSS, and HIPAA.
This tutorial is designed for IT administrators who want to enhance their ESXi security posture by implementing Multi-Factor Authentication (MFA) with RADIUS. We will cover the installation of NPS, RADIUS client configuration, network policies, and integration with ESXi 8, ensuring a seamless and secure authentication workflow.
Lab Setup Overview
Required Components
- Windows Server 2022 (configured with Active Directory, if applicable)
- Network Policy Server (NPS) role installed
- VMware ESXi 8 host
- RADIUS-compatible MFA provider (e.g., Duo Security, Microsoft Azure MFA, RSA SecurID)
Network Topology
- Windows Server 2022 – Acts as a RADIUS server with NPS installed.
- VMware ESXi 8 Host – Configured to use RADIUS authentication.
- MFA Provider – A third-party service that verifies user identity before allowing ESXi access.
Step 1: Install and Configure Network Policy Server (NPS) on Windows Server 2022
1. Install NPS Role
Open Server Manager > Click on Manage >

Select Add Roles and Features.
Choose Role-based or feature-based installation and click Next.
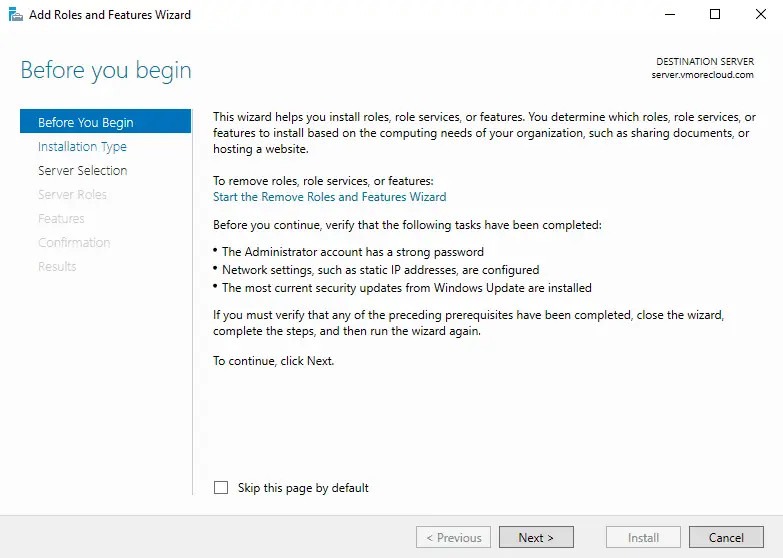
Select the Windows Server 2022 where NPS will be installed and click Next.
Under Server Roles, select Network Policy and Access Services > Click Next.
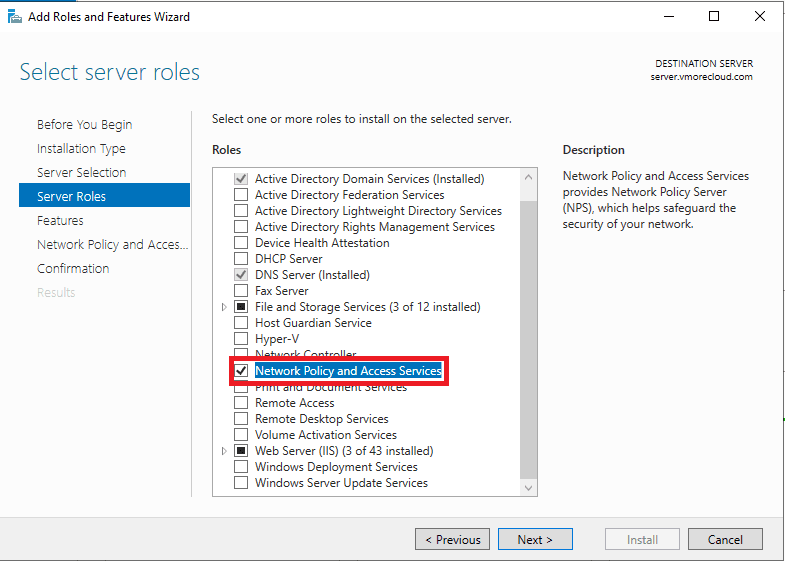
Under Role Services, check Network Policy Server (NPS) > Click Next.
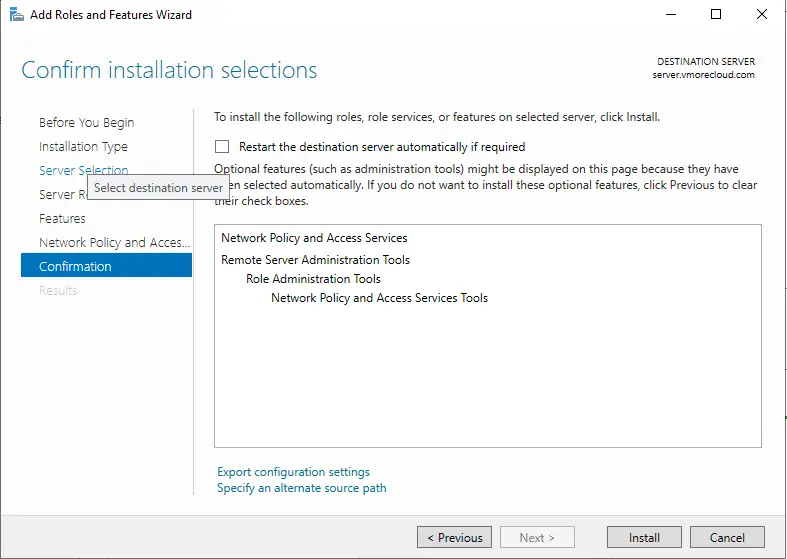
Click Install and wait for the installation to complete.
2. Register NPS in Active Directory
Open NPS Console (Run nps.msc from the Start menu).

Right-click NPS (Local) and select Register Server in Active Directory.
Click OK to confirm registration.
Step 2: Configure RADIUS Clients in NPS
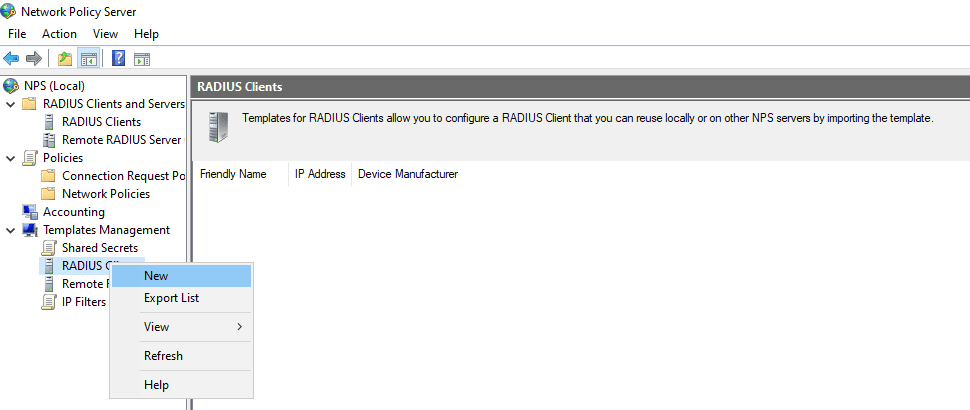
In NPS Console, expand RADIUS Clients and Servers > Right-click RADIUS Clients > Select New.
Enter a Friendly Name (e.g., VMware-ESXi-8). Enter the IP address of your ESXi 8 host.
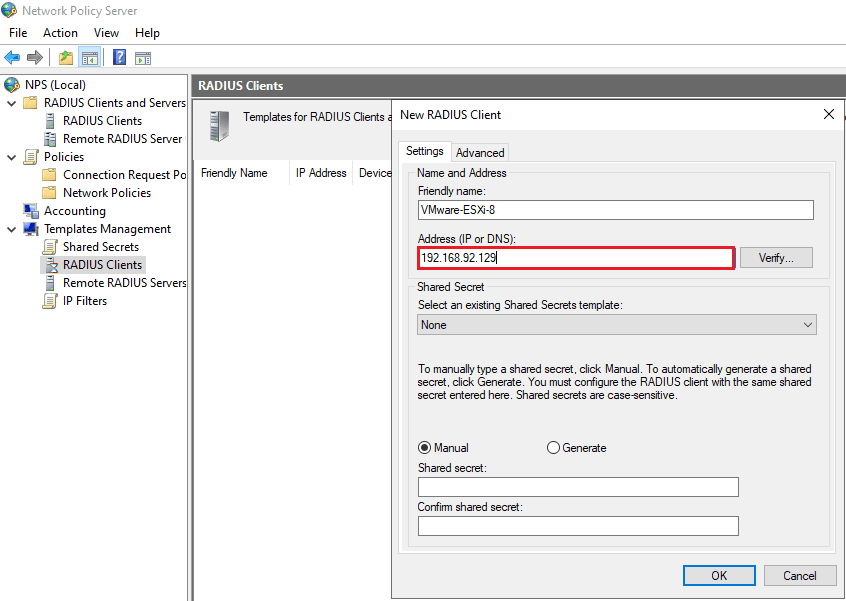
Click on the verify button to verify the IP address of VMware ESXi 8.
Choose a Shared Secret (store this safely; you will need it for ESXi configuration).
Click OK to save the client settings.
Step 3: Configure a Network Policy for ESXi Authentication
In NPS Console, navigate to Policies > Network Policies.
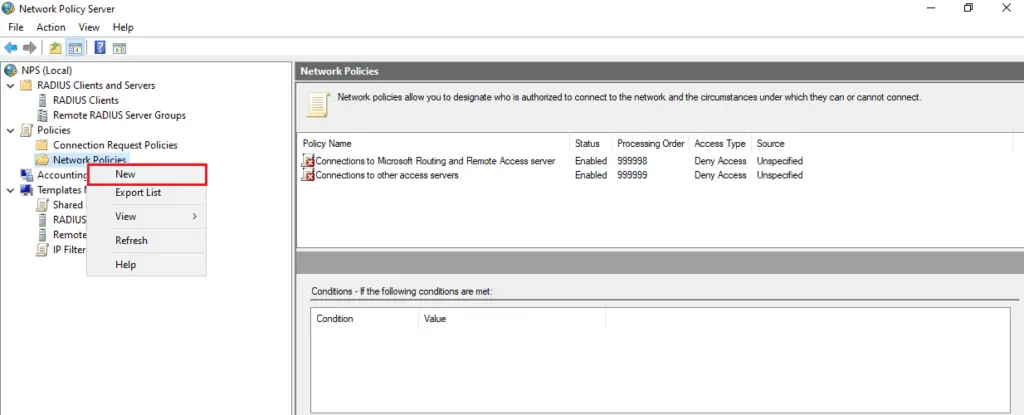
Click New and provide a Policy Name (e.g., “VMware ESXi Authentication”).

Select Grant Access if the request matches the conditions.
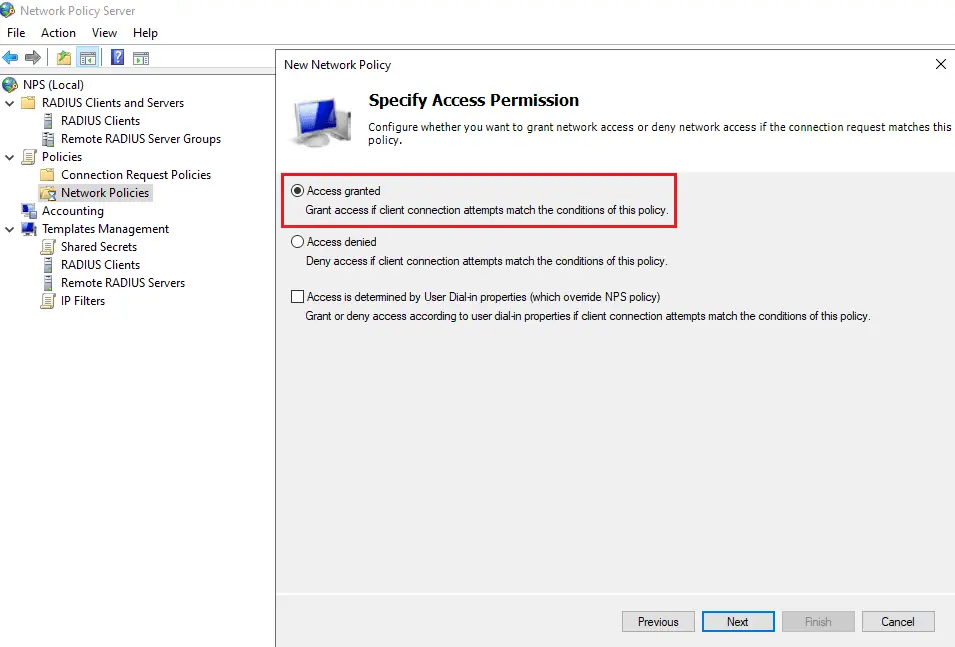
Under Conditions, click Add:
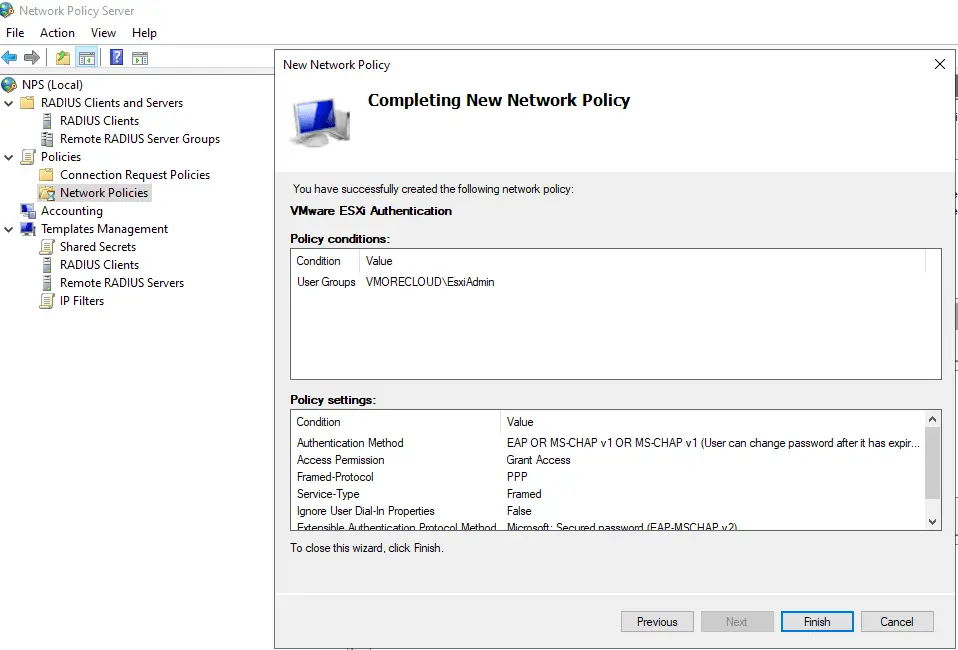
- Select User Groups > Choose an Active Directory group (e.g., “ESXi Admins”).
- Select Client IPv4 Address and enter the ESXi host IP.
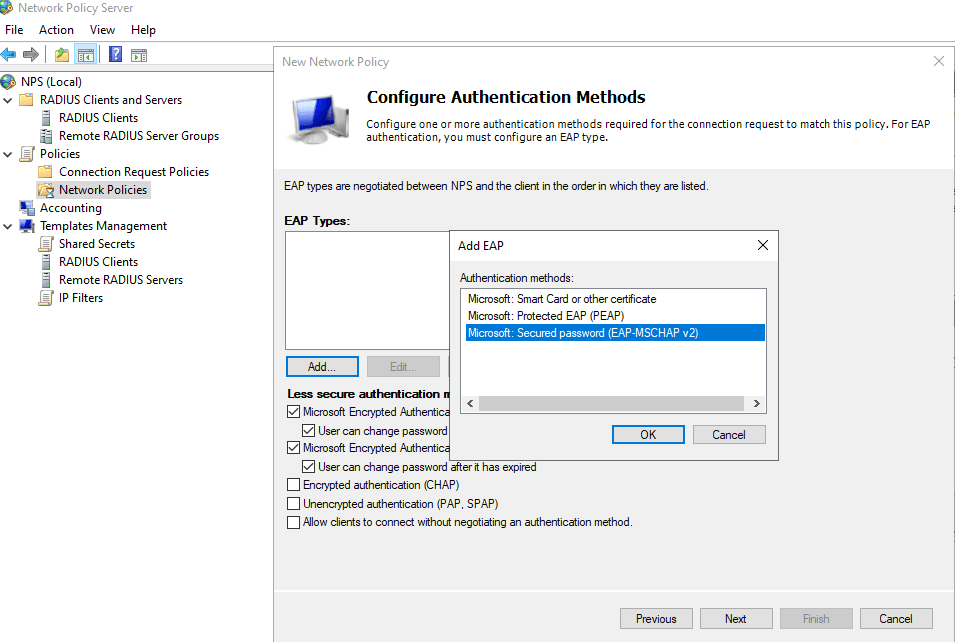
Under Authentication Methods, ensure Microsoft Encrypted Authentication (MS-CHAP v2) is enabled.
Click Next and then Finish to save the policy.
Step 4: Integrate RADIUS with VMware ESXi 8
1. Configure RADIUS Authentication in ESXi 8
Log in to the VMware ESXi 8 Web UI.
Navigate to Manage > Security & Users > Authentication Services.

Click Edit and select RADIUS Authentication.
Enter the Windows Server 2022 IP Address as the Primary RADIUS Server.
Enter the Shared Secret (same as configured in NPS). Set the Authentication Timeout (e.g., 10 seconds).
Click Save.
2. Configure ESXi User Permissions
- In ESXi Web UI, go to Manage > Users & Groups.
- Click Add User and create an Active Directory or Local User.
- Assign Administrator or Custom Role permissions.
Step 5: Test 2FA Authentication with RADIUS
- Try logging into ESXi 8 with an account configured in Active Directory.
- The system should prompt for 2FA verification via your MFA provider.
- Approve the authentication request from your MFA app.
- Once verified, you should gain access to VMware ESXi 8.
Conclusion
By integrating Windows Server 2022 as a RADIUS server for 2FA authentication, you significantly enhance VMware ESXi 8 security. This setup ensures that even if credentials are compromised, unauthorized users cannot gain access without the second authentication factor.
🔹 Key Benefits:
- Stronger security against unauthorized access.
- Compliance with security standards like ISO 27001, PCI DSS, HIPAA.
- Seamless integration with enterprise MFA providers.
💡 Next Steps: Implement audit logging in NPS for monitoring and configure backup authentication methods for failover security.


