Physical Address
304 North Cardinal St.
Dorchester Center, MA 02124
Physical Address
304 North Cardinal St.
Dorchester Center, MA 02124
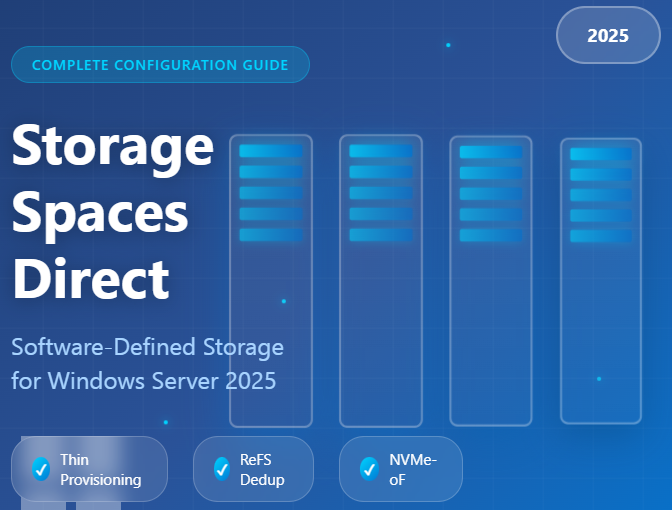
Remember when setting up enterprise storage meant dealing with expensive SAN hardware, complicated cabling, and vendor lock-in? Those days are rapidly fading. If you’re managing Windows Server infrastructure in 2026, there’s a powerful solution that’s been hiding in plain sight—Storage Spaces Direct (S2D). And with Windows Server 2025, it’s gotten even better.
Let me walk you through everything you need to know about utilizing and configuring Storage Spaces Direct, from what it actually does to getting it running in your environment.
Think of Storage Spaces Direct as software-defined storage on steroids. Instead of buying dedicated storage arrays, S2D lets you cluster together standard servers with their internal drives—whether they’re SSDs, NVMe drives, or traditional HDDs—and turn them into a unified, resilient storage pool.
Here’s what makes it special: you’re connecting servers over regular Ethernet (no fancy storage fabric required), and the software handles all the complexity of distributing data, providing redundancy, and managing performance. It’s like RAID, but distributed across multiple servers and infinitely more flexible.
Microsoft has baked this technology into Windows Server Datacenter Edition, and it’s the same foundation powering Azure Local (formerly Azure Stack HCI). That means you’re using battle-tested, cloud-grade infrastructure right in your own datacenter.
Microsoft didn’t just slap a new version number on S2D—they’ve added features that address real pain points:
This was the elephant in the room. Until now, when you created a 1TB volume in Storage Spaces Direct, it immediately consumed 1TB from your storage pool—whether you used it or not. Windows Server 2025 introduces thin provisioning, meaning storage is allocated only as you actually write data.
This is huge for virtualization environments. You can now create 100 virtual machine disks at 500GB each without immediately eating 50TB of physical storage. The space gets used only as those VMs grow. Plus, you can convert existing fixed volumes to thin provisioning without starting from scratch.
When a drive fails or a node comes back online, S2D needs to rebuild data. Previously, this happened at full throttle, potentially crushing your VM performance. Windows Server 2025 lets you tune the repair priority across five levels—either prioritize getting your data protected quickly or keep VMs running smoothly while repairs happen in the background.
If you’re running similar VMs or lots of backups, you’re wasting storage. The new native deduplication in ReFS can reduce storage consumption by over 60% in virtualization scenarios. And yes, it’s cluster-aware, so it works seamlessly across all your nodes.
For organizations pushing for maximum performance, Windows Server 2025 includes a native NVMe over Fabrics initiator. Microsoft claims up to 90% more IOPS compared to previous versions—with lower CPU overhead. While RDMA support is coming in future updates, TCP-based NVMe-oF is available now.
Here’s something cool for distributed environments: Windows Server 2025 supports campus clusters with rack-level nested mirroring. You can stretch a Storage Spaces Direct cluster across multiple racks or even data rooms in the same campus, providing both high availability and meeting regulatory requirements for data redundancy.
Before diving into configuration, let’s make sure you have the right setup. Don’t worry—this isn’t as demanding as traditional SAN requirements.
Servers:
Storage:
Networking:
Other Requirements:
For testing and evaluation, you can actually set this up on Hyper-V virtual machines—perfect for learning without investing in hardware.
Let me break down the entire deployment process. I’ll show you both PowerShell commands (the recommended approach) and explain what’s happening under the hood.
Start fresh on each server. Install Windows Server 2025 Datacenter Edition. You can use either Server Core (recommended for production) or Server with Desktop Experience.
For remote management, you’ll want a management workstation running Windows Server 2025, Windows 11, or Windows 10 with the latest Remote Server Administration Tools (RSAT).
On each server, join it to your Active Directory domain and give it a descriptive name:
powershell
Add-Computer -NewName "S2D-Node1" -DomainName "contoso.com" -Credential "CONTOSO\Administrator" -Restart -ForceRepeat for each node (S2D-Node2, S2D-Node3, etc.). Make sure your storage admin account has local administrator rights on all nodes.
From your management system, install the necessary roles on all cluster nodes:
powershell
$servers = "S2D-Node1", "S2D-Node2", "S2D-Node3", "S2D-Node4"

Invoke-Command $servers {
    Install-WindowsFeature -Name "Hyper-V", "Failover-Clustering", "Data-Center-Bridging", "RSAT-Clustering-PowerShell", "Hyper-V-PowerShell", "FS-FileServer" -IncludeManagementTools -Restart
}
This installs:
Networking is where many S2D deployments stumble. Windows Server 2025 includes Network ATC (Automatically Configure and Deploy Network Settings) which simplifies this dramatically.
For a converged setup (management + compute on same NICs):
powershell
Add-NetIntent -Name "ManagementCompute" -Management -Compute -AdapterName "NIC1", "NIC2"For dedicated storage network:
powershell
Add-NetIntent -Name "Storage" -Storage -AdapterName "NIC3", "NIC4"Network ATC automatically configures:
If you’re doing manual configuration (not recommended unless you have specific requirements), you’ll need to:
Before creating your cluster, validate that everything is configured correctly:
powershell
Test-Cluster -Node "S2D-Node1", "S2D-Node2", "S2D-Node3", "S2D-Node4" -Include "Storage Spaces Direct", "Inventory", "Network", "System Configuration"This generates an HTML report. Review it carefully—warnings are okay, but fix any failures before proceeding.
Now create the actual cluster:
powershell
New-Cluster -Name "S2D-Cluster" -Node "S2D-Node1", "S2D-Node2", "S2D-Node3", "S2D-Node4" -NoStorage -StaticAddress 10.0.1.100The -NoStorage flag is critical—it tells the cluster not to automatically add storage, which we’ll configure specifically for S2D.
This is the magic moment:
powershell
Enable-ClusterStorageSpacesDirect -CimSession "S2D-Cluster"Watch as the wizard:
Confirm when prompted. The process takes a few minutes.
Optional: Configure CSV Cache
For additional read performance, enable Cluster Shared Volume cache:
powershell
$ClusterName = "S2D-Cluster"
$CSVCacheSize = 2048  # Size in MB

(Get-Cluster $ClusterName).BlockCacheSize = $CSVCacheSizeTo use new features like thin provisioning, upgrade your storage pool:
powershell
Get-StoragePool S2D* | Update-StoragePoolConfirm with “Y” when prompted. This upgrade is irreversible, but necessary for accessing Windows Server 2025 capabilities.
Verify the pool version is 29:
powershell
(Get-CimInstance -Namespace root/microsoft/windows/storage -ClassName MSFT_StoragePool -Filter 'IsPrimordial = false').CimInstanceProperties['Version'].ValueNow you can create volumes. Windows Server 2025 offers multiple resilience options:
Two-way mirror (requires 2+ nodes) – Thin provisioned:
powershell
New-Volume -FriendlyName "Production-VMs" -StoragePoolFriendlyName S2D* -FileSystem CSVFS_ReFS -Size 1TB -ResiliencySettingName Mirror -PhysicalDiskRedundancy 1 -ProvisioningType ThinThree-way mirror (requires 3+ nodes) – Maximum resilience:
powershell
New-Volume -FriendlyName "Critical-Data" -StoragePoolFriendlyName S2D* -FileSystem CSVFS_ReFS -Size 500GB -ResiliencySettingName Mirror -PhysicalDiskRedundancy 2 -ProvisioningType ThinFour-copy mirror for campus clusters (requires 4+ nodes in different fault domains):
powershell
New-Volume -FriendlyName "Campus-Volume" -StoragePoolFriendlyName S2D* -FileSystem CSVFS_ReFS -Size 200GB -ResiliencySettingName Mirror -PhysicalDiskRedundancy 3 -ProvisioningType Thin -NumberOfDataCopies 4Dual parity (requires 4+ nodes) – Maximum capacity efficiency:
powershell
New-Volume -FriendlyName "Archival-Storage" -StoragePoolFriendlyName S2D* -FileSystem CSVFS_ReFS -Size 2TB -ResiliencySettingName Parity -PhysicalDiskRedundancy 2 -ProvisioningType ThinAll volumes automatically appear in C:\ClusterStorage\ on each cluster node.
For environments with redundant data:
powershell
Enable-DedupVolume -Volume "C:\ClusterStorage\Volume01" -UsageType HyperV
Set-DedupVolume -Volume "C:\ClusterStorage\Volume01" -Compression $true
This can save 60%+ storage in virtualization scenarios.
Let’s talk about what each resilience type actually means for your data:
Two-way mirror: Keeps 2 copies of your data across different nodes. Can tolerate 1 node failure. Uses 50% of raw capacity.
Three-way mirror: Keeps 3 copies. Can tolerate 2 simultaneous failures. Uses 33% of raw capacity. Recommended for production VMs.
Dual parity: Like RAID-6. Can tolerate 2 failures but is more space-efficient (uses about 50% capacity depending on cluster size). Better for archival data—slower write performance.
Mirror-accelerated parity: Combines mirror (for active data) and parity (for cold data), automatically tiering between them. Great for general-purpose file servers.
Once S2D is running, you’ll want to keep an eye on it. Here are the key tools:
Windows Admin Center (recommended): The modern, web-based GUI provides beautiful dashboards showing cluster health, storage capacity, performance metrics, and makes creating volumes point-and-click simple.
PowerShell:
powershell
# Check cluster health
Get-HealthFault

# View storage pool status
Get-StoragePool

# Check physical disk health
Get-PhysicalDisk

# Monitor volume capacity
Get-Volume

# View storage jobs (repairs, rebalancing)
Get-StorageJob
Performance counters: Monitor through Performance Monitor or Windows Admin Center:
This is the most common use case. Store your VM virtual disks on CSV volumes created from S2D. Use three-way mirror for production VMs, two-way for dev/test, and enable deduplication if running similar VM images.
Instead of accessing storage locally, you can expose CSV volumes as SMB3 file shares to other servers. Perfect for SQL Server, or providing storage to non-clustered Hyper-V hosts.
SQL Server loves S2D! Use three-way mirror volumes for databases, thin provisioning to handle growth, and the low-latency benefits of local storage.
“Pool is unhealthy” Check for failed drives: Get-PhysicalDisk | Where-Object HealthStatus -ne Healthy Replace failed drives—S2D will automatically rebuild.
Poor performance
Get-NetAdapterRdmaVolume out of space (thin provisioning) Expand the volume or add more physical drives to the cluster. S2D automatically rebalances.
Cluster validation warnings Some warnings are expected (like mixed drive models). Focus on errors. Microsoft’s documentation details which warnings are safe to ignore.
Running Windows Server 2019 or 2022? You can perform a rolling upgrade:
The process takes about an hour per node, and VMs stay running on other nodes throughout.
Storage Spaces Direct includes several security features:
Always follow the principle of least privilege for administrative access, and keep your cluster patched with the latest security updates.
Storage Spaces Direct transforms commodity servers into enterprise-grade storage infrastructure. With Windows Server 2025’s additions—thin provisioning, advanced deduplication, and improved performance—it’s now competitive with solutions costing 10x more.
The learning curve is real, especially around networking configuration, but once you’ve built your first cluster, the pattern becomes clear. Start small, maybe with a 2-3 node evaluation cluster, get comfortable with the management tools, and scale up as you gain confidence.
Whether you’re building a hyperconverged infrastructure for VMs, creating resilient file services, or modernizing your datacenter, S2D gives you software-defined flexibility with the reliability of mirrored, distributed storage.
We have detected that you are using extensions to block ads. Please support us by disabling these ads blocker.