How to Run DirectX Diagnostic Tool on Windows

☁️
VMORE CLOUDTech Today for a Smarter Tomorrow
Home › Guides › Windows › DirectX › Diagnostics
WINDOWSGUIDEDIRECTXTROUBLESHOOTING

How to Run DirectX Diagnostic Tool on Windows

Use DxDiag to check your DirectX version, graphics hardware, display drivers, audio devices and system information—and save a diagnostic report for troubleshooting.

Khurram Shahzad
By Khurram Shahzad
Hybrid Cloud & Virtualization Engineer
•
Published: Sep 29, 2026
Updated: Sep 29, 2026
•
7 min read
Microsoft Windows [Version 10.0]
C:\Windows\System32> dxdiag
DIRECTX DIAGNOSTIC TOOL
System • Display • Sound • Input
C:\Users\Administrator> dxdiag /t “%USERPROFILE%\Desktop\DxDiag.txt”
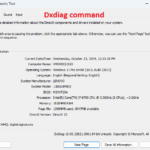
DOS-style command visual for launching DxDiag and generating a text report. This is a designed terminal illustration, not a screenshot of the Windows utility.

Key Takeaways

  • DxDiag is built into Windows and runs as dxdiag.exe.
  • The fastest graphical method is Windows + R → dxdiag → Enter.
  • You can also launch DxDiag from Windows Search or Command Prompt.
  • The System tab shows the DirectX version and core system information.
  • Display tabs provide graphics adapter, driver and feature-level information.
  • Save All Information… creates a report that can be shared with technical support.

What Is the DirectX Diagnostic Tool?

The DirectX Diagnostic Tool (DxDiag) is a Windows utility that reports information about DirectX components, graphics and audio hardware, drivers and related system configuration. Microsoft specifically documents it for checking the DirectX version and collecting information for troubleshooting sound and video problems.

How to Run DirectX Diagnostic Tool on Windows

Method 1: Use the Run Command

  1. Press Windows + R.
  2. Type dxdiag.
  3. Press Enter or select OK.
  4. Wait for DirectX Diagnostic Tool to open.
C:\Windows\System32\cmd.exe
C:\Windows\System32> dxdiag Launching DirectX Diagnostic Tool…

Microsoft also documents entering dxdiag.exe in the Run dialog when diagnosing display-driver issues.

Method 2: Use Windows Search

  1. Open Start or Windows Search.
  2. Type dxdiag.
  3. Select dxdiag or DirectX Diagnostic Tool.

Method 3: Run DxDiag from Command Prompt

Open Command Prompt and run:

DOS MODE — COMMAND
C:\Users\Administrator> dxdiag

Generate a DxDiag Text Report from Command Prompt

DxDiag can generate a text report with the /t option. This is useful when technical support asks for a diagnostic report.

DOS MODE — SAVE REPORT TO DESKTOP
C:\Users\Administrator> dxdiag /t “%USERPROFILE%\Desktop\DxDiag.txt” Report location: C:\Users\Administrator\Desktop\DxDiag.txt

Microsoft-hosted troubleshooting examples use dxdiag /t to generate a text report.

Tip: If you only need a normal support report, the graphical Save All Information… option is the simplest workflow.

Check Your DirectX Version

On the System tab, locate DirectX Version under System Information.

FieldWhat it tells you
DirectX VersionThe DirectX version reported by Windows.
Operating SystemWindows edition and version information.
ProcessorCPU information reported to DxDiag.
MemoryInstalled system memory reported by Windows.
System ModelComputer/platform identification where available.
BIOSFirmware information reported by the system.

Check Your Graphics Card and Driver

Select the Display tab. Systems with multiple display adapters may show multiple Display tabs. Review each one when troubleshooting hybrid graphics or multi-GPU systems.

  • Name: graphics adapter identified by Windows.
  • Manufacturer: GPU manufacturer information.
  • Display Memory: graphics memory information where reported.
  • Driver Model: graphics driver model.
  • Driver Version: installed graphics-driver version.
  • Feature Levels: Direct3D feature levels reported by the graphics stack.
Why this matters: Games and graphics applications can depend on specific GPU capabilities, drivers and feature levels. DxDiag gives support technicians a compact snapshot of the graphics configuration.

Check Audio Devices and Drivers

Use the Sound tabs to inspect audio devices and driver information. This is useful when troubleshooting game audio, multimedia applications or sound-driver problems.

Check Input Devices

The Input section provides information about input devices detected by the DirectX diagnostic environment and can help when investigating controller or input problems.

Save the Complete DxDiag Report

  1. Open DxDiag.
  2. Allow the tool to collect system information.
  3. Select Save All Information….
  4. Choose a location such as the Desktop.
  5. Save the generated text file.

Microsoft recommends Save All Information… when DxDiag results need to be shared with support personnel.

DOS MODE — SUPPORT WORKFLOW
C:\Users\Administrator> dxdiag [1] Check System tab [2] Check Display tab(s) [3] Check Sound tab(s) [4] Select Save All Information… [5] Share DxDiag.txt with your support technician

What Does DxDiag Help You Troubleshoot?

  • Games that report DirectX-related errors
  • Graphics-driver troubleshooting
  • GPU compatibility investigation
  • Display and rendering problems
  • Game audio or multimedia troubleshooting
  • Providing system information to technical support
  • Checking the installed DirectX version

DxDiag Does Not Automatically Fix Driver Problems

DxDiag is primarily a diagnostic information-gathering tool. If the Display tab shows Microsoft Basic Display Adapter, Microsoft recommends updating to the manufacturer’s display driver when one is available.

Windows 10 and Windows 11 receive supported DirectX updates through Windows Update; do not assume that downloading an unofficial DirectX package will fix a graphics-driver problem.

DirectX Version vs. GPU Feature Levels

The DirectX Version field on the System tab and the Feature Levels on a Display tab describe different aspects of the graphics environment. When troubleshooting compatibility, compare the application’s requirements with the GPU, driver and feature-level information in DxDiag.

Common DxDiag Problems

DxDiag Does Not Open

Try launching dxdiag.exe directly from Run. If it still fails, investigate Windows system health and other diagnostic tools rather than downloading an unofficial replacement.

The Display Adapter Is Microsoft Basic Display Adapter

This can indicate that Windows is using its generic display driver instead of a manufacturer-specific driver. Microsoft recommends the manufacturer’s driver when available.

Multiple Display Tabs Appear

This is not automatically an error. Multiple Display tabs can appear when a system has multiple display adapters.

A Game Says DirectX Is Missing

First check the DirectX Version field and Display tab. Then compare the game’s official requirements with the GPU driver and feature-level information.

Quick Reference: DxDiag Commands

CommandPurpose
dxdiagOpen the graphical DirectX Diagnostic Tool.
dxdiag.exeLaunch the executable explicitly.
dxdiag /t "%USERPROFILE%\Desktop\DxDiag.txt"Generate a text report at the specified path.
Win + R → dxdiagFast graphical launch through Run.

Why DxDiag Matters for IT Support

For IT administrators and support technicians, DxDiag provides a compact way to collect system, graphics and audio details that frequently matter when investigating Windows multimedia and gaming problems. A single report can make support conversations more efficient.

Practical User Workflow

  1. Run dxdiag.
  2. Check DirectX Version on System.
  3. Check every Display tab.
  4. Record GPU and driver information.
  5. Check Sound if the problem involves audio.
  6. Save the report using Save All Information….
  7. Compare the report with the application’s official requirements.
DirectX Diagnostic ToolDxDiagWindows 11Windows 10DirectXGPU DiagnosticsGraphics DriverWindows Troubleshooting
Khurram Shahzad — Hybrid Cloud & Virtualization Engineer

Hybrid Cloud & Virtualization Engineer specializing in VMware, Azure, AWS, Windows Server, Microsoft 365, Linux, networking, backup & disaster recovery. I share practical guides, technical projects and insights into modern IT infrastructure through VMoreCloud.

Editorial note: This is a technical how-to guide, not a news article. Procedures and diagnostic details are based on Microsoft’s current support documentation and technical references. No first-hand testing claim is made unless explicitly stated.
VMORE CLOUD — Tech Today for a Smarter Tomorrow
© 2026 VMoreCloud. All rights reserved.
Ads Blocker Image Powered by Code Help Pro

Ads Blocker Detected!!!

We have detected that you are using extensions to block ads. Please support us by disabling these ads blocker.

Powered By
100% Free SEO Tools - Tool Kits PRO