Upgrade VMware ESXi to 7.0 U3 via command line
This is a quick VMware ESXi upgrade to ESXi 7.0 U3 via a command-line interface (CLI) that allows you to quickly download and upgrade your ESXi host in case you are NOT using a vCenter server AND your hosts are without internet access. Interesting fact as I was testing other methods, as usual, and one of the upgrade types did not work (upgrade via ISO).
Update: VMware has taken down the U3 “B” and “C” due to a problem. See this KB article 86398.
Currently vSphere vCenter 7.0 U3 is available in the following versions:
- vSphere vCenter 7.0 Update 3 (build 18700403)
- vSphere vCenter 7.0 Update 3a (build 18778458). Release notes
This is the first time I upgrade a virtual ESXi and the ISO upgrade did not worked. You’ll see the details at the end of the post.
So to upgrade your ESXi to the latest ESXi 7 U3, all you need to do is to basically download the latest upgrade patch from VMware Patch Portal here to your local hard drive, then place this file on a datastore visible by your ESXi host and run a couple of CLI commands.
I’m assuming that there is a lot of standalone ESXi hosts running in lab environments for testing or monitoring and all those hosts have to be updated somehow. Or you might have some isolated hosts without internet access that you have to upgrade “offline” so this is the way you can proceed. You don’t need to have vCenter server to update ESXi via CLI.
I know that there has been quite a lot of questions in the past on this type of upgrade so that’s why this kind of post, again.
Upgrade VMware ESXi to 7.0 U3 via command line – The steps
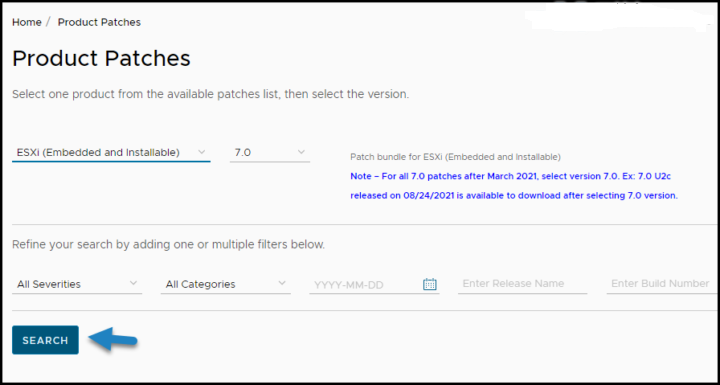
First, download the latest ESXi patch from VMware patch portal.
Select ESXi embedded and Installable and 7.0
then click the Search button.
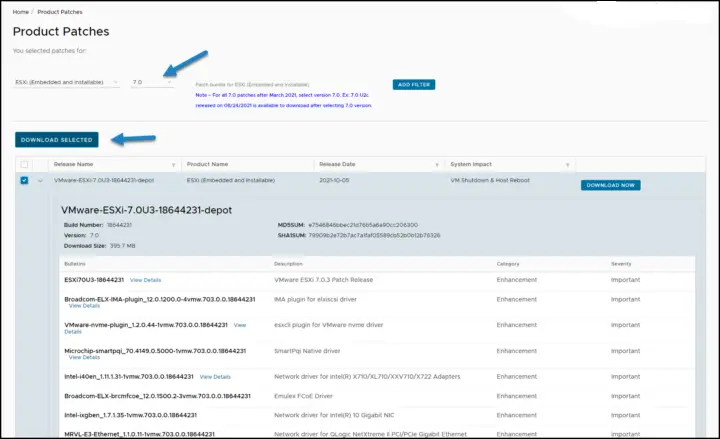
Once done, check the box next to the file and click Download Selected.
The next step is to upload this file to a datastore visible by your ESXi host. In my case, I’m using local datastore named “250” (as the capacity).
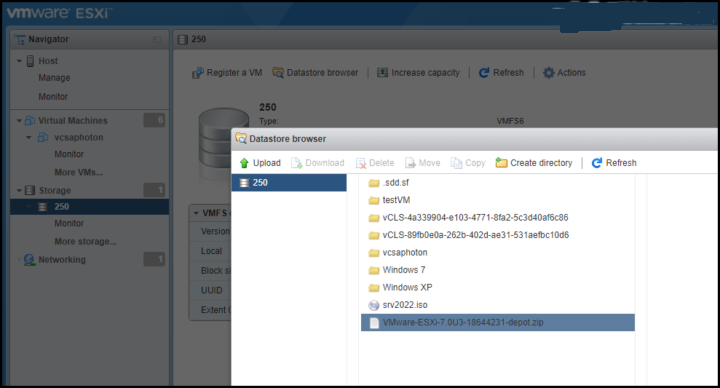
Once done, migrate or power off the virtual machines running on the host and put the host into maintenance mode. (either via UI or via CLI).
Via CLI:
vim-cmd /hostsvc/maintenance_mode_enter
You can confirm if the host is in maintenance mode by running this command:
vim-cmd /hostsvc/hostsummary | grep inMaintenanceMode
Navigate to the directory on the datastore where the patch file was uploaded to and verify that the file exists by running these commands (note: my datastore’s name is “250” . It is the capacity of the datastore btw. Wanted to rename, but it is grayed out )
cd /vmfs/volumes/250
and
ls
First, let’s show the profiles we have in our depot.
Enter this:
esxcli software sources profile list -d /vmfs/volumes/250/VMware-ESXi-7.0U3-18644231-depot.zip

Then pick a profile that you want to use. In our case, we pick the “standard”.
I’m picking up the “standard” as I want to have VMware tools package present on the host. The other one with “no-tools” is the one you would use for Autodeploy.
Remember, using the update command is the recommended method as it preserves VIBs. (The “install” command wipes things out). Using this command applies all of the newer contents in the file, including all security fixes.
Then enter this command to update your ESXi host

esxcli software profile update -d “/vmfs/volumes/250/VMware-ESXi-7.0U3-18644231-depot.zip” -p ESXi-7.0U3-18644231-standard
And the output:
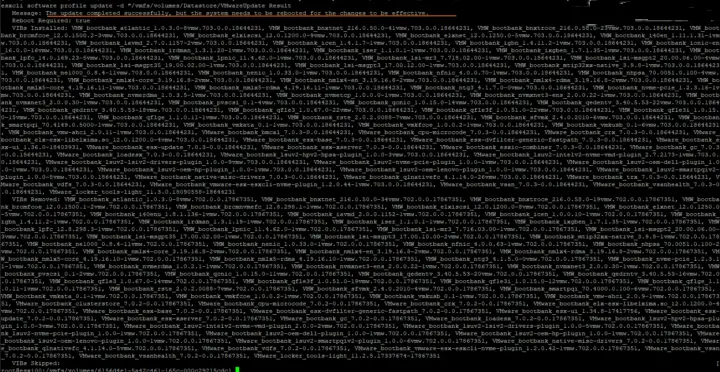
(note: you can see that it is -d and -d, as in one of my earlier posts we had some problems with WordPress to rounding double dashes into one single one etc… Check the screenshot details if hesitating).
Once you have the message that the host has been updated successfully, you can reboot the host. After that, you’ll be running the latest ESXi 7U3.
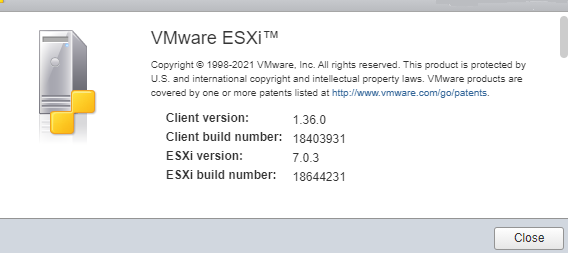
We’re done.
Upgrade ESXi to ESXi 7U3 with Internet connection
You’ll need to create a firewall rule to allow the ESXi host to connect the Internet. The software needs to pull down the required patches. You have to put the host into maintenance mode.
esxcli network firewall ruleset set -e true -r httpClient
To upgrade/update ESXi from VMware repository run the below esxcli command
esxcli software profile update -d https://hostupdate.vmware.com/software/VUM/PRODUCTION/main/vmw-depot-index.xml -p ESXi-7.0U3-18644231-standard
You’re done.
Which upgrade methods did not work?
ISO method
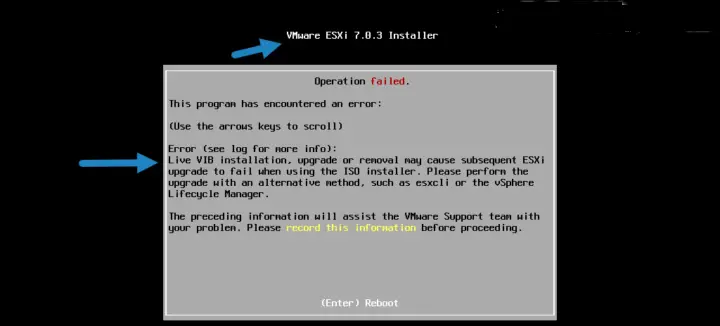
I noticed a message when trying to upgrade (for testing purposes) one of my nested ESXi hosts via ISO image. As you know, you can boot the ISO on existing (non-upgraded) ESXi host and then you choose the “Upgrade ESXi, preserve VMFS datastore” option (default) which allows you to keep all files and VMs without wiping everything. I had a message that looks like this and the method did not worked.
I run only nested lab through VMware Workstation. Not a physical system. It is probably a known situation for VMware folks? If yes, please leave a comment. -:)
And as such I could not upgrade the host via ISO.
Another alternative method that VMware has for patching is obviously via vSphere Lifecycle Manager, but we won’t cover it here. Through vSphere lifecycle manager you can upgrade/patch your whole infrastructure managed via vCenter server. Now you can also patch your vSAN stretched cluster including the Witness appliance.
