Physical Address
304 North Cardinal St.
Dorchester Center, MA 02124
Physical Address
304 North Cardinal St.
Dorchester Center, MA 02124

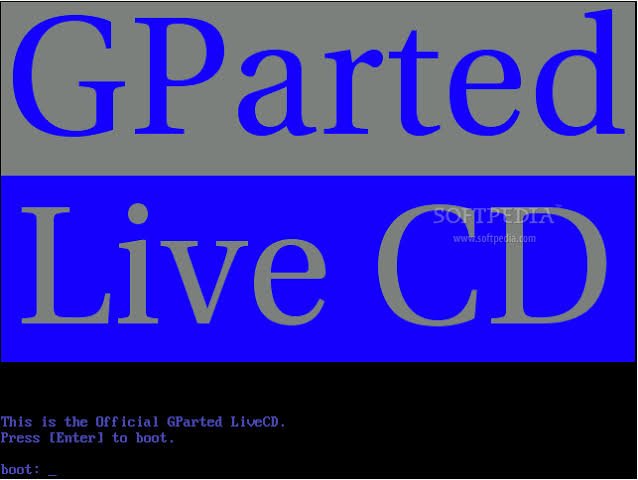
GParted (GNOME Partition Editor) is the de facto standard free tool for creating, resizing, moving, and repairing disk partitions on Linux and beyond. GParted Live packages it as a small, bootable Debian-based Linux distribution, which matters enormously for one reason: you can’t safely resize or modify a partition that’s actively mounted and in use by a running operating system. Booting from external media sidesteps that problem entirely by running GParted outside of any OS installed on the disk you’re working on.
This guide is built to be used two ways: read start to finish for a full working understanding, or jump straight to the section matching your task.
Download the current GParted Live ISO from the official source at gparted.org/download.php, which redirects to SourceForge for the actual file. As of early 2026 the current stable release is the 1.8.x line (built on a current Debian base) — always grab the current release rather than an old cached ISO, since newer releases include updated file system drivers (particularly important for newer Btrfs, exFAT, and NTFS features) and kernel-level hardware support for recent SSDs and NVMe controllers.
Verify the download. GParted’s download page publishes checksums (and often GPG signatures) for each release. For a tool that’s about to modify your disk partition tables, confirming you have an unmodified, official image is not optional paranoia it’s a five-second check worth doing every time:
sha256sum gparted-live-*.iso
# compare against the published checksum on gparted.org
On Linux, the simplest reliable method is dd, used carefully:
# Identify your USB device FIRST — get this wrong and you will overwrite the wrong disk
lsblk

# Write the ISO (replace /dev/sdX with your actual USB device — NOT a partition like /dev/sdX1)
sudo dd if=gparted-live-1.8.1-3-amd64.iso of=/dev/sdX bs=4M status=progress conv=fsync
⚠️ Warning: dd overwrites the target device completely with no confirmation prompt. Double- and triple-check of=/dev/sdX points at your USB drive, not an internal disk. There is no undo.
If you’d rather avoid raw dd, Ventoy is a strong current alternative: install Ventoy once to a USB drive, then simply copy ISO files (GParted Live and others) onto it Ventoy handles making them bootable, and you can carry multiple bootable ISOs on one drive without re-flashing each time you switch tools.
On Windows, use Rufus (the long-standing community-preferred tool for this): select the ISO, select your USB drive, leave partition scheme on the Rufus default (GPT for UEFI systems, MBR for legacy BIOS Rufus generally detects the right one automatically based on your system), and write. Rufus will warn you that the target drive’s contents will be erased confirm only once you’ve verified the correct drive letter.
On macOS, dd works the same way as Linux (device paths look like /dev/diskN use diskutil list to identify the right one, and make sure to write to the raw disk device /dev/rdiskN for meaningfully faster writes), or use a GUI tool like balenaEtcher if you prefer a safer, guided UI with device-selection confirmation built in.
Read more about GParted Live 1.8 Released With Linux Kernel 6.18
Less common today, but if optical media is your only option, burn the ISO as a disk image (not as a data file) using your OS’s built-in “burn disc image” function or a tool like cdrecord/wodim on Linux, Disk Utility on macOS, or the built-in Windows ISO burner.
F12, F11, Esc, or Del depending on manufacturer — check your system’s boot screen or manual).GParted Live boots directly into the GParted application window on a minimal desktop — there’s no separate desktop environment to navigate through first. On launch, GParted automatically scans all connected disks and displays the first detected disk’s partition layout. If you have multiple disks connected, you’ll select between them via a dropdown in the top-right of the toolbar (covered next).
The GParted window is organized around a few consistent regions:
/dev/sda) and its total size./dev/sda1), File System, Label, Size, Used, Unused, and Flags./dev/sda1). On Linux, sdX denotes SATA/SCSI/USB disks in enumeration order, nvmeXnY denotes NVMe disks, and the trailing number is the partition index.unknown or unallocated if it lacks a recognized file system or hasn’t been formatted at all.boot (marks the active/bootable partition on MBR disks), esp (EFI System Partition, required for UEFI booting on GPT disks), lvm, raid, swap, and hidden. Flags are set via Partition > Manage Flags.
Before doing anything else, confirm you’re looking at the correct disk in the top-right dropdown. This is the single most consequential navigation step in the entire tool — every operation you queue applies to whichever disk is currently selected, and GParted does not ask “are you sure this is the right disk” beyond the disk name and size shown in that dropdown. Cross-check the size shown (e.g., “500.11 GiB”) against what you know about your physical disks before proceeding.
Every task below follows the same underlying model: you stage the operation (it’s added to the pending queue and nothing on disk changes yet), then separately apply the queue (see Section 4) to actually execute it. This section covers staging; execution is covered next.
When to use it: you have unallocated space (shown as gray/hatched in the graphical map) and want to carve out a new partition — for a new OS install, a dedicated data volume, a swap partition, etc.
Workflow:
Choosing a file system:

When to use it: you need to grow a partition into adjacent unallocated space, or shrink one to free up space for something else.
Workflow:
Growing (expanding) a partition:
Shrinking a partition:
⚠️ This is one of the operations flagged for irreversible data loss. Deleting a partition removes its entry from the partition table — the underlying data isn’t immediately wiped, but it becomes unallocated space that GParted (or anything else) may write over at any time, and without specialized recovery tools, the data is effectively gone the moment you delete and apply.
Workflow:
Before deleting: confirm you’ve identified the correct partition (cross-check size, label, and file system type against what you expect), and confirm you have a backup of anything on it you might need. There is no “recycle bin” for this — once you delete and apply, recovery requires third-party data-recovery tools working against raw disk sectors, with no guarantee of success.
When to use it: you need to relocate a partition’s starting position on the disk — commonly to consolidate unallocated space in a specific location, or as a side effect of a resize operation involving preceding free space.
Workflow: handled through the same Resize/Move dialog described above adjusting “Free space preceding” effectively moves the partition’s start position.
⚠️ This is the slowest and highest-risk common operation. Moving a partition means physically rewriting every block of data to a new location on the disk, rather than just updating a boundary marker (unlike a pure resize into adjacent free space, which doesn’t need to relocate existing data). For a large, heavily-used partition, this can take a long time and represents extended exposure to interruption risk — a power loss or system crash mid-move is far more consequential than one mid-resize. Back up first, and ensure a stable, uninterruptible power source if working on a laptop or during a storm.
When to use it: you want to apply a fresh file system to a partition — either a newly created one, or an existing one you’re repurposing (which erases its current contents).
Workflow:
⚠️ Formatting an existing partition destroys its current data. There is no partial/selective formatting — it’s a full wipe of that partition’s file system and everything on it.
Every action described above create, resize, delete, move, format only stages an operation into the pending queue shown at the bottom of the GParted window. Nothing is written to disk until you explicitly apply the queue. This is GParted’s core safety mechanism: you can stage several operations, review them as a batch, remove or reorder ones you change your mind about (via Edit > Undo for the most recent staged operation, or by clearing individual queued operations), and only commit once you’re confident in the full plan.
Before clicking Apply, review the operations queue carefully it lists each staged operation in plain language (e.g., “Shrink /dev/sda2 from 500.00 GiB to 300.00 GiB,” “Create new Ext4 partition #3”). This is your last checkpoint to catch a mistake a wrong disk selection, a wrong target size, an accidental delete before anything becomes real.
Use the pending operations queue as your review checkpoint every time read each line item, confirm the disk device path matches your intended target, and confirm sizes are what you expect (watch for MiB vs. GB confusion, since GParted displays in GiB/MiB, which differ slightly from the GB/MB figures often quoted by drive manufacturers).
Version and release-cadence details (current 1.8.x stable line, release dates, changelog highlights like FAT/MSDOS LBA flag handling and file-system-signature erasure improvements) are drawn from GParted’s official news page (gparted.org) and current software-distribution listings, verified as of early-to-mid 2026. Core interface behavior, the stage-then-apply operational model, and file-system-specific resize/shrink mechanics have been stable across GParted releases for many years and are not expected to be version-sensitive for this guide’s purposes but always grab the current ISO from gparted.org before starting a real task, since file-system driver support (particularly for newer NTFS, Btrfs, and exFAT features) does meaningfully improve release over release.

We have detected that you are using extensions to block ads. Please support us by disabling these ads blocker.