Nakivo: configure Boot Verification for VM Backups

The Boot Verification feature in Nakivo Backup & Replication ensures that VM backups or replicas are not corrupted and can be successfully booted when needed.
To perform verification, Nakivo leverages iSCSI technology to connect the VM disks stored in the backup to the ESXi host.
Boot Verification feature
To ensure that VM backups or replicas are usable, Nakivo provides the Boot Verification feature that checks the integrity of a backup or replica by booting a VM from a backup or starting a replica and performing some checks.
To do the verification, the configured Transporter exposes the VM disks and mount them to the target hypervisor host presenting the VM as RDM disks in virtual compatibility mode.
There are two VM verification methods:
- Boot Verification – the system starts the VM and checks is VMware Tools are running.
- Screenshot Verification – the system starts the VM and takes a screenshot of the VM screen.
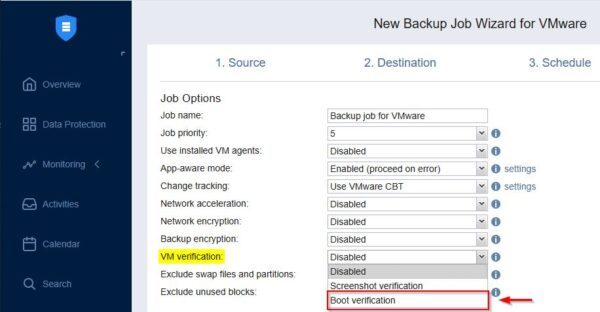
The Boot Verification operation is configured during the creation of the Backup Job and its execution involves three steps:
- VM is booted with network turned off.
- Once the OS has booted, checks if guest OS agents are run successfully (Boot verification) or takes a screenshot of the running VM (Screenshot Verification).
- Power off and discards the VM.
“Verification of the VM cannot be started” error
To run the Boot verification task properly, you need a specific configuration in your Nakivo backup infrastructure to avoid issues.
If the requirements to run the Nakivo Boot Verification are not met, the test fails with the error “Verification of the <name> VM cannot be started“.
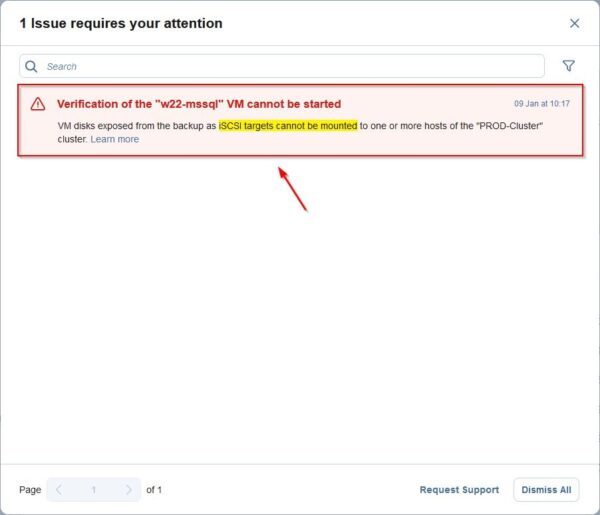
Configure the Boot Verification requirements
Since Nakivo uses the iSCSI technology to run the Boot Verification, a working iSCSI network must be available in your VMware vSphere infrastructure.
iSCSI configuration in vSphere
To run the Boot Verification, you need that iSCSI is configured in your VMware vSphere infrastructure.
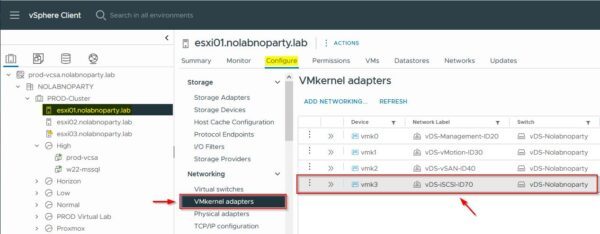
Login to your vCenter Server and select the first ESXi host. Go to Configure area and select VMKernel adapters under Networking. Make sure you have the software iSCSI adapter (HBA) configured (create the iSCSI network if not available).
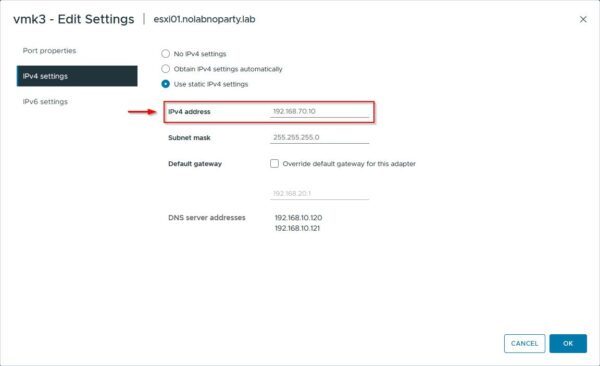
Write down the configured subnet for the iSCSI network.
Select Storage Adapters under Storage and verify that a Port Group is configured in Network Port Binding.
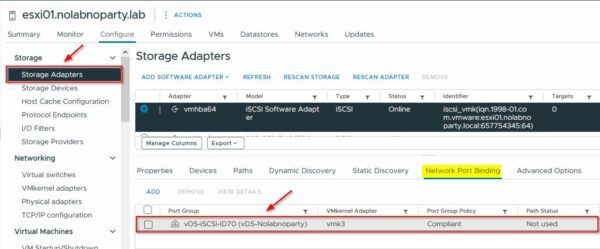
Configure the Transporter
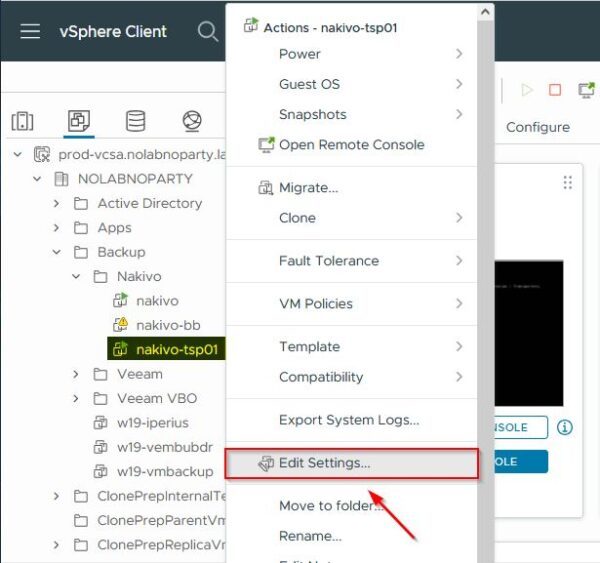
Right click the Transporter used by the Nakivo’s Backup Job to verify the VM Backup and select Edit Settings.
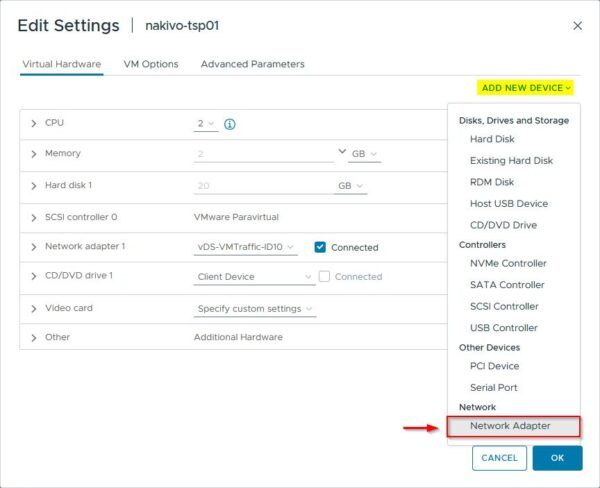
Click Add New Device and select Network Adapter.
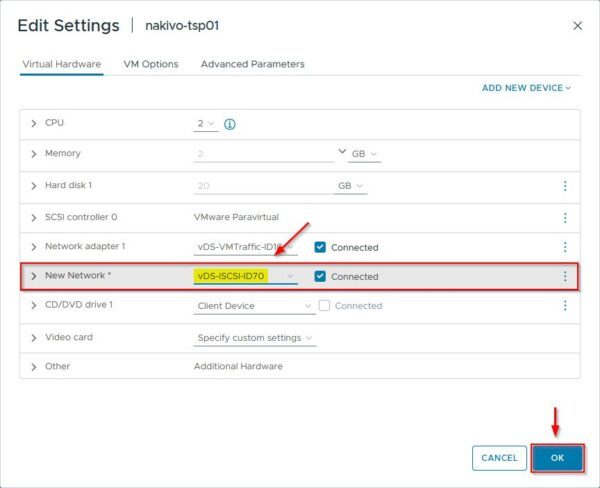
In the New Network, configure the correct iSCSI network to use and click OK.
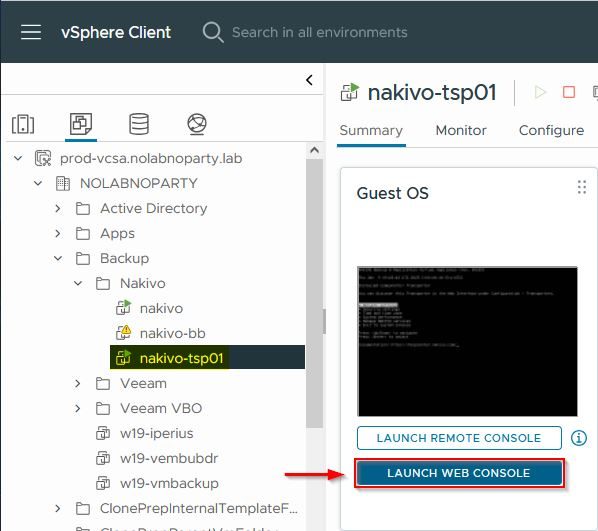
Select the Transporter and click Launch Web Console to access the Transporter’s console.
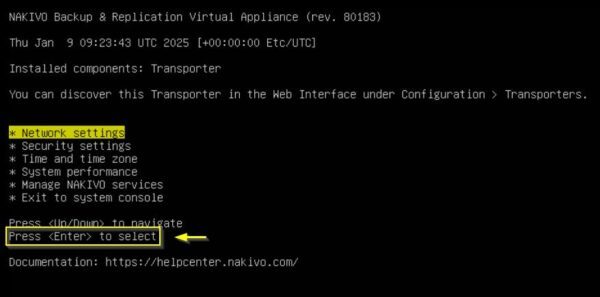
Select Network Settings and press Enter.
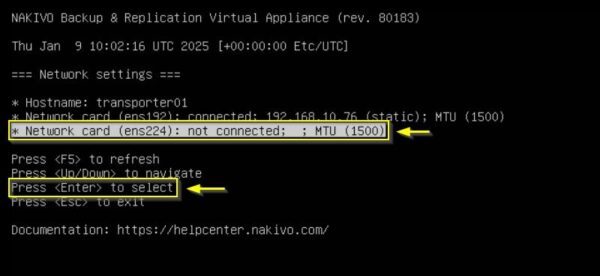
Select the new Network card detected and press Enter.
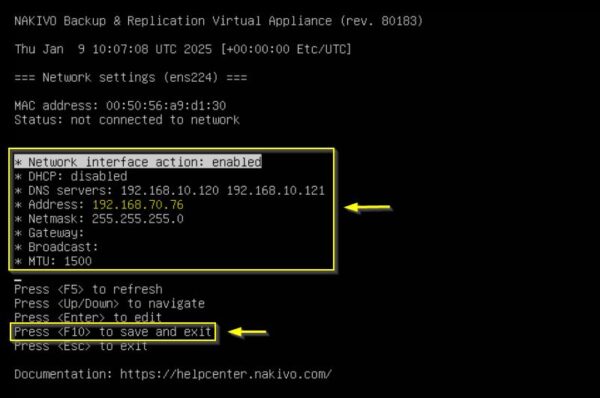
Configure the network parameters accordingly (Address must be an IP in the iSCSI subnet) and press F10 to save.
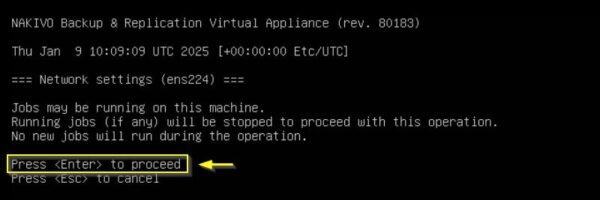
Press Enter to apply the configuration.
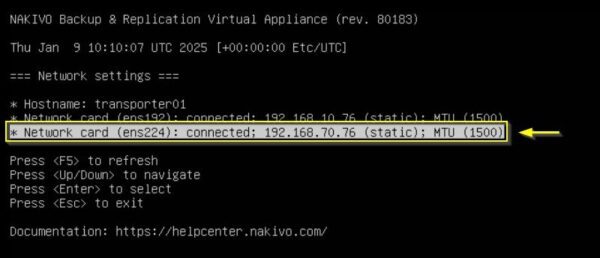
The new Network card is now configured.
Configure the Backup Job
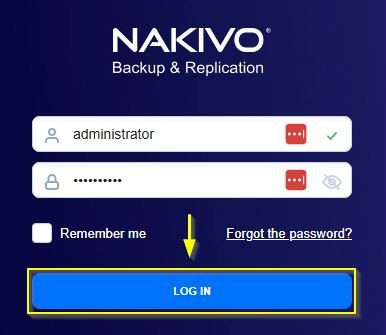
Login to the Nakivo Dashboard by entering the correct credentials. Click Log in.
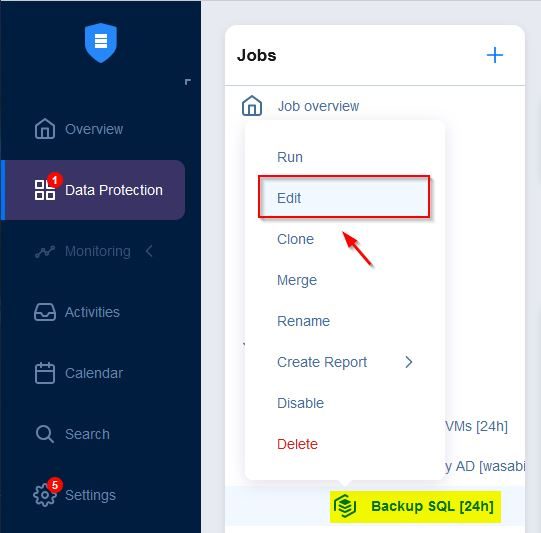
Right click the Backup Job for which you want to enable the Boot Verification and click Edit.
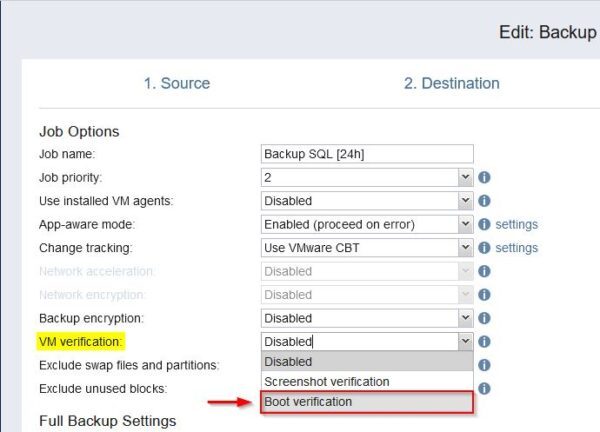
Go to Options area and from the VM verification drop-down menu, select Boot verification option.
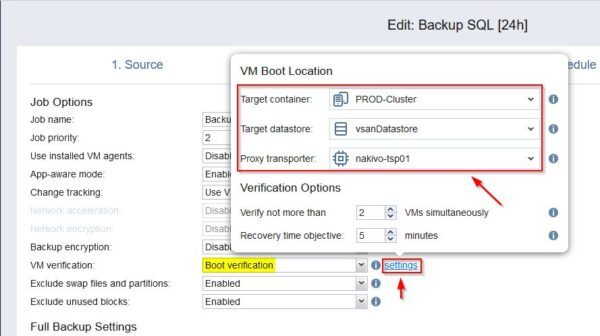
Click the link Settings and specify the VM Boot Location. Click Save at the bottom of the screen to save the configuration.
Test the Backup Job
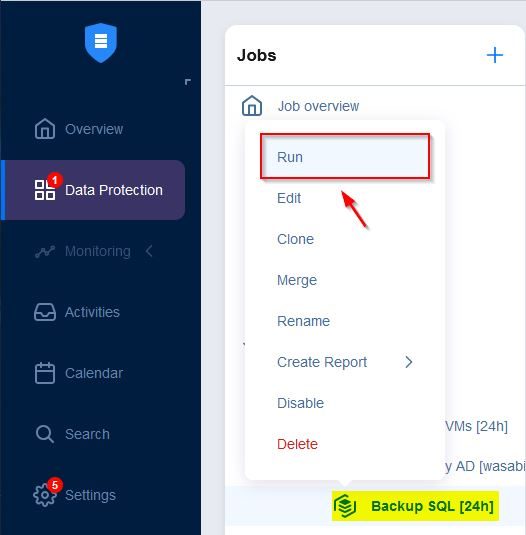
Right click the configured Backup Job to test the correct functionality and select Run.
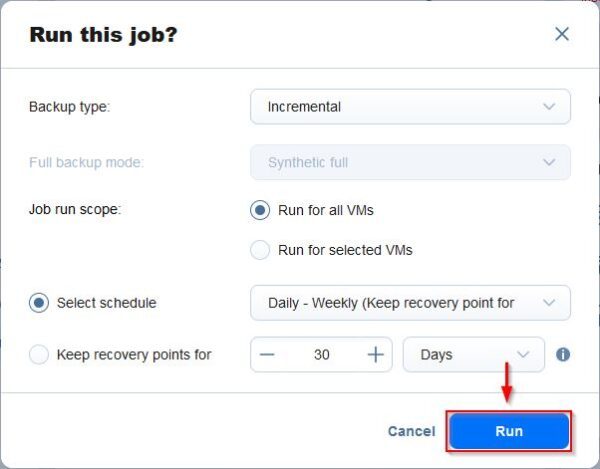
Click Run.
The Backup Job is being executed.
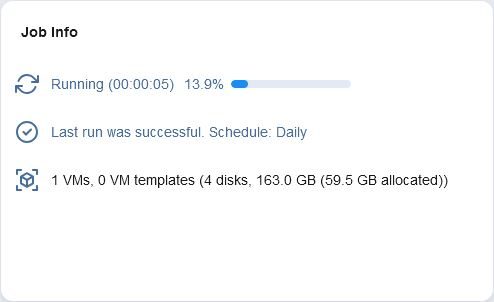
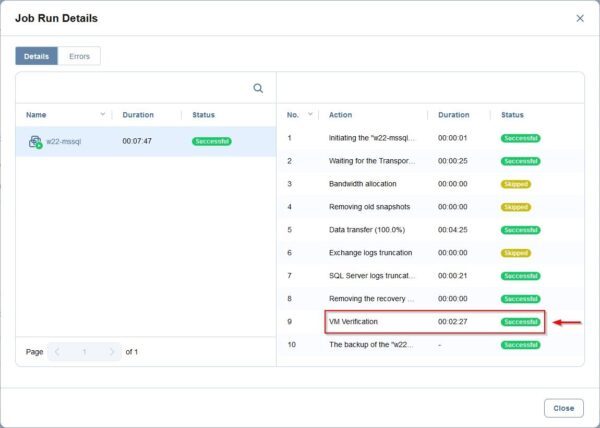
In the Activities area, select the running job and click Details.
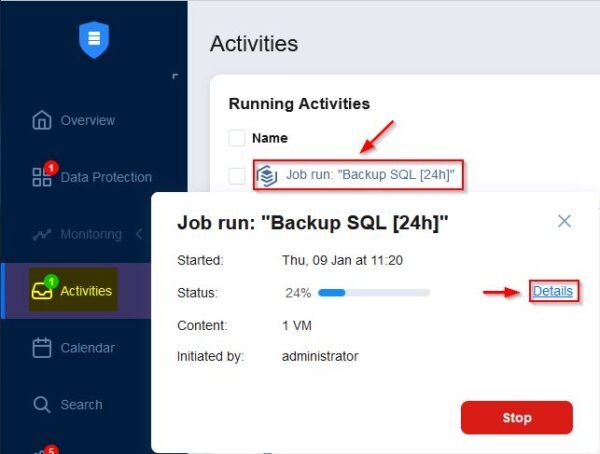
From this window you can see the progress of the backup.
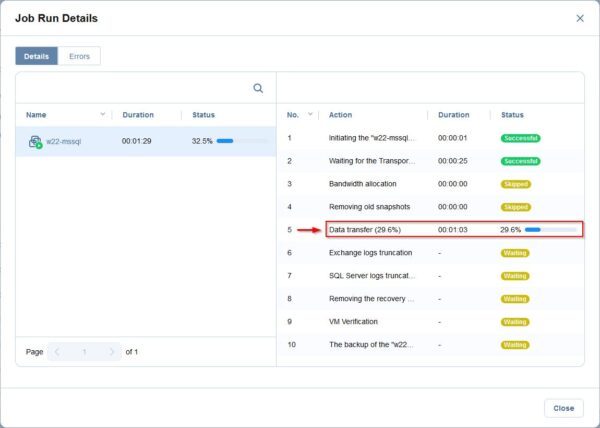
After completing the Data transfer operation, the VM Verification step is performed.
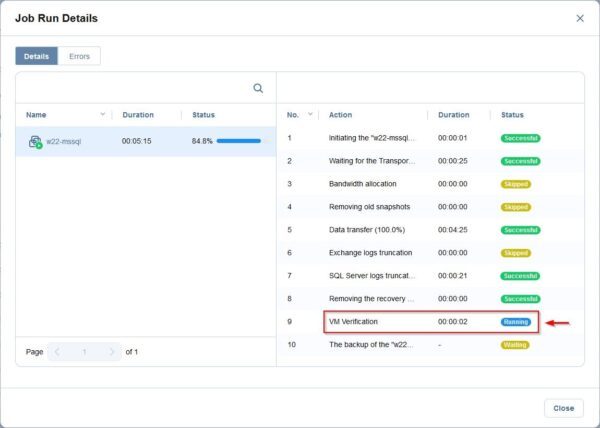
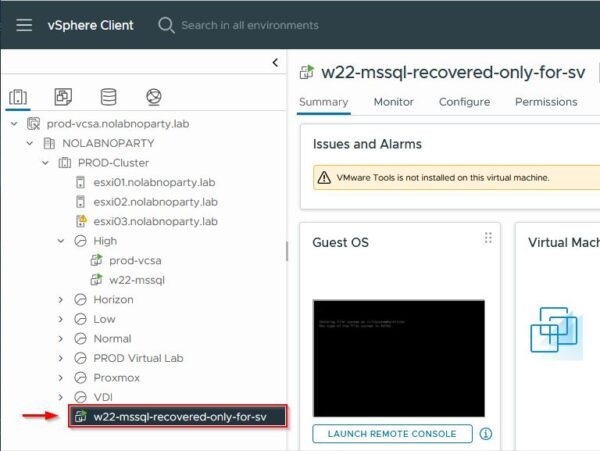
From the vSphere Client you can see the booted VM.
The VM Verification operation is completed successfully.
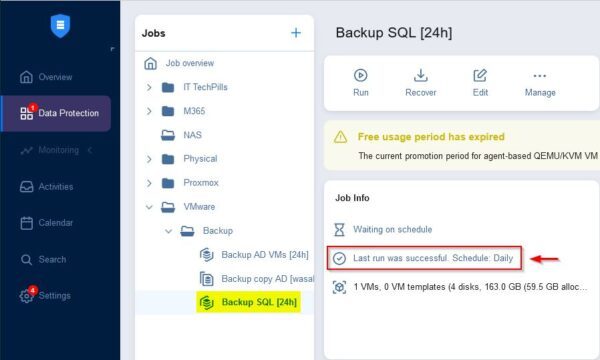
The Backup Job with the Boot Verification is now completed successfully with no errors.
It is strongly recommended to test your backups to ensure they are not corrupted and they are bootable.
Nakivo Backup & Replication is available to download as 15-day trial.


