Physical Address
304 North Cardinal St.
Dorchester Center, MA 02124
Physical Address
304 North Cardinal St.
Dorchester Center, MA 02124
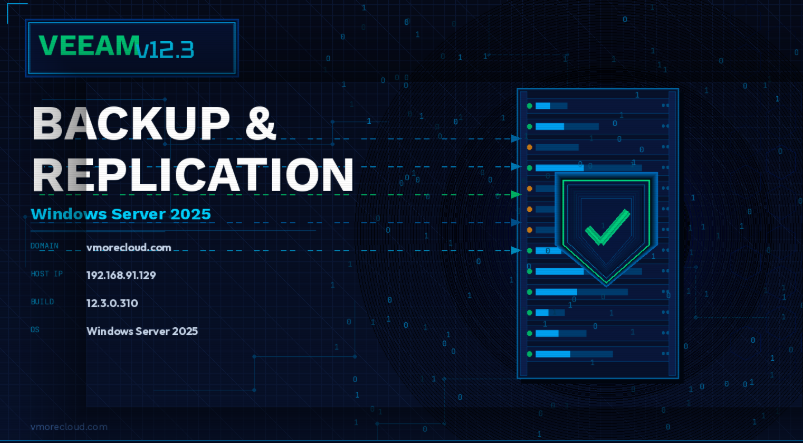
Veeam Backup & Replication is a data protection and disaster recovery solution designed to back up, restore, and replicate virtual, physical, and cloud workloads. It is one of the most widely adopted enterprise backup solutions in the virtualization world. With version 12.3, Veeam continues to deliver powerful data protection, disaster recovery, and replication capabilities for both physical and virtual environments.
In this step-by-step guide, we will walk through the complete installation of Veeam Backup & Replication 12.3 on a Windows Server 2025 machine. Our environment details are as follows:
| Role | Veeam Backup & Replication Server |
| Operating System | Windows Server 2025 (Standard/Datacenter) |
| Domain Controller | vmorecloud.com |
| Server IP Address | 192.168.91.129 |
| Veeam Version | 12.3 (Build 12.3.0.310) |
Before starting the installation, ensure your environment meets the following hardware and software requirements:
| Component | Minimum | Recommended |
| CPU | 4 Cores | 8+ Cores |
| RAM | 8 GB | 16 GB or more |
| System Disk (C:) | 100 GB | 200 GB SSD |
💡 Pro Tip: It is strongly recommended to join the server to your Active Directory domain (vmorecloud.com) before installation, so Veeam can properly leverage domain credentials for managed servers and backup jobs.
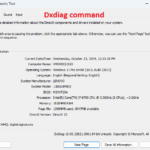
Confirm that your Windows Server 2025 machine is joined to the vmorecloud.com domain. Open a PowerShell window and run:
(Get-WmiObject Win32_ComputerSystem).Domain
The output should display:
vmorecloud.com
If the server is not yet domain-joined, navigate to System Properties > Change settings > Change, and join the domain using an administrator account from vmorecloud.com.
Ensure the server has a static IP address configured. Our server uses IP address 192.168.91.129. Verify this with:
Get-NetIPAddress -AddressFamily IPv4 | Select-Object IPAddress, InterfaceAlias
Also confirm DNS resolution is working properly:
Resolve-DnsName vmorecloud.com
During installation, you may temporarily disable Windows Firewall. Re-enable it afterward and configure the necessary Veeam firewall rules.
Set-NetFirewallProfile -Profile Domain,Public,Private -Enabled False
⚠️ Warning: Remember to re-enable Windows Firewall after installation and add the necessary Veeam port rules (TCP 9392, 9401, 2500-3300, etc.).
Make sure Windows Server 2025 is fully patched before proceeding. Open Server Manager > Local Server > Windows Update, or run:
Install-WindowsUpdate -AcceptAll -AutoReboot
Download the Veeam Backup & Replication 12.3 ISO from the official Veeam website. Right-click the ISO file in Windows Explorer and select Mount, or use PowerShell:
Mount-DiskImage -ImagePath ‘C:\Downloads\VeeamBackup&Replication_12.3.0.310.iso’
Navigate to the mounted drive (e.g., D:\) and double-click Setup.exe to launch the installer splash screen.
The Veeam Backup & Replication 12.3 splash screen will appear. Click Install under the Veeam Backup & Replication section.

📌 Note: The splash screen also offers installation of Veeam Backup Catalog, Veeam Backup Enterprise Manager, and redistribution packages. For most standalone installations, only Veeam Backup & Replication is needed.
On the License Agreement page, review the End User License Agreement (EULA). Check the box to accept the terms of the Veeam license agreement and the third-party components license agreements, then click Next to continue.

On the Provide License page, you have two options:
For production use, click Browse, locate your license file (e.g., C:\Licenses\veeam.lic), and click Open, then click Next.
The Components page allows you to choose which Veeam components to install. The following are selected by default:

Review the installation paths. By default, Veeam installs to:
C:\Program Files\Veeam\Backup and Replication\
You may change the path if needed. Click Next to continue.
This step is critical. Veeam requires a Microsoft SQL Server database to store its configuration and job metadata. You have three options:
For our lab environment at 192.168.91.129, we will allow Veeam to install SQL Server Express automatically. Select Install SQL Server Express 2016 and note the instance name:
192.168.91.129\VEEAMSQL2016
💡 For production environments with more than 10 managed servers or heavy job schedules, use a full SQL Server (Standard or Enterprise) instead of SQL Express.
Veeam services require an account with appropriate privileges. On the Service Account page, specify the domain account that will run Veeam services:
Username: vmorecloud\veeam-svc Password: ************
Ensure the account has local Administrator privileges on this server. Veeam will automatically grant the required SQL Server permissions. Click Next.
The Veeam Guest Catalog Service is responsible for indexing VM guest file systems for quick searches and file-level restores. Configure the catalog folder path (default is acceptable for most environments):
C:\VBRCatalog
Click Next to proceed.
The Ready to Install page presents a summary of all selected components and configurations. Review the settings carefully:
Click Install to begin the installation. The process typically takes 10-20 minutes depending on server performance. Veeam will install all dependencies, configure the SQL database, register Windows services, and configure firewall rules automatically.
⏳ The installer will show a progress bar for each component. Do not close the installer window or reboot the server during this process.
Once the installation finishes, you will see a confirmation screen showing all components installed successfully. The following Windows services will now be running:
| Service Name | Description |
| Veeam Backup Service | Core backup engine and job scheduler |
| Veeam Broker Service | Manages communication between components |
| Veeam Mount Service | Handles instant VM recovery and mounts |
| Veeam Guest Catalog Service | Indexes VM guest file systems |
| Veeam Distribution Service | Manages Veeam agents and updates |
Check the Launch Veeam Backup & Replication console checkbox and click Finish to complete the setup and open the console.
The Veeam Backup & Replication console will open and automatically connect to the local server at 192.168.91.129. You will be prompted to review and accept the third-party component licenses if you haven’t already.
The console consists of the following main sections visible in the left navigation pane:
Before creating backup jobs, you must configure at least one Backup Repository. Navigate to Backup Infrastructure > Backup Repositories and click Add Repository.
To protect virtual machines, add your hypervisor infrastructure. Navigate to Inventory and click Add Server.
Veeam will discover all hosts, clusters, datastores, and VMs automatically.
Navigate to Home > Jobs > Backup and click Backup Job > Virtual machine.
Set up email notifications to stay informed about backup job status. Navigate to Main Menu > General Options > E-mail Settings.
Veeam Backup & Replication requires the following ports to be open between components. Configure your Windows Firewall and any network firewalls accordingly:
| Port | Protocol | Purpose |
| 9392 | TCP | Veeam Backup & Replication console connections |
| 9401 | TCP | Veeam Backup Service (internal communications) |
| 9397-9398 | TCP | Veeam Broker Service |
| 2500-3300 | TCP | Data transfer between Veeam components |
| 443 | TCP | VMware vCenter/ESXi HTTPS API access |
| 902 | TCP | VMware ESXi host network file copy (NFC) |
| 135, 137-139, 445 | TCP | Microsoft networking & WMI (Hyper-V) |
| 1433 | TCP | SQL Server database connection |
Congratulations! You have successfully installed and configured Veeam Backup & Replication 12.3 on Windows Server 2025 within the vmorecloud.com domain. Your Veeam server at 192.168.91.129 is now ready to protect your virtual and physical infrastructure.
With Veeam 12.3, you benefit from:
We have detected that you are using extensions to block ads. Please support us by disabling these ads blocker.