How to Update VMware vCenter

Introduction
Updating VMware vCenter is critical to ensure optimal performance, security, and compatibility within your virtualized environment. Whether you’re enhancing functionality, fixing bugs, or patching vulnerabilities, it’s essential to perform updates accurately. Here, we’ll walk through all possible methods for updating VMware vCenter, providing step-by-step instructions to help you complete the process smoothly.
Table of Contents
Preparation for vCenter Update
Before starting the update process for VMware vCenter, ensure the following preparation steps are complete. These actions help prevent data loss, downtime, and compatibility issues, enabling a smooth and successful update:
Backup Your vCenter Server
Full Back up: Perform a full backup of the vCenter Server Appliance (VCSA) using a backup solution or native backup tools. This backup is essential to restore your environment if the update encounters issues.
Snapshot (Optional): Consider taking a snapshot of the vCenter Server Appliance before updating, especially if using VM-based backups.
Check Compatibility
Compatibility Matrix: Review VMware’s compatibility matrix to ensure that your existing vSphere components, such as ESXi hosts, vSAN, NSX, and any integrated plugins, are compatible with the new vCenter version.
Third-Party Integrations: Verify that any third-party solutions, like backup, monitoring, or security tools, are compatible with the target vCenter version.
Review VMware Release Notes
Release Notes: VMware’s release notes for vCenter updates contain important information on bug fixes, new features, known issues, and upgrade considerations. Reviewing these notes can help you avoid potential issues specific to your environment.
Plan a Maintenance Window
Downtime Scheduling: Plan an appropriate maintenance window, as the vCenter update process may require some downtime. The update might affect the availability of vCenter services and the ability to manage ESXi hosts temporarily.
Communicate with Teams: Inform relevant stakeholders about the planned maintenance to avoid disruptions to ongoing work or services.
Free Up Disk Space
Check Disk Usage: Ensure the vCenter Server Appliance has adequate free disk space for the update process. Insufficient space may cause the update to fail. VMware documentation provides details on specific storage requirements.
Remove Unused Snapshots: If using snapshots or previous backups, consider removing any unnecessary ones to free up space.
Disable or Pause Scheduled Tasks
Scheduled Backups: Pause scheduled backups, snapshots, or other tasks to avoid conflicts or excessive resource usage during the update.
Automated Scripts: Temporarily disable any automated scripts or integrations that interact with vCenter to prevent interruptions.
Verify Administrative Access
Root and vCenter Admin Credentials: Ensure you have current credentials with root access to the vCenter Server Appliance and administrative access to the vSphere environment.
SSH Access: For command-line updates, ensure SSH access is enabled on the VCSA. This access is essential for command-line updates or troubleshooting if the web interface becomes unavailable.
Updating vCenter Using the vCenter Server Appliance (VCSA)
Updating vCenter via the vCenter Server Appliance (VCSA) is one of the most straightforward methods. The VCSA’s built-in update feature allows you to easily apply patches and new versions. This step-by-step guide will help you update your VCSA efficiently, ensuring your vCenter Server remains secure and up to date.
Step-by-Step Guide to Updating vCenter Using VCSA
Log into the VCSA Management Interface (VAMI)
The VMware vCenter Server Appliance (VCSA) Management Interface, commonly referred to as the VAMI, is a web-based interface used for managing the VCSA. Accessible through a browser, the VAMI allows you to perform essential administrative tasks like monitoring, updating, configuring network settings, and managing backups.
Open a web browser and go to the VCSA Management Interface (VAMI) at https://<vcenter_ip>:5480. Log in with your root credentials.
Navigate to the Update Section
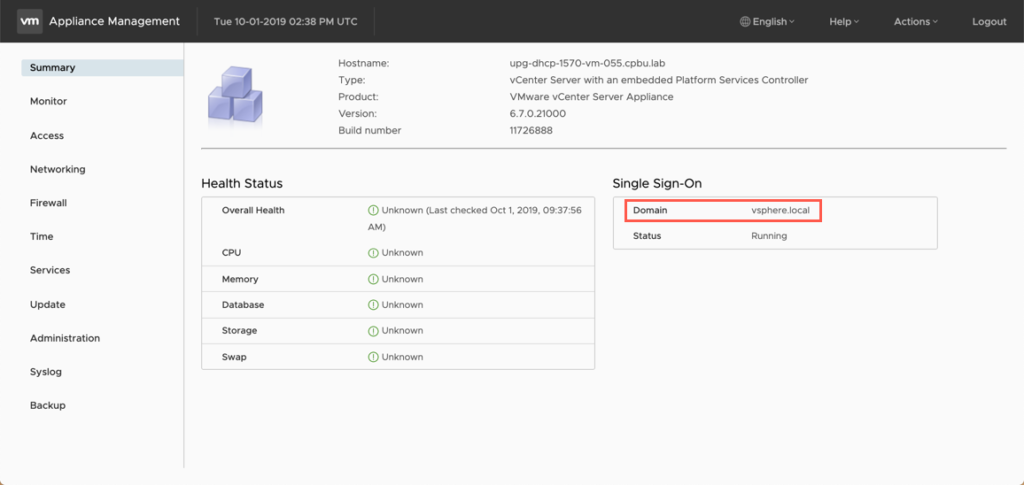
Once logged in, go to the Update tab in the VAMI dashboard. Here, you can view current update status, available updates, and any existing patches.
Check for Available Updates
Click Check Updates in the top-right corner of the screen. You have two options:
- Check Repository: This option checks VMware’s online repository for the latest updates (requires internet access).
- Check CD-ROM: Use this if you are updating offline with an ISO file attached to the VCSA.
Select the Update Version
After checking for updates, available versions will appear in a list. Select the desired update version. You may see multiple versions, but typically, you’ll want to choose the latest stable release for new features and security patches.
Stage the Update (Optional)
- If you prefer to download the update now and install it later, select Stage Only. This action downloads the update package without initiating the installation process.
- Staging allows you to plan the installation at a more convenient time.
Install the Update
To start the update immediately, select Stage and Install. Read through the End User License Agreement (EULA), then accept it by checking the relevant box and clicking Next.
Review Update Details and Confirm
A summary screen will appear, displaying the version details and potential impact on services. Review the summary, then click Finish to start the installation.
Monitor the Update Process
The VCSA will display a progress bar as the update installs. During this time, vCenter services may be temporarily unavailable. Allow time for the update to complete. The appliance may reboot automatically to apply changes.
Log Back into the VCSA Management Interface
After the update, log back into the VAMI at https://<vcenter_ip>:5480 to verify the installation. Check the Update section to confirm that the update applied successfully.
Verify vCenter Functionality
Log into the vSphere Client and perform routine tasks to ensure all vCenter services are working as expected. Verify version details by navigating to Home > Administration > System Configuration to confirm the update.
Updating vCenter via Command-Line Interface (CLI)
For administrators who prefer or require a command-line approach, updating VMware vCenter via the Command-Line Interface (CLI) provides a robust, efficient method for managing updates. This approach can be useful in environments where graphical management may not be accessible or preferred.
Below is a step-by-step guide to updating vCenter using the CLI, specifically through SSH access to the vCenter Server Appliance (VCSA).
Steps to Update Using CLI:
Prerequisites for CLI Update
Backup the VCSA: Perform a full backup of the VCSA before initiating the update to ensure data protection and easy restoration if any issues arise.
Check System Requirements: Confirm that your environment meets all system requirements and dependencies for the update.
Enable SSH: Ensure SSH is enabled on the VCSA. You can enable SSH through the VAMI by navigating to Access and turning on SSH access.
Step-by-Step Instructions for Updating vCenter via CLI
Log into the VCSA via SSH
Open an SSH client (such as PuTTY or a terminal on Linux/macOS) and connect to the VCSA by entering:
ssh root@<vcenter_ip>
Replace <vcenter_ip> with the actual IP address or hostname of the vCenter Server Appliance.Log in with the root credentials.
Check the Current Version
- Run the following command to verify the current version of vCenter:
vpxd -v
This command outputs the current vCenter version, which helps confirm the update was successful later.
Check for Available Updates
- To list available updates, use the following command
software-packages list --repo
This command queries VMware’s online repository for available updates. (Ensure the VCSA has internet access if using this option.)
Download the Update
If updates are available, download them using:
software-packages download
This command downloads the update package without installing it. Downloading ahead of time is useful if you plan to install the update later.
Install the Update
To install the downloaded update, execute:
software-packages install --staged
The system will prompt for confirmation before proceeding with the installation. Confirm and let the update process complete.
Monitor the Installation Progress
During installation, the CLI will display progress and status updates. Ensure the connection remains stable until the installation completes. The system may automatically reboot to apply changes.
Verify the Update
After the update, confirm the new vCenter version by running:
vpxd -v
Alternatively, log back into the VAMI or vSphere Client to verify the version and check that services are functioning as expected.
Alternative Method: Updating via ISO Image
If you need to update offline or with limited internet connectivity, you can perform the update using an ISO image:
Attach the ISO: Upload and attach the ISO file to the VCSA VM.
Mount the ISO: To mount an ISO file attached to your VMware vCenter Server Appliance (VCSA), you can use the following command in the SSH terminal:
mount /dev/cdrom /mnt/cdrom
The software-packages list --iso command is used to list available updates from an ISO file mounted on the VMware vCenter Server Appliance (VCSA). This command is particularly helpful when updating in environments with limited internet access, as it allows you to pull update packages directly from an attached ISO image.
software-packages list --iso
Install the Update from ISO: The software-packages install --iso command is used to install updates on the VMware vCenter Server Appliance (VCSA) from an attached ISO file. This method is particularly useful when performing an offline update, as it allows you to apply updates directly from the ISO without needing an internet connection.
software-packages install --iso
Unmount the ISO. The umount /mnt/cdrom command is used to safely unmount the ISO file from the /mnt/cdrom directory after an update or installation on the VMware vCenter Server Appliance (VCSA). Unmounting ensures that the ISO is properly detached from the system and frees up the /mnt/cdrom directory for future use.
umount /mnt/cdrom
If any process is using the mount, the unmount command will fail. To check, you can use the following command.
lsof | grep /mnt/cdrom
Ensure a stable connection during the CLI update process, as interruptions may lead to incomplete installations. Perform the update during a planned maintenance window, as vCenter services may be temporarily unavailable. After the update, check all critical services in the vSphere Client to verify functionality.
Manual Offline Update Method
When internet connectivity is restricted, use the offline update method.
Steps for Offline Update:
Download the ISO:
Go to VMware’s Customer Connect portal and download the latest vCenter Server Appliance update ISO.
Mount the ISO:
Mount the ISO to the VCSA (either through vSphere Web Client or vCenter).
Open VCSA Management Interface:
Access the VAMI at https://<vcenter_ip>:5480.
Update Using ISO:
Navigate to Update > Check CD-ROM to detect the ISO update. Click Stage and Install and follow the prompts.
Alternative Methods for Updating vCenter
Auto-Update Settings: In the VCSA, you can enable automatic updates under the Update tab, allowing vCenter to manage updates autonomously. For organizations with multiple vCenter instances, Lifecycle Manager can streamline the update process by automating patch management.
Post-Update Checks and Verification
Check Version: Confirm the update was successful by checking the vCenter version under the Summary tab in the VAMI.
Review Logs: Inspect system logs to ensure no errors occurred during the update process.
Test Functionality: Verify vCenter functionality by performing routine tasks to confirm no impact on performance or availability.
Comparison of Update Methods
| Method | Best For | Pros | Cons |
| VCSA (GUI) | General users | User-friendly, GUI-based | Requires internet or ISO access |
| CLI | Advanced users, automation | Scriptable, quick for experts | Requires command-line knowledge |
| Offline | Secure environments | No internet needed, ISO-based | Manual download and mounting |
| Auto Update | Low-maintenance environments | Hands-free, less maintenance | Less control over update timing |
Conclusion
Updating VMware vCenter is an essential maintenance task that ensures your virtualization infrastructure runs smoothly and securely. By following these methods and preparation steps, you can carry out the update without issues, regardless of your preferred method.
