

Upgrading to vCenter Server 8.0 U1b is a crucial step in boosting efficiency and security within your VMware environment. This update brings significant enhancements that streamline your operations while strengthening your system’s protection. In this post, I will show how to apply the upgrade patch for vCenter Server 8.0 U1b.
Review Compatibility and Prerequisites
- Ensure your environment meets the system requirements for vCenter Server 8.0 U1b, such as supported hardware, storage, and network configurations.
- Check compatibility with your existing infrastructure, including ESXi hosts, vSphere client versions, and other VMware products.
- Ensure you have a valid backup of your current vCenter Server, as well as a backup of any critical data.
Preparation
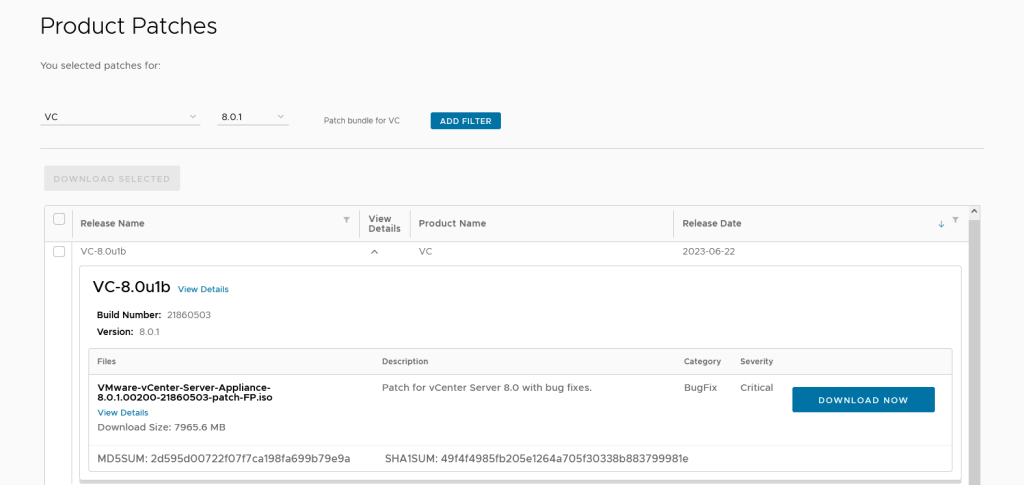
Go to the VMware Downloads page and download the appropriate version of vCenter Server 8.0 U1b for your system (either the Windows version or the appliance).You will need a valid VMware account to access the download section.
Download the VC-8.0u1b patch.
Check for Any Pending Updates
- Before starting the upgrade process, check if your existing vCenter Server installation has any pending updates, patches, or critical fixes. This can be done through the vSphere Client or CLI.
- If there are updates, install them before proceeding to avoid any conflicts with the upgrade.
Backup vCenter Server and Related Services
- Create a full backup of the vCenter Server appliance, including the vCenter Server database and configuration. This is crucial to restore the system in case anything goes wrong during the upgrade process.
- VMware provides a backup and restore guide for more detailed instructions
Upgrade Process
Option A: Upgrade using the vSphere Client (vCenter Appliance)
- Log in to the vSphere Client.
- Navigate to your vCenter Server appliance and select Update.
- In the vCenter Server Appliance section, select Check for Updates.
- If an update to vCenter Server 8.0 U1b is available, click on Install.
- Follow the on-screen instructions to initiate and complete the upgrade process.
- The appliance will automatically restart during the upgrade.
Option B: Upgrade using the ISO File (for both Windows and Appliance)
- Mount the vCenter Server 8.0 U1b ISO file (this can be done through the vSphere Client for appliance upgrades or directly for Windows installations).
- For vCenter Server Appliance (VCSA), log in to the appliance’s shell via SSH and use the CLI upgrade method.
- For Windows-based vCenter Server, launch the installer and follow the prompts to upgrade from the current version to 8.0 U1b.
- Accept the terms and conditions, then select the installation type (typically “Upgrade”).
- Choose the vCenter Server instance to upgrade, and follow the prompts to complete the process.
Monitor the Upgrade Process
- During the upgrade, monitor the progress and ensure there are no issues.
- The upgrade process may take some time, so be patient.
- Once the upgrade is complete, verify the system is operational by checking logs and validating all services are running.
Now I will upgrade vCenter Server 8.0 to 8.0 U1b.
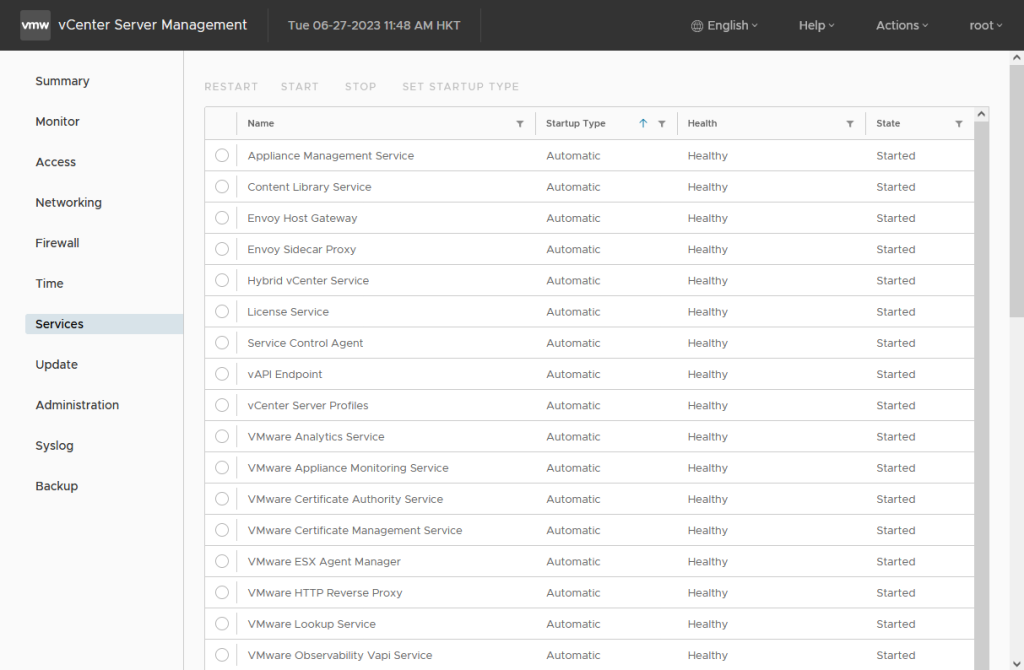
Go to Services menu, make sure all services are running in Healthy.
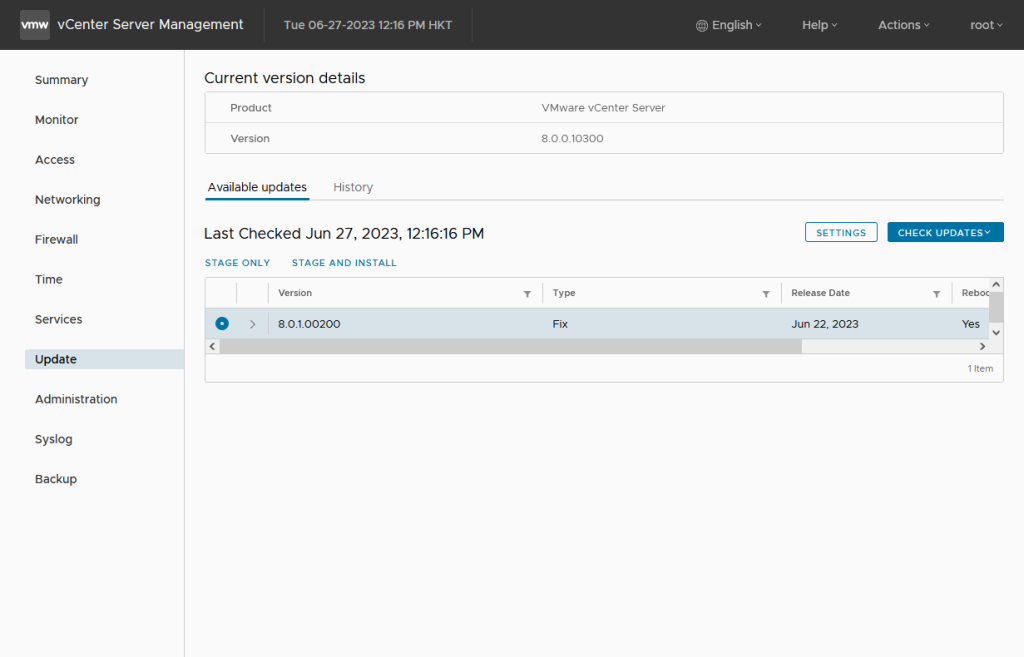
Then go to Update menu, click “Check Updates“.
NOTE: The vCenter Server must mount the upgrade patch ISO.
It will show the upgrade patch, select the patch and click “Stage and Install“.
Accept the license agreement, click Next.
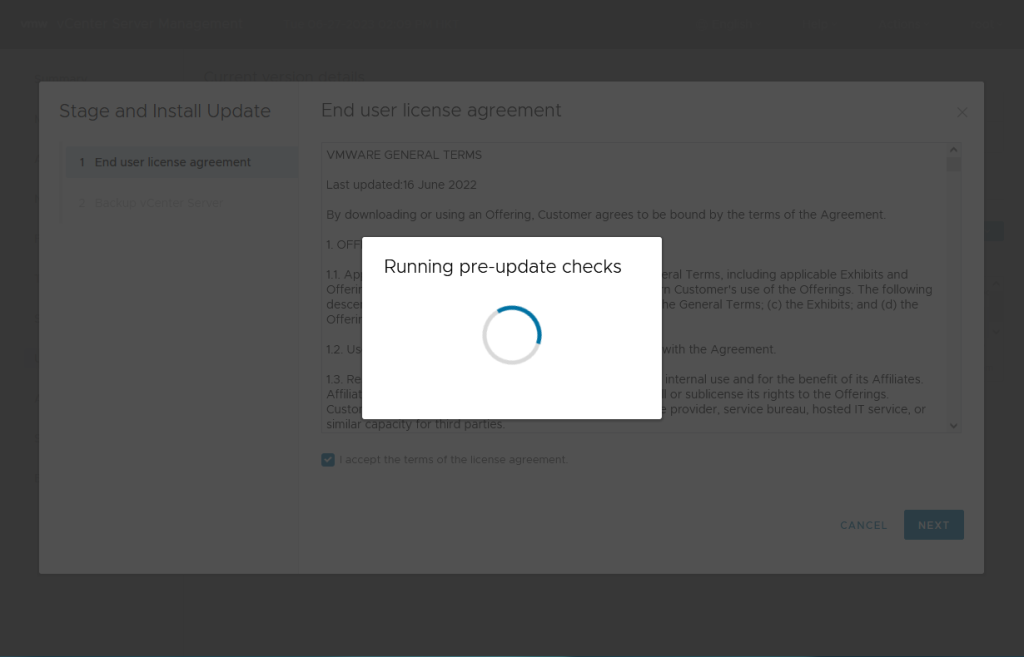
Backup the vCenter Server and select “I have backed up vCenter Server and its associated databases“. Click “Finish“.
The upgrade process will start.
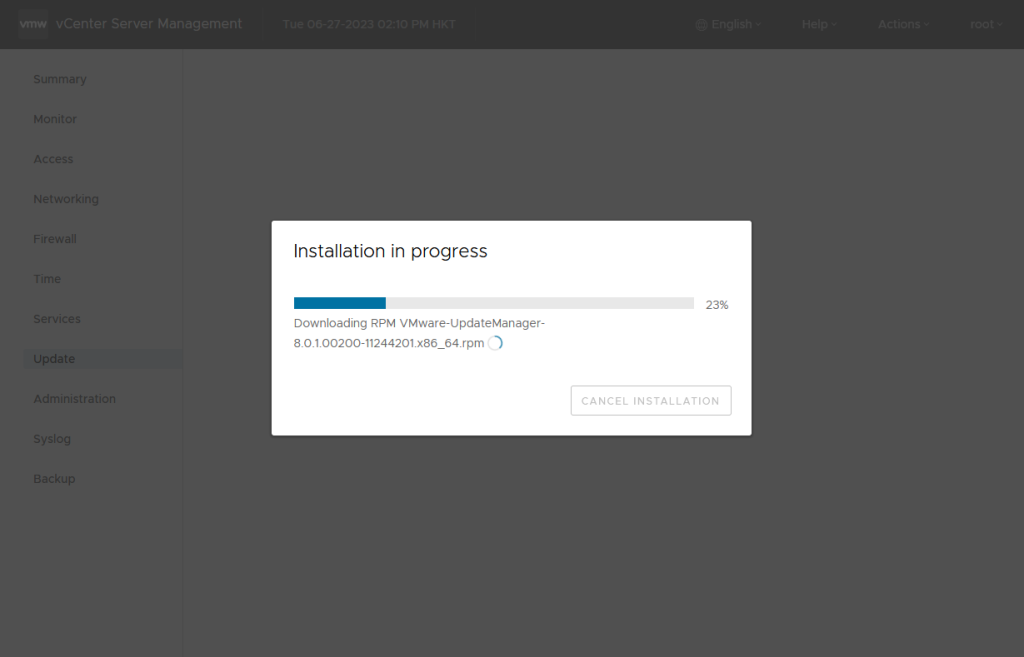
The version shows 8.0.1.00200 when the upgrade was successfully completed.

Post-Upgrade Tasks
- After the upgrade, verify that all the vCenter Server services are running correctly.
- Check the version of vCenter Server and confirm it matches 8.0 U1b.
- Review the vCenter Server logs to ensure there are no errors.
- Re-verify any integrations (like VMware NSX, vSAN, etc.) to ensure they are functioning as expected.
Test the Environment
- Perform comprehensive testing to ensure everything is working properly (e.g., managing ESXi hosts, creating and managing VMs, networking, and storage configurations).
Optional: Cleanup and Optimization
- Once the upgrade is complete, consider cleaning up old snapshots and other unnecessary files.
- Review VMware’s documentation for any post-upgrade optimizations.