Comprehensive Guide to vCenter High Availability (vCenter HA)
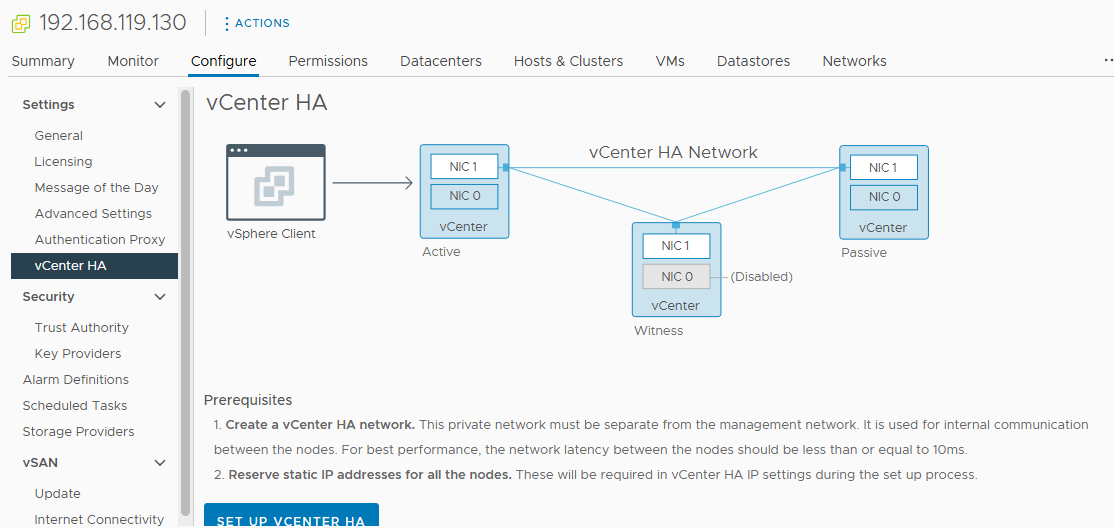
Table of Contents
Introduction
vCenter High Availability (vCenter HA) is a critical component for ensuring the continuous availability of your VMware environment. VMware’s vCenter High Availability (vCenter HA) is a powerful feature designed to eliminate downtime for the vCenter Server Appliance (VCSA) by providing active-passive failover. This built-in redundancy mechanism ensures continuous operations, even during unexpected hardware or software failures. By leveraging a simple yet effective architecture consisting of Active, Passive, and Witness nodes, vCenter HA provides robust protection against outages, making it an essential component for businesses that demand high uptime and reliability in their VMware infrastructure. In this guide, we will delve into the benefits of vCenter HA, its architecture, prerequisites, and provide a step-by-step lab tutorial to set it up.
What is vCenter High Availability (vCenter HA)?
At its core, vCenter High Availability (vCenter HA) is a feature designed to protect your vCenter Server from failures. It ensures that if one vCenter Server instance fails, another instance automatically takes over without impacting your infrastructure’s operation. vCenter HA aims to eliminate downtime, which is crucial in production environments where availability is a top priority.
Why implement vCenter HA?
Key Benefits
- Minimized Downtime: Automatically detects and mitigates failures.
- Data Protection: Ensures the integrity of vCenter configurations.
- Scalability: Supports growing infrastructure needs.
- Enhanced Disaster Recovery: Quick recovery from unexpected issues.
vCenter HA Architecture Overview
vCenter HA ensures that your vCenter Server Appliance (VCSA) remains operational even during unexpected failures. It achieves this by utilizing three key components: Active Node, Passive Node, and Witness Node, each with distinct responsibilities.
Active Node
- Role: The Active Node is the primary and most critical component. It handles all client requests and performs the operational tasks of the vCenter Server.
- Responsibilities:
Processes API requests, user interactions, and other system functions.
Continuously synchronizes its configuration and runtime state with the Passive Node.
Serves as the central point for managing the VMware environment.
Passive Node
- Role: The Passive Node is a standby replica of the Active Node, ready to take over in case of failure.
- Responsibilities:
Maintains a real-time synchronized copy of the Active Node’s data, including configurations and runtime states. Becomes the new Active Node in the event of a failure (failover). - Failover Process:
If the Active Node experiences downtime or failure, the Passive Node seamlessly assumes the Active Node’s role, ensuring continued availability. This failover is automatic and requires no user intervention.
Witness Node
- Role: The Witness Node is a lightweight component responsible for monitoring and arbitration. It ensures there is no split-brain scenario (where both Active and Passive nodes try to act as the primary node).
- Responsibilities:
- Monitors the heartbeat and communication between the Active and Passive nodes.
- Facilitates failover by deciding which node should become Active in the event of an issue.
- Requires minimal resources compared to the Active and Passive nodes.

How vCenter HA Works
When you enable vCenter HA, it replicates the state of the Active node to the Passive node. If the Active node goes down (for example, due to a hardware failure), the Passive node automatically assumes the Active role, minimizing downtime. The Witness node plays a crucial role here by deciding if the Active node has failed and triggers the failover process.
Prerequisites for Setting Up vCenter HA
Before starting, ensure the following:
- vCenter Version: Ensure you are running vSphere 6.5 or later.
- Resources: At least 3 vCenter Server Appliances.
- Networking: A dedicated private network for HA traffic.
- Time Synchronization: All nodes must have synchronized NTP configurations.
- Backups: Take a full backup of your vCenter Server Appliance.
- vSphere Distributed Switch: It’s best to use a vSphere Distributed Switch to configure networking for the vCenter HA nodes, but a Standard Switch can also work.
This hands-on lab tutorial will guide you through implementing VMware vCenter High Availability in your test environment. We’ll configure a three-node vCenter HA cluster using your existing infrastructure.
Lab Environment Overview
Current Infrastructure
- vCenter Server: 192.168.119.130
- ESXi Host 1: 192.168.119.128
- ESXi Host 2: 192.168.119.183
- ESXi Host 3: 192.168.119.184
- HA Port Group: vCHA (already configured on all hosts)
What We’ll Accomplish
By the end of this lab, you’ll have:
- A fully functional 3-node vCenter HA cluster
- Automatic failover capabilities
- Monitoring and management tools configured
- Tested failover procedures
Pre-Lab Preparation
Step 1: Verify Prerequisites
Check ESXi Host Status
SSH to each ESXi host and verify status.
ssh root@192.168.119.128
esxcli system version get
exit
ssh root@192.168.119.183
esxcli system version get
exit
Similarly to find the third Esxi hostname type the following command.
ssh root@192.168.119.184
esxcli system version get
exit
Verify vCenter Resources
- Current vCenter CPU: Should be at least 2 vCPUs
- Current vCenter RAM: Should be at least 12 GB
- Available storage: At least 120 GB free
Verify Network Configuration
Make sure all Esxii hosts are added in vCenter cluster. Right click on Cluster and choose Add Host to add all the three host in this cluster one bye one.

Type IP address, username and password of the each Esxi host to add in vCenter.

After adding all the three hosts, Next step is to create port group with the name vCHA across all the three Esxi hosts. Make sure to assign same name to all the port group.
Log into vSphere Client (https://192.168.119.130). Navigate to each ESXi host. Verify vCHA port group exists on all hosts. Confirm port group has proper VLAN/network configuration.
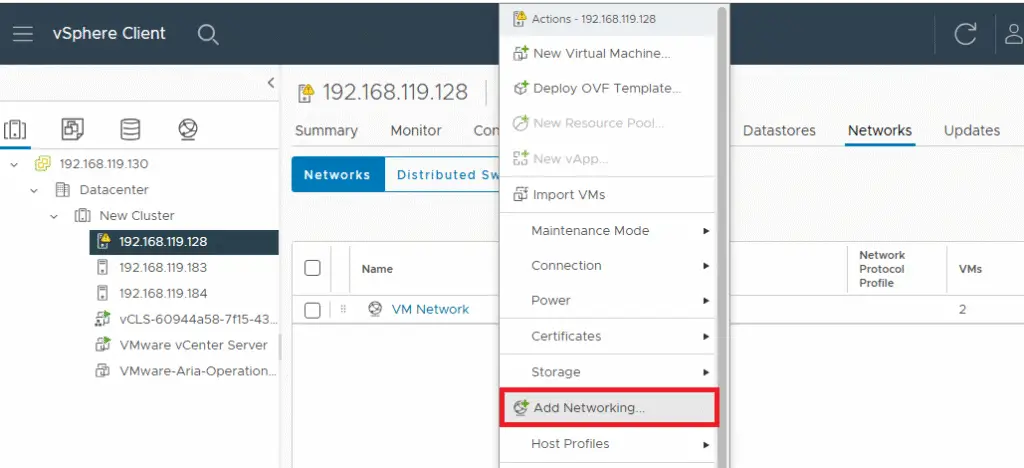
Select port group option to give name vHCA and vLAN ID 20 for this setup.
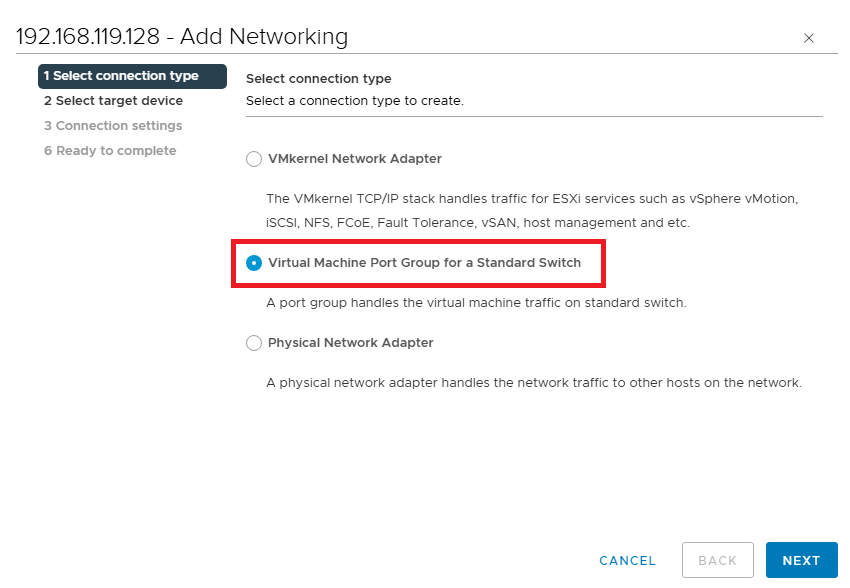
Select existing switch, which is vSwitch0.

Select the desire switch. For this tutorial we will be using default switch for this high availability.

Type port group name vCHA. After this setup, the requirements for vCenter HA is complete now. In the next step we will configure HA.

Configure vCenter High Availability
Now our basic requirements for High Availability are ready now. we will enable now. Click on setup vCenter HA. Type all the information displayed.

Enter informtion for Witness Mode, like choosing the Management interface and vCenter HA Network (NIC).

Click , Next to procced.
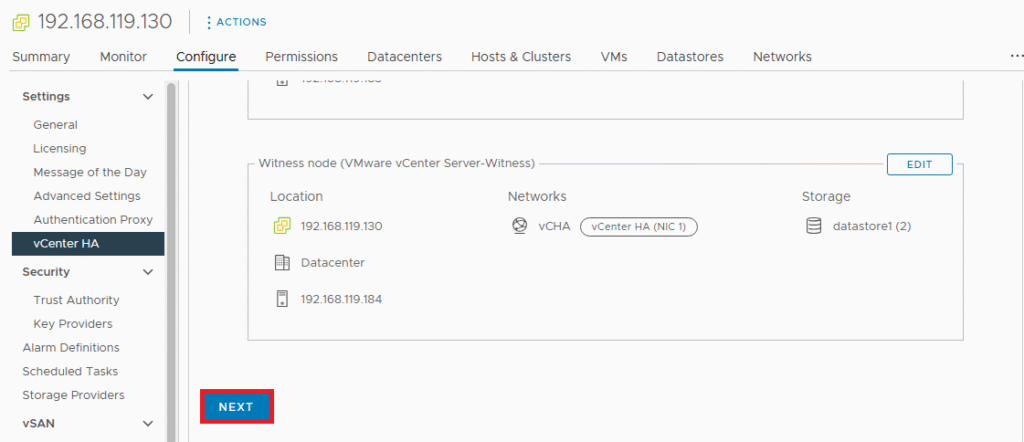
Type IP address of port group. I have assigned class A range ip address to HA network.
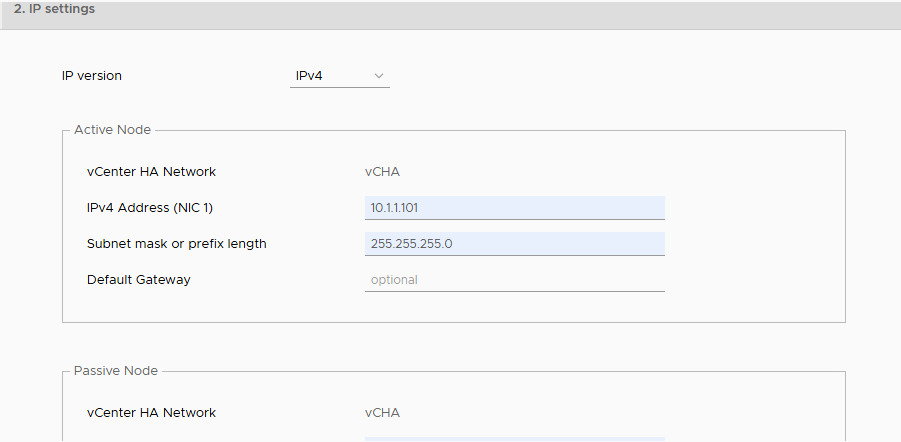
Click finish to start vCenter HA Process.
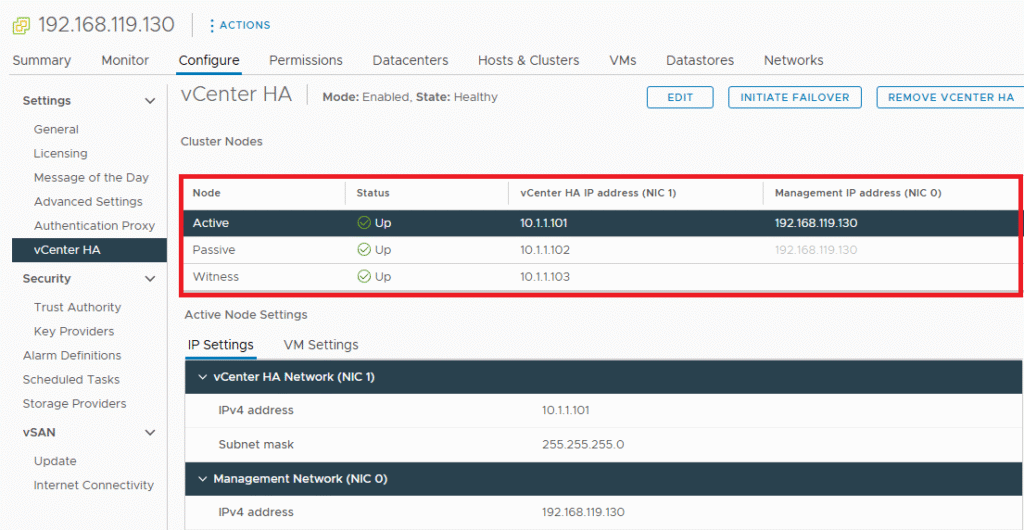
Once the configure is complete, You can see the status is now Up with green tick. It means our vCenter HA is setup successfully.
Conclusion
VMware vCenter High Availability is an essential component for maintaining a robust and resilient virtualized infrastructure. By following the guidelines and best practices outlined in this guide, you can ensure your vCenter Server remains highly available, minimizing downtime and maintaining business continuity.
Regular monitoring, proper maintenance, and adherence to best practices will help you maximize the benefits of vCenter HA while avoiding common pitfalls. Remember that vCenter HA is part of a comprehensive availability strategy that should include proper backup, disaster recovery, and business continuity planning.
The investment in implementing vCenter HA pays dividends through reduced downtime, improved service availability, and enhanced operational confidence in your VMware infrastructure.


[…] <div id=”ezoic-pub-ad-placeholder-615″></div><script> ezstandalone.cmd… […]
[…] Also Read Comprehensive Guide to vCenter High Availability (vCenter HA) […]