How to back up VMware ESXi with Veeam Backup Replication
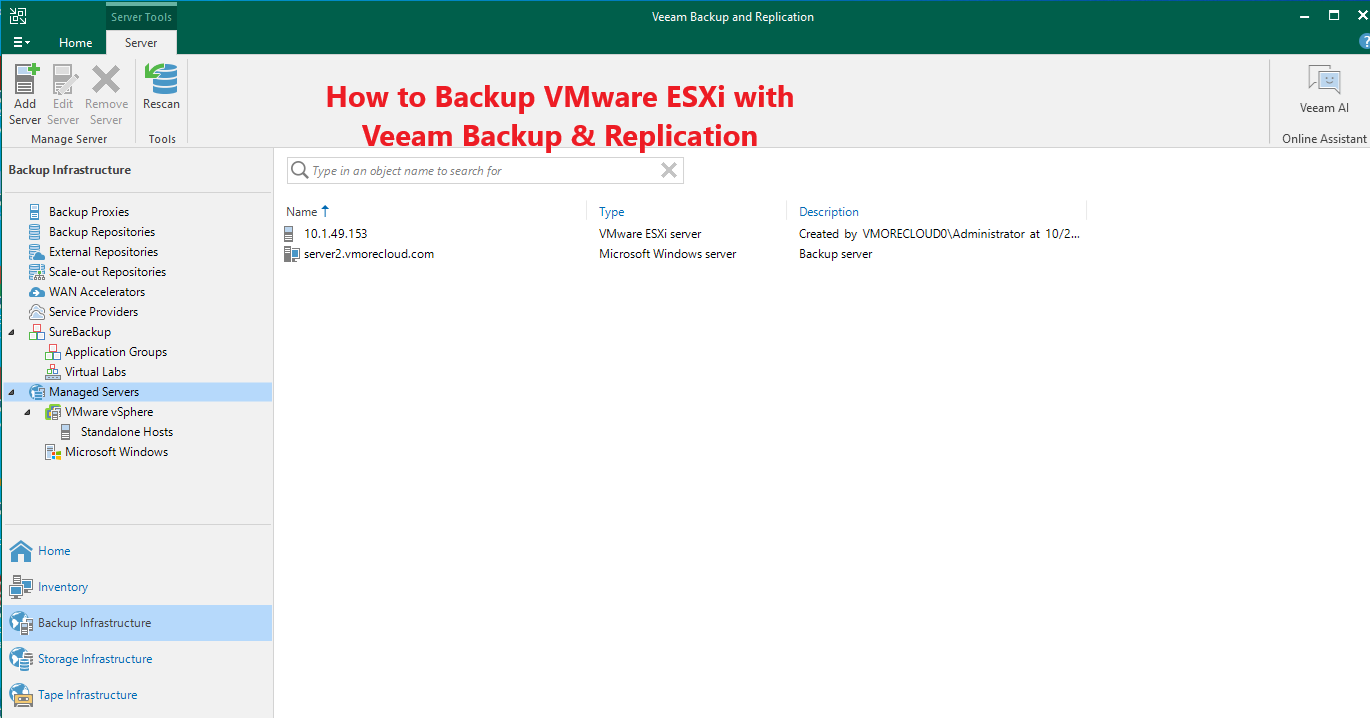
Table of Contents
Introduction
Backing up virtual environments is a critical aspect of IT management, especially for organizations that rely on VMware ESXi for their virtualization needs. With the increasing importance of data integrity and availability, ensuring that your virtual machines are properly backed up is paramount to safeguarding your business operations. One of the most effective solutions for backing up VMware ESXi environments is Veeam Backup & Replication.
Veeam provides a comprehensive backup and recovery solution that not only simplifies the backup process but also ensures that your data is recoverable in the event of hardware failures, data corruption, or disasters. Its intuitive interface, combined with powerful features like application-aware processing, incremental backups, and instant recovery, makes it an essential tool for any IT administrator.
In this guide, we will explore the step-by-step process of backing up your VMware ESXi infrastructure using Veeam Backup & Replication. We’ll cover everything from installation and configuration to executing backup jobs and restoring data, equipping you with the knowledge to effectively protect your virtual machines and maintain business continuity. Whether you’re a seasoned IT professional or new to virtualization, this comprehensive guide will help you navigate the backup process with confidence.
Overview of Veeam Backup & Replication
Veeam Backup & Replication offers powerful backup and recovery options for VMware environments, including:
- Image-based backups of VMs
- Application-aware processing for consistent backups of applications
- Instant Recovery of VMs
- Granular file and application item recovery
Prerequisites
Before you start, ensure that you have the following:
- Veeam Backup & Replication installed: Ensure you have the latest version installed on a Windows server.
- Access to the VMware ESXi host: Ensure that the Veeam server can communicate with your ESXi host and has the necessary credentials.
- Sufficient storage: Make sure you have enough disk space on your backup repository to store the backups.
Step-by-Step Guide to Back Up VMware ESXi with Veeam
Step 1: Add VMware vSphere to Veeam
Open Veeam Backup & Replication. In the Inventory pane, click on Virtual Machines. Right-click on Virtual Machines and select Add Server.
Choose VMware vSphere and click Next. Enter the IP address or hostname of your vCenter Server or ESXi host and provide the necessary credentials (username and password). Click Next, review the summary, and click Finish.
Step 2: Create a Backup Job
In the Home tab, click on Backup Job and then select VMware vSphere.
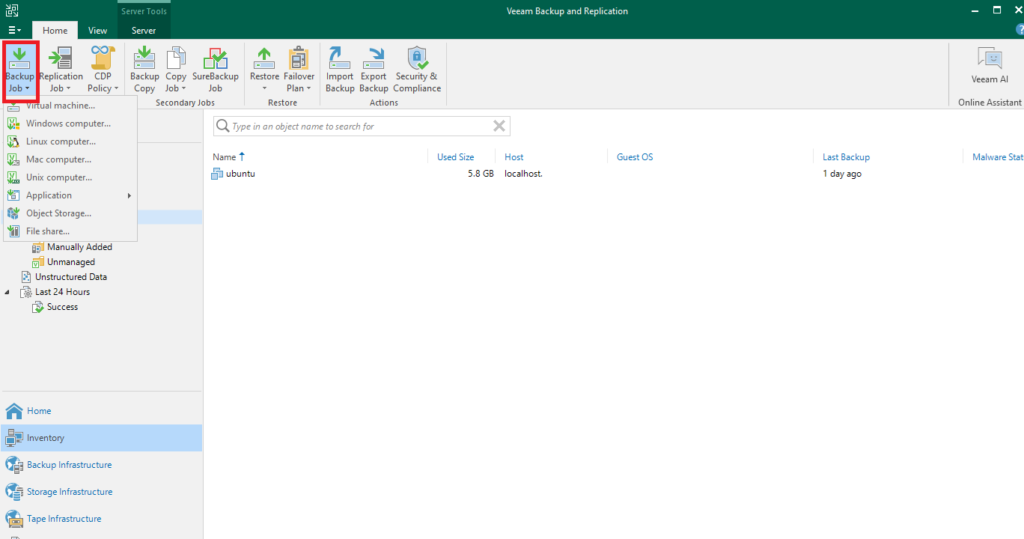
Click on Add to select the VMs you want to back up. You can choose individual VMs or entire folders.

Provide a name for the backup job and an optional description, then click Next.
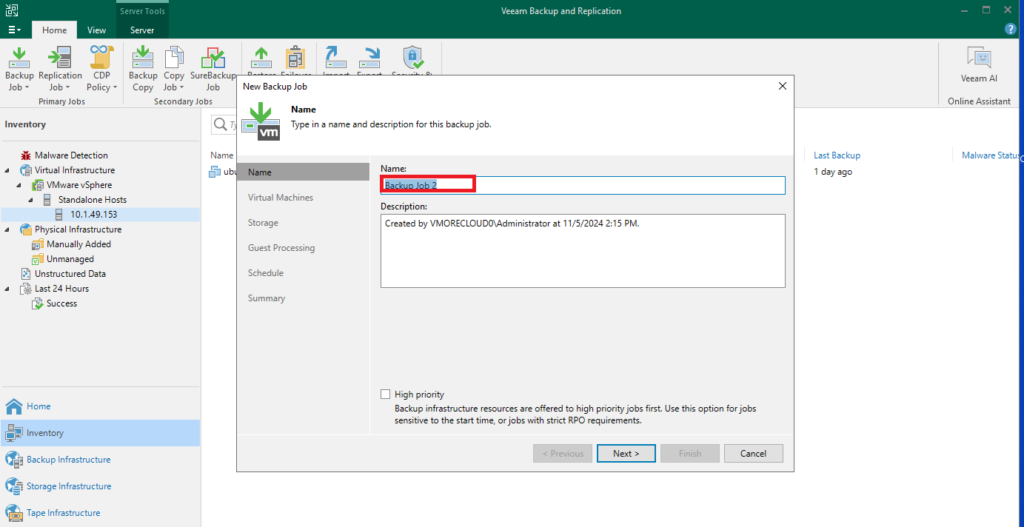
Click Next after selecting the VMs.

Step 3: Configure Backup Settings
Backup Mode: Choose between the following options:
Incremental: Only changes since the last backup are saved.
Reverse Incremental: The latest backup is the full backup, and the previous ones are incremental.
Full: A full backup is created each time.
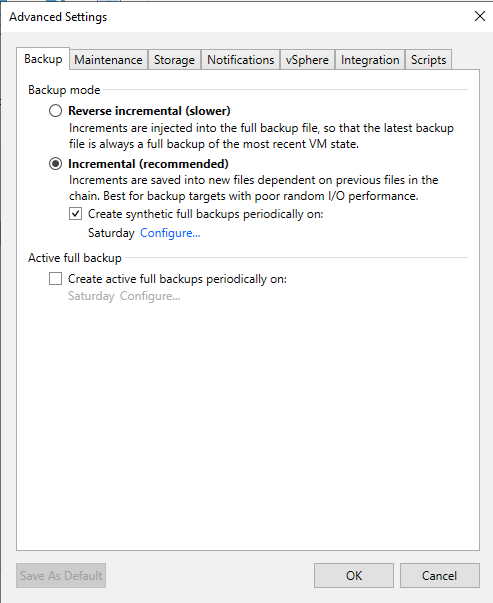
Storage: Select the backup repository where the backups will be stored. If you haven’t set up a backup repository yet, you can do so in the settings.

Schedule: Configure the schedule for the backup job to run. You can set it to run daily, weekly, or according to your business requirements.
Click Next to proceed.
Step 4: Configure Advanced Settings (Optional)
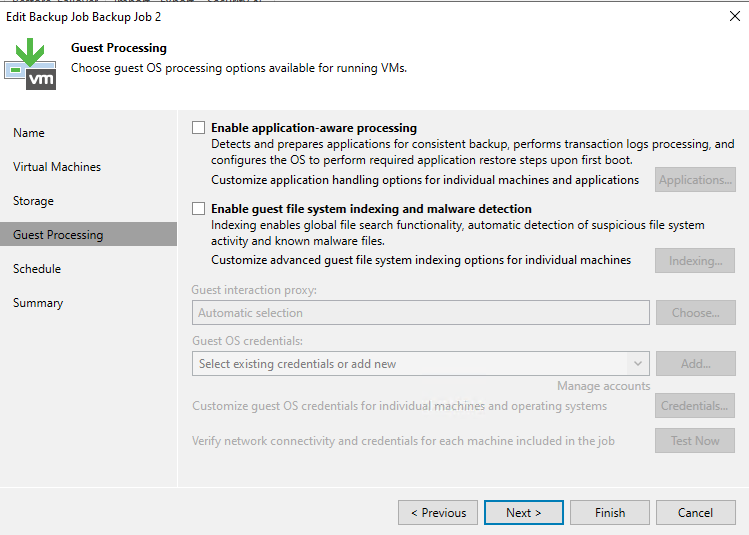
Guest Processing: Enable application-aware image processing if you want consistent backups of applications like Microsoft Exchange or SQL Server. You will need to provide credentials for the applications being backed up.
Network: Specify the network settings, if necessary, particularly if you want to throttle backup traffic.
Step 5: Review and Finish
Review all the settings configured for the backup job. Click Finish to create the backup job.

Step 6: Run the Backup Job
In the Backup & Replication view, locate your newly created backup job. Right-click on the job and select Start to run the backup immediately. Monitor the progress in the Veeam console to ensure the backup completes successfully.
Restoring from Backup
Restoring from a backup with Veeam is also straightforward:
In the Backup & Replication view, locate your backup job. Right-click on the backup and select Restore.
Choose the type of restore (Entire VM, File Level, Application, etc.). Follow the prompts to restore the VM or specific files as needed.
Conclusion
Backing up your VMware ESXi environment with Veeam Backup & Replication is an essential practice to ensure data integrity and business continuity. With its robust features and user-friendly interface, Veeam simplifies the backup process while providing powerful recovery options. Regularly testing your backups and reviewing your backup strategies will help ensure that your virtual machines are protected against data loss and can be quickly restored when needed.


